Is your Shark Professional Navigator Lift-Away’s roller brush suddenly stopped spinning? This is one of the most common vacuum issues, and the cause is usually simple: a clog, a tangled brush, or a worn drive belt. Before you panic or call for service, you can diagnose and often fix the problem yourself in under 30 minutes with basic tools. This guide walks you through every potential cause, from easy debris removal to belt replacement, and helps you determine when the problem might be a failed motor requiring professional repair.
Key Takeaways
- The #1 cause is almost always a blockage or tangle: Hair, string, and carpet fibers wrap around the roller brush bearings or lodge in the airway, stopping rotation. This is the fastest fix.
- Always unplug and disassemble safely: Before any inspection, ensure the vacuum is off and unplugged. Learn the correct way to detach the Lift-Away pod and brush roll housing to avoid damage.
- A worn, stretched, or broken drive belt is a prime suspect: If the motor runs but the brush doesn’t spin, the belt connecting them has likely failed. Replacing it is a common and inexpensive DIY repair.
- The brush roll itself can wear out or break: The plastic bearings can crack, or the brush bristles can become so matted they seize. Inspect the roller for physical damage when you remove it.
- Less common, but possible: motor or electrical failure: If the brush roll, belt, and airways are pristine, the issue may be a faulty brush roll motor or a broken wire in the hose connection.
- Preventive maintenance is crucial: Regularly cleaning the brush roll and checking for obstructions after vacuuming high-pile carpets or pet hair areas will prevent 90% of roller failures.
- Know your limits: While most fixes are user-serviceable, internal motor or wiring issues often require Shark’s customer support or a professional appliance repair service.
[FEATURED_IMAGE_PLACEHOLDER]
📑 Table of Contents
- So Your Shark Navigator’s Roller Stopped Spinning: Let’s Fix This
- Understanding the Anatomy: How the Lift-Away Roller System Works
- Step-by-Step Troubleshooting: Finding the Source of the Problem
- Deep Cleaning the Roller Brush and Brush Roll Housing
- Replacing the Drive Belt: A Common and Inexpensive Fix
- Motor and Electrical Issues: When the Problem is Deeper
- Preventive Maintenance: Keeping Your Roller Rolling
- Conclusion: You’ve Got This
So Your Shark Navigator’s Roller Stopped Spinning: Let’s Fix This
You’re in the middle of cleaning, and you notice it. That reassuring whirring sound is missing. You look down, and the big, powerful roller brush on your Shark Professional Navigator Lift-Away is just… sitting there. Not moving. Your heart sinks a little. That roller is the heart of your vacuum’s cleaning power on carpets. Without it spinning, you’re just pushing dirt around with a weak suction nozzle. Before you resign yourself to a costly repair bill or the hassle of a warranty claim, take a deep breath. The phrase “Shark Professional Navigator Lift Away roller not working” is one of the most searched-for vacuum problems for a reason: it’s incredibly common, and in the vast majority of cases, the solution is something you can handle yourself with a screwdriver, some patience, and maybe a pair of scissors.
This machine is designed for power and versatility, with that handy Lift-Away pod that lets you clean stairs and upholstery. But that complex mechanism has a few key points where things can go wrong. The system relies on a clear path: the motor spins a belt, the belt turns the roller brush, and the roller agitates carpet fibers so the suction can lift the dirt away. Break that chain anywhere, and the roller stops. Our job today is to walk that chain backward and forward, checking every link. We’ll start by understanding exactly what we’re looking at.
Understanding the Anatomy: How the Lift-Away Roller System Works
To troubleshoot effectively, you need to know the cast of characters in this little drama. When you press the “Brush Roll” button on your Navigator, an electric motor (either in the main body or a dedicated motor in the brush roll housing) activates. This motor is connected via a rubber drive belt to the metal axle of the roller brush. The roller brush itself is a cylindrical core with bristles (or a rubberized strip on some models) and bearings on each end that sit in sockets in the vacuum’s floor head housing. As the belt turns the axle, the roller spins. Simple, right? The complexity comes from the environment: it lives in a world of dust, hair, fibers, and occasional small objects. Let’s break down the key components you’ll be inspecting.
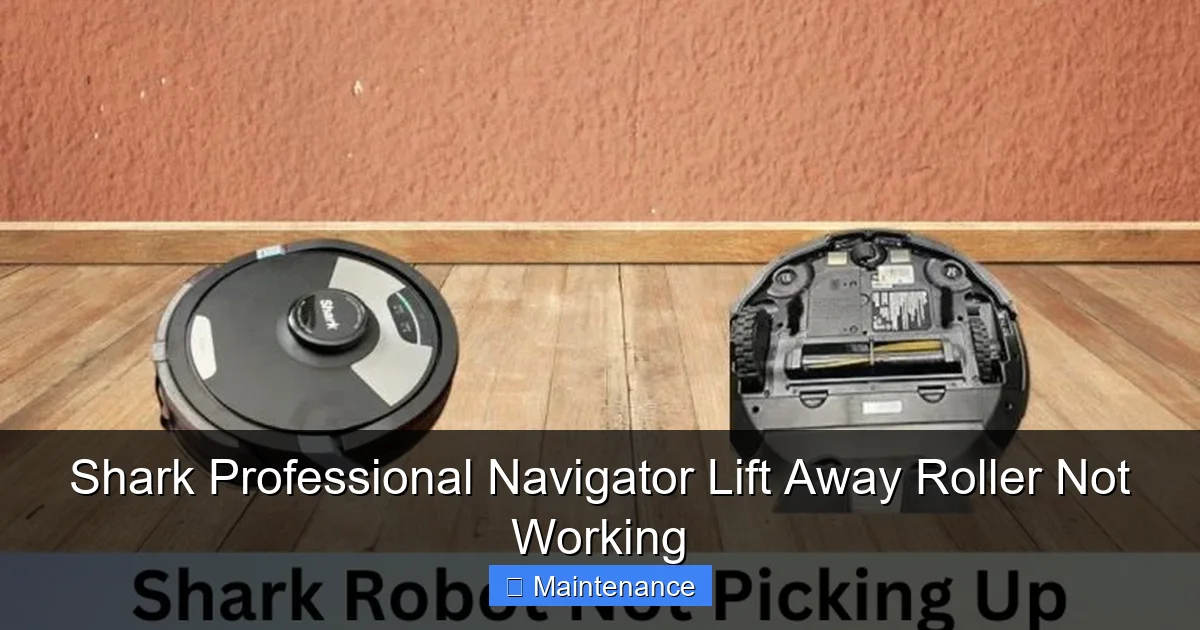
Visual guide about Shark Professional Navigator Lift Away Roller Not Working
Image source: sharkvacuum.blog
The Roller Brush (Brush Roll)
This is the long, brush-covered cylinder you can see through the clear housing. On the Shark Navigator models, it’s typically a combination of stiff bristles and a rubber stripping that helps grip carpet. The bearings at each end are critical. They allow smooth rotation but are also perfect traps for hair and string. When enough debris wraps around the axle and bearings, it creates so much friction that the motor can no longer turn it. This is the most frequent culprit.
The Drive Belt
This is a thin, rubber loop, usually black, that connects the motor pulley to the roller brush axle. Over time, with heat and stress, this belt can stretch, lose its grip, develop cracks, or even snap entirely. If the belt is loose or broken, the motor might hum (you can sometimes hear it), but the roller gets zero power. It’s a silent failure from the outside.
The Brush Roll Motor
Some Shark models have a separate, smaller motor dedicated just to spinning the brush roll, located in the brush roll housing itself. Others use the main suction motor via a clutch or belt system. If this dedicated motor burns out (a less common but possible failure), the roller won’t spin, but you’ll still have suction. You’ll need to test for power reaching this motor to diagnose it.
The Airway and Hose Connection
Don’t forget the path of least resistance! The Lift-Away pod connects to the main vacuum body via a hose and a series of airtight couplings. If the connection between the pod and the main unit is loose, or if there’s a clog inside that hose or the pod’s intake, it can cause a severe loss of suction. While this doesn’t directly stop the roller, a severely clogged system can cause the motor to overload and shut down the brush roll function as a safety measure. Always check for clear airflow too.
Step-by-Step Troubleshooting: Finding the Source of the Problem
Now that we know the parts, let’s play detective. We’re going to follow a logical, top-to-bottom process. Start with the easiest, most likely fixes first. You’ll need your Shark Navigator, a Phillips head screwdriver, a pair of scissors, and maybe a stiff brush like an old toothbrush. Most importantly, make sure the vacuum is turned OFF and unplugged from the wall outlet before you touch a single screw. Safety first.
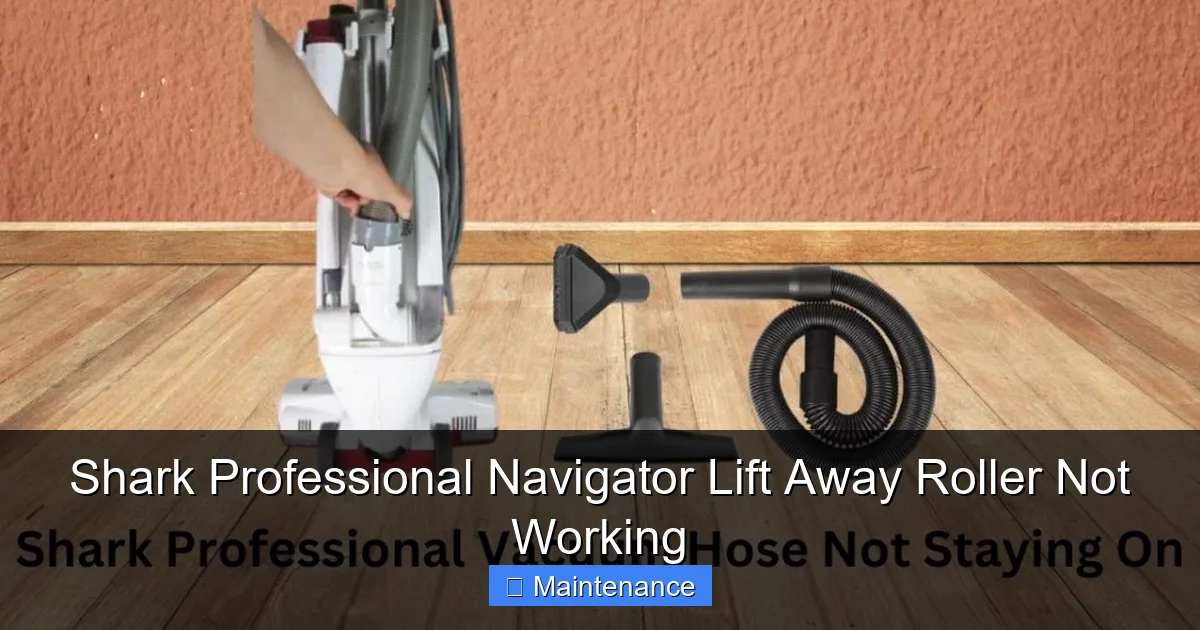
Visual guide about Shark Professional Navigator Lift Away Roller Not Working
Image source: sharkvacuum.blog
Step 1: The Visual & Auditory Check
Before you lay the vacuum on its side, do a quick assessment. Turn the vacuum on (with it upright) and press the “Brush Roll” button. Listen. Do you hear a distinct change in the motor sound when you engage the brush? A deeper, slightly more strained hum? If you hear nothing different, the brush roll motor or its circuit might not be getting power. If you hear the hum but see no spinning, the power is there, but something is mechanically blocking the transfer of that power to the roller. This is your first clue.
Next, look at the clear brush roll housing. Can you see the roller itself? Is it visibly jammed with a wad of hair, carpet string, or maybe a piece of clothing? If you see a massive tangle, that’s almost certainly your problem. Use a pair of scissors to carefully cut and remove as much of the external debris as you can. Don’t try to pull it off; you’ll just tighten the knot. Cut it lengthwise along the roller.
Step 2: Removing the Brush Roll Housing and Roller
To get to the heart of the matter, you need to remove the roller. The process is similar across most Shark Navigator Lift-Away models, but always consult your specific user manual if possible. Generally:
- Lay the vacuum on its side for easier access.
- Locate the release clips or screws on the underside of the brush roll housing (the gray or black plastic part on the floor head). There are usually two latches you can pry up with a flathead screwdriver, or two screws.
- Release the housing and swing it down. You’ll see the roller brush sitting in its cradle.
- There is often a small plastic clip or a set of tabs holding the roller in place. Release these, and the roller should slide out easily. If it’s stuck tight due to debris or a seized bearing, don’t force it. Work more debris loose with your scissors and brush.
Once the roller is out, inspect it thoroughly. Spin it by hand. Does it turn smoothly? Or is it gritty, stiff, or completely locked? If it doesn’t spin freely in your hands, the problem is 100% with the roller itself—either tangled debris or a failed bearing. Clean it meticulously.
Step 3: The Belt Inspection
With the roller out, you have a perfect view of the drive belt. It should be a taut loop connecting the motor pulley (a small wheel near the back of the housing) to the roller’s axle. Here’s what to look for:
- Is it there? Sounds silly, but belts can snap and fall out of position.
- Is it loose? Press on it. It should have some tension. If you can easily twist it or it sags significantly, it’s stretched and needs replacement.
- Is it shiny or glazed? A belt that has been slipping will have a smooth, shiny surface and lose its friction.
- Are there cracks, fraying, or chunks missing? Any sign of damage means it’s time for a new one.
If the belt looks okay but the roller was jammed, clean the debris and reinstall everything. A jammed roller can sometimes appear to be a belt problem because the motor stalls trying to turn the stuck roller. Always rule out the roller jam first.
Deep Cleaning the Roller Brush and Brush Roll Housing
Let’s assume your inspection found the roller was stiff or you saw a lot of gunk. This is your fix 90% of the time. A thorough cleaning is not a quick wipe-down; it’s a surgery.
Visual guide about Shark Professional Navigator Lift Away Roller Not Working
Image source: sharkvacuum.blog
Removing and Dissecting the Roller
With the roller out, take it to a well-lit area. You’ll see the bristles and the rubber stripping. Hair and synthetic fibers are the arch-nemesis here. They don’t just wrap; they weave themselves into a dense mat around the axle and into the bearings. Use your scissors to cut through these mats lengthwise. Then, use a sturdy seam ripper, a dedicated vacuum cleaning tool, or even a dedicated “lint roller” for vacuums to pick and pull the cut sections away. Be meticulous. Check both ends where the bearings are. Sometimes you can pop the plastic end caps off (they may just snap or have a small screw) to clean directly around the bearing seat. If the bearing feels gritty when you spin the roller after cleaning, the bearing itself is contaminated and may need to be replaced, though this is rarer.
Cleaning the Housing and Airway
Now, look into the empty brush roll housing. You’ll likely find a pile of dust, hair, and small debris that was ejected from the roller or sucked up but missed. Use a long, flexible brush (like a bottle brush) to sweep this out. Pay special attention to the area where the belt rides on the motor pulley—debris there can cause belt slippage. Also, follow the air path from the housing back into the hose connection. Any clog here reduces suction and can trigger the roller’s safety shut-off. A straightened wire coat hanger (with a small hook on the end) can be used carefully to dislodge packed debris from the hose connector inside the pod.
Reassembly and Test
Once everything is bone dry (moisture can cause belt slippage), reassemble. Place the clean roller back in its housing, ensuring it seats properly and the bearing sockets are aligned. Stretch the drive belt over the motor pulley and onto the roller’s axle. It can be tricky to stretch it on; you may need to rotate the roller while guiding the belt. Make sure it’s sitting straight and not twisted. Snap the housing back into place securely. Plug the vacuum in, engage the brush roll, and lay it on a test carpet. Listen and watch. Is it spinning smoothly? If yes, success! If it’s still not working, we move to the next likely culprit.
Replacing the Drive Belt: A Common and Inexpensive Fix
If your roller spins freely but the brush roll still doesn’t move when you press the button, and you’ve confirmed a good connection and no jams, the drive belt is the prime suspect. Replacing it is one of the most frequent Shark repairs and costs about $10-$15 for an OEM or high-quality universal belt.
Identifying the Correct Replacement Belt
Do not guess. The belt model is critical. The part number is usually printed on your old belt (if it’s intact) or, more reliably, on a sticker on the underside of your vacuum or on the brush roll housing. Common Shark Navigator Lift-Away part numbers start with “X” followed by numbers (e.g., XTF, XSTF). You can also search “Shark Navigator Lift-Away drive belt” on Shark’s official website or a reputable parts supplier like eReplacementParts.com. Have your exact model number (found on the back of the main unit) handy.
Step-by-Step Belt Replacement
Since you’ve already removed the brush roll housing to inspect the old belt, you’re halfway there.
- Remove the old belt: With the roller out, simply slide the old belt off the motor pulley and the roller axle. It may be stuck due to heat; carefully pry it off with a flathead if needed.
- Install the new belt: This is the trickiest part. Stretch the new belt over the motor pulley first. It helps to rotate the pulley to “feed” the belt on. Then, while holding tension on the belt, rotate the roller axle and guide the belt onto it. It requires some dexterity and patience. Ensure the belt is seated fully on both pulleys and is not twisted.
- Reinstall the roller: Slide the roller back into its housing, making sure the belt is not pinched between the roller and the housing wall.
- Reassemble the housing: Snap or screw the housing cover back on securely.
- Test: Before you put the vacuum fully upright, plug it in and engage the brush roll while it’s on its side. You should see and hear the roller spin up immediately. If it hesitates or the belt slips off, you likely didn’t seat it correctly. Re-do the installation.
If the new belt works perfectly but then fails again within a few weeks, you likely have a misaligned roller or a seized bearing that is putting extra stress on the belt. Re-inspect the roller’s spin and bearing sockets.
Motor and Electrical Issues: When the Problem is Deeper
If you’ve verified a clean, free-spinning roller, a brand-new, properly installed belt, and clear airways, yet the roller still doesn’t spin (though the main suction motor runs), the issue moves upstream. This is less common but requires more diagnostic work.
Testing the Brush Roll Motor
On most Shark Navigator Lift-Away models, the brush roll motor is a separate component housed in the brush roll pod. You need to check if it’s receiving power.
- Visual Inspection: With the brush roll housing removed, look at the electrical connector that plugs into the main pod or hose. Is it corroded, burnt, or loose? Unplug it and inspect the pins.
- Continuity Test (for advanced users): If you have a multimeter, you can test the motor for continuity. Unplug the motor connector and set your meter to the continuity setting (or lowest ohms). Touch the probes to the two motor pins. You should get a low resistance reading (usually under 5 ohms). If it reads “OL” (open loop) or infinite resistance, the motor windings are fried and the motor needs replacement.
- Jumpering Test (Caution): If you’re comfortable, you can carefully apply 12V DC power (like from a car battery charger on a low setting) directly to the motor’s pins to see if it spins. Only do this if you understand the risk of short circuits. If it spins with direct power, the problem is in the switch or wiring. If it doesn’t, the motor is dead.
Checking the Electrical Pathway
Power flows from the main unit, through the hose, into the Lift-Away pod, and to the brush motor. A break anywhere stops it.
- The “Brush Roll” Switch: The button on the handle can wear out. Listen when you press it. Do you feel a click? A lack of a click can indicate a faulty switch.
- The Hose Connection: The metal contacts on the hose connectors (where the pod plugs into the main body) are notorious for getting dirty or bent. Clean them with a pencil eraser and ensure they make firm contact when connected.
- Internal Wiring: This is the hardest to diagnose without professional tools. Wires can break at flex points, like where the hose connects to the pod. Look for any visible damage or fraying.
If you suspect a motor or wiring issue and your vacuum is still under warranty, stop and contact Shark Customer Support. Opening the main sealed unit can void the warranty. For out-of-warranty units, a local appliance repair shop can diagnose the electrical fault.
Preventive Maintenance: Keeping Your Roller Rolling
An ounce of prevention is worth a pound of cure. The “Shark Professional Navigator Lift Away roller not working” syndrome is almost always preventable with a simple routine.
After Every Few Uses: The Quick Clean
Get in the habit. After vacuuming a room with a lot of pet hair or long carpet fibers, unplug the vacuum, tip it over, and use scissors to cut away any visible hair wrapped around the roller ends. It takes 30 seconds and saves hours of hassle later. Also, tap out the dust cup and check the pre-motor filter.
Monthly Deep Clean
Once a month, or after a major cleaning session, fully remove the brush roll housing. Give the roller a thorough comb-out with a dedicated tool or scissors. Wipe down the inside of the housing and the belt with a dry cloth. Check the belt for glazing or cracks. This keeps everything operating at peak efficiency.
Smart Usage Habits
Don’t use your Shark on surfaces it’s not designed for, like wet messes or large, hard objects (nails, staples). These can damage bearings. Be extra cautious with long, silky fibers (like from some rugs or clothing); they are the worst for wrapping. When vacuuming high-pile rugs, go slower to allow the roller to agitate without overloading.
Proper Storage
Store your Navigator upright with the brush roll off the floor. This prevents the roller bearings from being under constant pressure and deformation. If storing for a long time, consider removing the roller to prevent flat spots.
Conclusion: You’ve Got This
A non-spinning roller on your Shark Professional Navigator Lift-Away is frustrating, but it is almost never a death sentence for your vacuum. It’s a mechanical system with a clear cause-and-effect relationship. By methodically checking for the most common issues—debris jams, a tangled brush, and a worn belt—you will solve the problem yourself 95% of the time. The process empowers you, saves you money, and deepens your understanding of your machine. Remember the golden rule: always unplug first. Start with the simple cut-and-clean fix, then move to the belt. Only when those are perfect should you suspect deeper motor or electrical faults. With a little routine maintenance, your Navigator’s roller will be spinning powerfully for years to come, lifting away dirt and keeping your home fresh. Now, go grab that screwdriver and get that roller moving!
Frequently Asked Questions
My Shark Navigator’s roller spins for a second then stops. Why?
This is a classic sign of a severe jam or a motor overheating safety cut-off. The motor tries to turn the stuck roller, draws too much current, and shuts down. Unplug the vacuum immediately and perform the full roller and housing cleaning procedure described above to remove the binding debris.
How do I know if my drive belt needs replacing?
Look for these signs: the belt is visibly cracked, frayed, or has a shiny, glazed surface; it’s loose enough that you can twist it easily; or the roller doesn’t spin at all while the motor runs (after confirming the roller itself spins freely by hand). A belt that is more than 2-3 years old is a good candidate for preventative replacement.
Can I use my Shark Navigator without the roller brush?
Technically yes, for hard floors only. The vacuum will still have suction. However, you should not operate it this way on carpets, as you’ll lack the agitation needed to clean them effectively. Also, running the brush roll motor with no belt or roller attached can damage the motor, so always ensure the belt is properly engaged with the roller if you reinstall it.
What if the roller spins but my vacuum still has no suction on carpet?
If the roller is spinning but you’re not picking up dirt, the issue is likely pure suction loss. Check for clogs in the hose, wand, or dust cup. Ensure the dust cup is not overfilled and the filters (pre-motor and post-motor) are clean. A clogged filter is a very common cause of lost suction.
How often should I clean the roller brush on my Shark Navigator?
For homes with pets, children, or high-pile carpet, a quick hair-cutting check after every 2-3 uses is wise. A full removal and deep cleaning of the roller and housing should be done at least once a month for heavy use, or every 2-3 months for light use on low-pile carpets.
When should I contact Shark Support instead of trying to fix it myself?
Contact Shark if your vacuum is still under warranty and you need to open the main sealed body, if you suspect a failed internal motor after ruling out all external issues, or if you are uncomfortable performing any of the disassembly steps. Also, if you smell burning or see smoke, unplug immediately and contact support—do not attempt further use.