Maintaining your Shark Vertex vacuum with regular filter replacements is crucial for sustaining its powerful suction and ensuring clean air in your home. This comprehensive guide details the specific filter types for each Vertex model, provides easy-to-follow replacement instructions, offers essential cleaning and maintenance tips to extend filter life, and helps you identify genuine Shark replacement parts to avoid counterfeit products. Proper filter care directly impacts your vacuum’s performance and the longevity of your investment.
So, you’ve invested in a Shark Vertex vacuum. You love its powerful suction, its swivel steering, and how it tackles pet hair and ground-in dirt like a champ. But have you ever stopped to think about what keeps that powerful motor running cleanly and efficiently? The answer lies in its filters. Think of your vacuum’s filters as its lungs. If they’re clogged with dust and debris, the whole machine struggles to breathe. Understanding Shark Vertex vacuum filters replacement isn’t just a chore—it’s a fundamental part of maintaining your vacuum’s legendary performance and ensuring your home’s air stays fresh. This guide will walk you through everything you need to know, from identifying the exact filters in your model to mastering the quick swap process. Let’s dive in and keep your Vertex working at its peak.
Key Takeaways
- Multiple Filters: Your Shark Vertex uses at least two distinct filters (pre-motor and post-motor), each with a specific function and replacement schedule.
- Geniune Parts Matter: Always use genuine Shark Navigator filters or certified replacements to ensure proper fit, filtration efficiency, and to prevent damage to your vacuum’s motor.
- Cleaning Extends Life: Washable foam filters should be cleaned monthly with water and dried completely for 24 hours to maintain performance between replacements.
- Model Compatibility: Filter part numbers vary slightly between Vertex models (e.g., AZ6002, AZ6003, AZ6004, AZ6005). Always verify your model number before purchasing.
- Performance Indicator: A significant drop in suction power, strange odors, or a vacuum that feels harder to push are primary signs your filters need attention.
- Post-Motor is Critical: The exhaust filter is vital for trapping fine dust and allergens expelled from the vacuum, directly affecting your home’s air quality.
- Simple Maintenance: The entire filter replacement process for a Shark Vertex takes less than 5 minutes and requires no tools, making it an easy regular task.
[FEATURED_IMAGE_PLACEHOLDER]
📑 Table of Contents
- Why Filter Replacement is Non-Negotiable for Your Shark Vertex
- Identifying Your Shark Vertex Model & Its Specific Filters
- The Step-by-Step Guide to Replacing Your Shark Vertex Filters
- Maintenance Beyond Replacement: Getting the Most from Your Filters
- Troubleshooting: What to Do If Suction Doesn’t Return After Filter Change
- Buying Guide: How to Source Genuine Shark Vertex Filters (and Avoid Fakes)
- Conclusion: A Simple Habit for a Powerful Clean
Why Filter Replacement is Non-Negotiable for Your Shark Vertex
Before we get to the “how,” let’s establish the “why.” Filters are not just optional accessories; they are critical components of your vacuum’s design and health. Neglecting them is the fastest route to diminished performance, costly repairs, and compromised indoor air quality.
The Dual-Filter System: How Your Vertex Breathes
The Shark Vertex series, like most modern high-performance vacuums, employs a two-stage filtration system. This system works in sequence to protect both your vacuum and your lungs.
- The Pre-Motor Filter (Foam Filter): This is your vacuum’s first line of defense. Usually a washable, reusable foam filter, it sits right after the dirt cup. Its job is to catch the big particles—lint, hair, larger debris—before the air carrying fine dust reaches the sensitive motor. A clogged pre-motor filter forces your motor to work harder, reducing suction and overheating the machine.
- The Post-Motor Filter (Exhaust Filter): After the air passes through the motor for cooling, it passes through this final filter. This is often a pleated, non-washable filter (sometimes with an activated carbon layer for odor reduction). Its sole purpose is to ensure that the air expelled from your vacuum back into your room is clean. Without a functioning post-motor filter, your vacuum could be blowing fine dust, allergens, and microscopic particles right back into your living space, completely defeating the purpose of vacuuming.
Signs Your Filters are Begging for Attention
You don’t need a calendar to know when it’s time. Your Vertex will give you clear signals:
- Noticeable Loss of Suction: The most common sign. If your vacuum isn’t picking up debris as effectively as it used to, especially on hard floors where suction is key, check the filters first.
- Unusual Odors: A burning smell or just a general “stale” odor when the vacuum is running can indicate an overheating motor due to a blocked pre-motor filter or a saturated post-motor filter.
- Harder to Push/Pull: A significant drop in suction creates more resistance against the carpet, making the vacuum feel heavier and harder to maneuver.
- Visible Dirt and Grime: Simply removing the filters and inspecting them. If the foam filter is completely gray and dense, or the pleated filter looks dark and clogged, it’s time for a clean or replacement.
Identifying Your Shark Vertex Model & Its Specific Filters
This is the most important step. Shark has released several Vertex models over the years (AZ6002, AZ6003, AZ6004, AZ6005, etc.), and while they are very similar, their filter part numbers are not always identical. Using the wrong filter can lead to a poor fit and ineffective filtration.
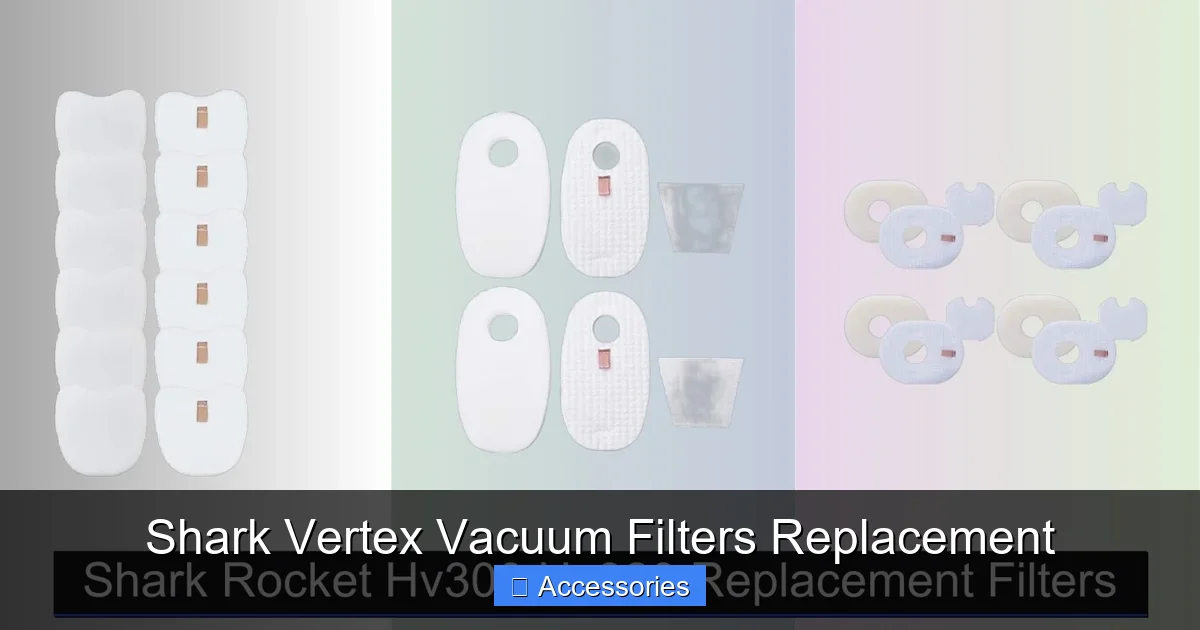
Visual guide about Shark Vertex Vacuum Filters Replacement
Image source: sharkvacuum.blog
How to Find Your Exact Model Number
Your model number is located on a silver sticker, typically on the back or underside of the vacuum’s body (the main canister). It will start with “AZ” followed by four digits. Find that number and write it down. This is your golden ticket to finding the perfect filters.
Filter Part Numbers by Common Vertex Models
Here is a general compatibility guide. Always double-check with your model number before purchasing.
- Shark Vertex AZ6002, AZ6003, AZ6004, AZ6005: These are the most common variants of the original Vertex line.
- Pre-Motor Foam Filter: Typically Shark Part # XF1 (or sometimes listed as “Shark Foam Filter for Vertex/Navigator Lift-Away”). This is the washable, blue foam filter.
- Post-Motor Pleated Filter: Typically Shark Part # XFF1 (or “Shark Exhaust Filter for Vertex/Navigator”). This is the rectangular, pleated, non-washable filter. Some models may also use a Shark Part # XF2 (a smaller, circular post-motor filter), but the AZ6000-series most commonly uses the XFF1.
- Shark Vertex Pro (AZ6006, AZ6007, etc.): Newer “Pro” versions may have slightly different part numbers, often still starting with “XF.” The pre-motor might be #XF1 or #XF3, and the post-motor might be #XFF1 or #XFF2. Your model sticker is your ultimate reference.
Pro Tip: When you buy a genuine Shark filter, the packaging will list compatible model numbers. Look for your AZxxxx model on that list.
The Step-by-Step Guide to Replacing Your Shark Vertex Filters
Thankfully, Shark designs its vacuums for user-friendly maintenance. Replacing these filters is a tool-free, 2-minute job. Here’s how to do it correctly for both filters.
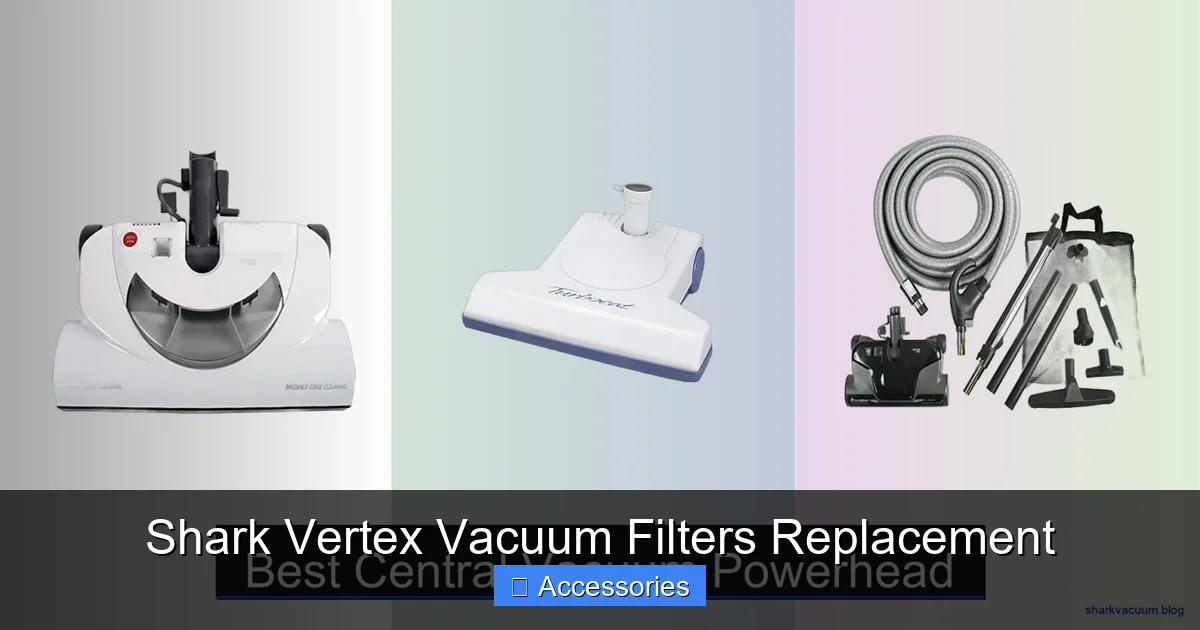
Visual guide about Shark Vertex Vacuum Filters Replacement
Image source: sharkvacuum.blog
Replacing the Pre-Motor Foam Filter (The Washable One)
Step 1: Prepare. Ensure the vacuum is unplugged. Have a trash bag handy for any loose dust that might escape.
Step 2: Access the Filter. Turn the vacuum over. Locate the dirt cup release button (usually on the top or side of the canister). Press it and lift off the entire dirt cup assembly.
Step 3: Remove the Old Foam. On the underside of the dirt cup, you’ll see a plastic filter housing. Press the two release tabs on the sides and pull the housing out. The blue foam filter is simply sitting inside. Lift it out.
Step 4: Clean (If Reusing) or Replace. If your foam filter is still in good shape (not torn, brittle), you can wash it. Rinse it under lukewarm water until the water runs clear. Do not use soap or detergent. Gently squeeze out excess water. Let it air-dry completely for at least 24 hours—this is crucial. Never install a damp filter. If it’s old, damaged, or you’re due for a replacement, simply discard the old one and prepare the new genuine Shark XF1 foam filter.
Step 5: Reassemble. Place the clean or new foam filter back into the plastic housing, ensuring it sits flat and covers all openings. Snap the housing back into the dirt cup until the tabs click. Reattach the dirt cup to the vacuum body until it clicks securely.
Replacing the Post-Motor Pleated Filter (The Exhaust Filter)
Step 1: Locate the Filter Housing. Stand the vacuum upright. On the back of the canister (the part that connects to the wand/handle), you’ll see a rectangular plastic cover. This is the exhaust filter cover.
Step 2: Open the Housing. Press the release tab on the top or side of this cover and swing it open. You’ll see the pleated filter inside, held in by a plastic frame.
Step 3: Remove the Old Filter. Gently pull the entire filter assembly (filter + plastic frame) straight out. Dispose of the old filter. Note: This filter is not washable. It is a single-use, replaceable component.
Step 4: Install the New Filter. Take your new genuine Shark XFF1 (or correct part) filter. It will have a plastic frame around the pleated media. Simply slide this frame back into the housing, ensuring it sits correctly and the airflow arrow (if present) points away from the motor. Close the plastic cover until it clicks.
That’s it! You’ve successfully completed your Shark Vertex vacuum filters replacement. Your vacuum is now ready to deliver optimal performance and clean air.
Maintenance Beyond Replacement: Getting the Most from Your Filters
Replacing filters on schedule is vital, but you can extend their life and your vacuum’s efficiency with proper care. This is especially true for the washable pre-motor foam.
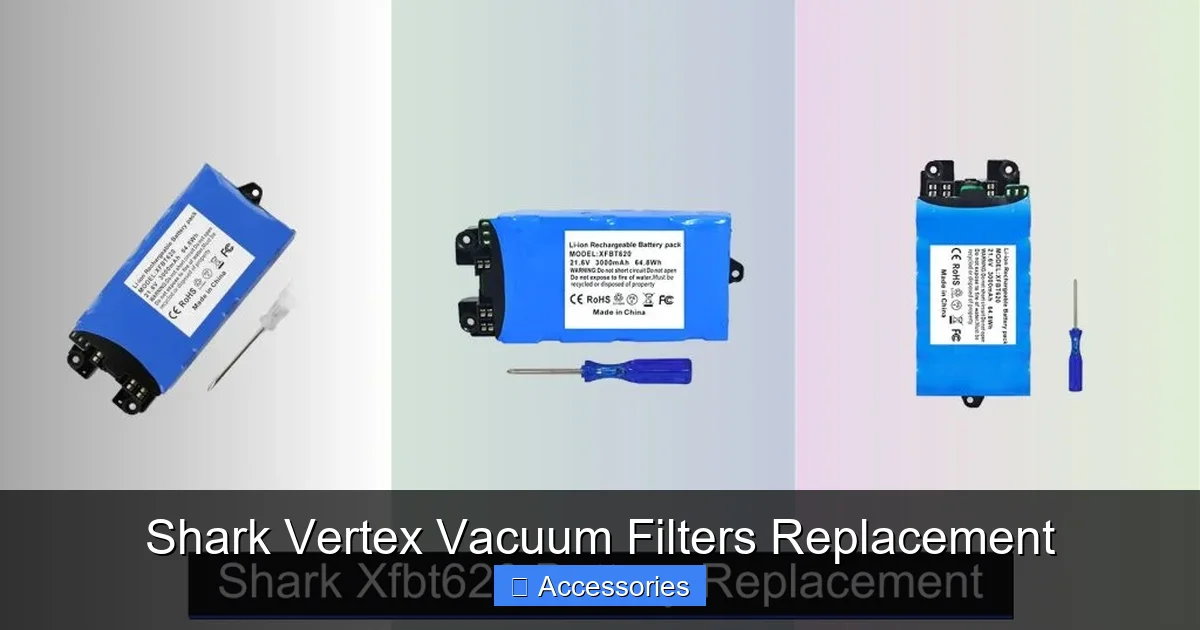
Visual guide about Shark Vertex Vacuum Filters Replacement
Image source: sharkvacuum.blog
The Art of Washing the Foam Filter
As mentioned, the foam filter is designed to be washed. Here is the definitive protocol:
- Frequency: Clean it every 1-2 months with regular use, or immediately if you’ve vacuumed up a lot of fine dust, construction debris, or pet dander.
- Method: Use only cool or lukewarm water. Gently agitate and squeeze the filter. You will see dirty water—this is normal. Continue rinsing until the water runs clear. Never use soap, detergent, or cleaning agents. These can leave residues that degrade the foam and potentially harm the motor when air passes through.
- Drying: This is the most critical step. Squeeze out as much water as you can. Then, place the filter in a well-ventilated area, away from direct heat or sunlight. It must be 100% bone-dry before reinsertion. This can take 24-48 hours. Using a hair dryer on cool setting can speed it up, but monitor closely.
When to Toss, Not Wash
No filter lasts forever. The foam filter will eventually break down. Replace it with a new genuine Shark XF1 if you notice:
- It’s torn, crumbly, or has holes.
- It doesn’t return to its original shape after squeezing.
- Even after a thorough wash, it remains discolored and dense, and suction doesn’t fully return.
- It develops a persistent, sour smell that washing doesn’t remove.
The pleated post-motor filter has no such revival ritual. Once it’s visibly dirty or after the recommended lifespan (usually 3-6 months with normal use), it must be replaced with a new XFF1.
Troubleshooting: What to Do If Suction Doesn’t Return After Filter Change
You’ve followed all the steps. You have brand-new, genuine Shark filters installed correctly. But the suction is still weak. Don’t panic. This is a classic troubleshooting scenario, and the filter is just one piece of the puzzle. Here’s your diagnostic checklist.
The Full Vertex Suction Audit
Follow this sequence to find the blockage:
- Check the Dirt Cup: Is it completely full? Empty it. Even if it looks half-full, empty it for the test. A full cup restricts airflow instantly.
- Inspect the Hose and Wand: Detach the hose from the back of the vacuum. Look through it. Is there a sock, a toy, or a wad of hair stuck inside? Use a long, flexible brush or a straightened coat hanger (covered with a cloth to avoid scratches) to gently dislodge clogs. Check the wand and the power nozzle/brush roll housing as well.
- Examine the Brush Roll: Turn the vacuum over. Is the brush roll spinning freely, or is it jammed with hair and carpet fibers? Clear any obstructions. A seized brush roll creates immense drag.
- Verify the Seals: Ensure the dirt cup is clicked securely into place. An improper seal allows air to bypass the filtration system entirely, killing suction. Also, make sure the post-motor filter cover is fully closed and locked.
- Consider the Motor: If you’ve checked every single point of airflow—cup, hose, wand, brush roll, filters—and there’s still no improvement, the issue may be internal, such as a worn motor or a compromised internal hose. This is rare but possible in older machines and may require professional service.
Remember: The filters are often the culprit, but they are not the only potential culprit. A systematic approach will always solve the mystery.
Buying Guide: How to Source Genuine Shark Vertex Filters (and Avoid Fakes)
You now know you need specific filters. But where do you buy them, and how do you ensure you’re getting the real deal? Counterfeit filters are a real problem online, and they are often made of inferior materials that can harm your vacuum.
Where to Buy: Trusted Sources
- Official Shark Website: The safest bet. You can shop by your exact model number and be guaranteed of authenticity.
- Authorized Retailers: Major stores like Target, Walmart, Best Buy, and Amazon (sold by Shark or Amazon directly) carry genuine Shark replacement parts in their appliance or vacuum sections.
- Specialty Appliance Parts Stores: Reputable online stores that specialize in vacuum cleaner parts and bags often stock genuine Shark filters.
Red Flags for Counterfeit Filters
Be a savvy shopper and watch for these warning signs:
- Price That’s Too Good to Be True: If a 2-pack of XF1 filters is significantly cheaper than Shark’s official price, it’s almost certainly a fake. Genuine filtration media and materials have a cost.
- Vague or Incorrect Packaging: Genuine Shark packaging is high-quality, with clear printing, part numbers, and lists of compatible models. Counterfeits often have blurry logos, misspelled words, or generic packaging.
- Seller Name & Reviews: Be wary of third-party sellers on marketplaces with strange names and few reviews. Read reviews specifically mentioning “fake,” “not genuine,” or “doesn’t fit.”
- Material Differences: Genuine Shark foam is a specific, dense, blue polyurethane. It’s flexible and resilient. Fake foam is often a cheaper, flimsier, lighter-colored material that tears easily. Genuine pleated filters have a sturdy plastic frame and crisp, uniform pleats.
Investing in genuine Shark Vertex vacuum filters is an investment in your vacuum’s longevity and your home’s air quality. It’s a small price to pay for guaranteed performance and protection.
Conclusion: A Simple Habit for a Powerful Clean
Mastering your Shark Vertex vacuum filters replacement schedule is one of the easiest and most impactful things you can do for your cleaning routine. It’s not a complicated task, but it yields enormous returns. By understanding the two-filter system, correctly identifying your model’s parts (the washable XF1 foam and the replaceable XFF1 pleated filter), and performing the quick swaps as needed, you safeguard your vacuum’s motor, restore its powerful suction, and ensure the air in your home is truly being cleaned, not just recirculated. Pair this with monthly foam washings and you’ll get years of reliable, high-performance service from your Shark Vertex. Make it a habit to check your filters during your regular vacuum maintenance—your machine, and your lungs, will thank you for it.
Frequently Asked Questions
How often should I replace the filters in my Shark Vertex?
The washable pre-motor foam filter (XF1) should be washed every 1-2 months and replaced every 6-12 months, depending on use. The non-washable post-motor pleated filter (XFF1) should be replaced every 3-6 months for optimal performance and air quality.
Can I use a third-party or universal filter instead of a genuine Shark filter?
While universal filters may fit, they often use inferior filtration media that can reduce suction, allow dust to bypass the system, and potentially damage your vacuum’s motor over time. For guaranteed performance and to protect your investment, genuine Shark filters are highly recommended.
What happens if I put my foam filter back in while it’s still damp?
Never install a damp filter. Trapped moisture can travel to the motor, causing damage, corrosion, and creating a breeding ground for mold and mildew. Always allow the washed foam filter to air-dry completely for at least 24 hours.
My suction is weak even with new filters. What else could be wrong?
A full dirt cup, a clogged hose or wand, a jammed brush roll, or an improperly sealed dirt cup/filter housing are the most common culprits. Systematically check each component in the airflow path from the floor to the exhaust.
Where exactly is the model number on my Shark Vertex?
Look for a silver sticker on the back or underside of the main canister body (the part that holds the dirt cup). The model number begins with “AZ” followed by four digits (e.g., AZ6002).
Is the post-motor filter washable?
No. The post-motor pleated filter (XFF1) is a disposable, single-use filter. It is not designed to be washed or cleaned. Attempting to do so will destroy its structure and render it useless. Simply replace it with a new one when it becomes visibly dirty or according to the schedule.