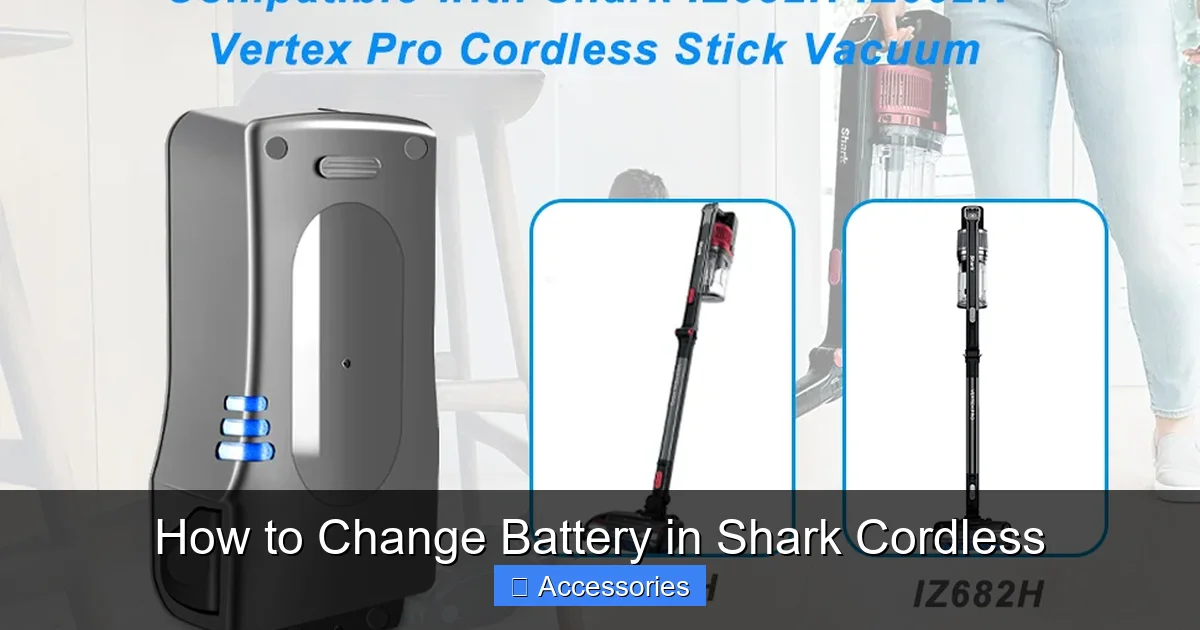
Changing the battery in your Shark cordless vacuum is a straightforward DIY task that can restore your vacuum’s original power and runtime. The process varies slightly by model series (Vertex, IZ, Stratos, etc.), but always begins with correctly identifying your specific model number to purchase the compatible replacement battery. With the right tools and safety precautions, you can complete the swap in under 30 minutes, saving money compared to buying a new machine and keeping your home cleaning efficiently.
There’s nothing quite as frustrating as your trusty Shark cordless vacuum losing its pep halfway through cleaning the house. That once-mighty suction starts to wane, the runtime shrinks from a full hour to a mere 15 minutes, and the low-battery light seems to mock you. Before you resign yourself to the cost and waste of a new vacuum, consider this: in the vast majority of cases, the issue is a single, replaceable component—the lithium-ion battery. Learning how to change the battery in a Shark cordless vacuum is a simple, empowering skill that saves you money, reduces electronic waste, and gets your cleaning powerhouse back to its former glory. This comprehensive guide will walk you through every step, from identifying your exact model to safely installing a fresh power cell.
The world of Shark cordless vacuums is diverse, with several popular series like the Vertex, IZ, Stratos, and Pet Pro. Each has its own elegant design and battery integration method. This means the first and most critical rule is: do not guess your battery part number. Using the wrong battery can damage your vacuum or, at best, not fit at all. We will demystify model identification and provide clear, model-specific instructions. By the end, you’ll have the confidence and knowledge to perform this maintenance task efficiently, safely, and correctly. Let’s plug in and get started.
Key Takeaways
- Model Identification is Crucial: Your Shark vacuum’s exact model number (found on the battery door, underside, or manual) is the key to ordering the correct, compatible replacement battery.
- Tools Are Simple: Most models only require a small Phillips-head screwdriver and possibly a plastic pry tool, making this an accessible DIY repair for most homeowners.
- Safety First: Always disconnect the battery, work on a non-conductive surface, and avoid short-circuiting the terminals to prevent damage or injury.
- Series Have Different Procedures: Shark’s main cordless lines (Vertex, IZ, Stratos, Pet Pro) have distinct battery removal methods, from simple latches to screw-down compartments.
- Proper Disposal Matters: Old lithium-ion batteries must be recycled at designated e-waste facilities, not thrown in household trash, due to environmental regulations.
- New Battery Care: A new Shark battery should be fully charged before first use and undergo 2-3 full charge cycles to calibrate its power gauge for optimal performance.
- Cost-Effective Repair: Replacing the battery typically costs 25-40% of a new vacuum’s price, making it a highly economical way to extend your appliance’s lifespan by several years.
📑 Table of Contents
- 1. Identifying Your Shark Cordless Model: The Essential First Step
- 2. Gathering Your Tools and Preparing Your Workspace
- 3. The Main Event: Step-by-Step Battery Replacement by Series
- 4. Safety Protocols and Proper Battery Disposal
- 5. Troubleshooting: What to Do If Your Shark Won’t Turn On After a Battery Swap
- 6. Maximizing the Lifespan of Your New Shark Battery
- Conclusion: Empowerment Through Simple Maintenance
1. Identifying Your Shark Cordless Model: The Essential First Step
You cannot buy the correct replacement battery without knowing exactly which Shark cordless vacuum you own. Shark has produced numerous iterations over the years, and a battery for a Shark Vertex Pro (AZ6002) will not fit a Shark IZ682. The model number is your golden ticket. Here’s exactly where to find it and what it looks like.
Where to Locate the Model Number
The model number is typically printed on a sticker or label in one of three primary locations:
- On the Battery Door/Compartment: This is the most common spot. Open the battery release latch or remove the battery door cover. The label is often on the inside of the door or on the plastic frame surrounding the battery slot.
- On the Underside of the Main Body: Flip the vacuum over. Look for a sticker on the bottom housing, usually near the wheels or brush roll area. You may need to tilt the vacuum to see it clearly.
- On the Original User Manual or Packaging: If you have the original box or manual, the model number is prominently displayed on the front. The manual’s cover or first page will have it listed.
The model number is a combination of letters and numbers, such as IZ682, AZ6002, HV322, or SNF360. It is different from the serial number. Write this number down exactly as it appears.
How to Use Your Model Number to Find the Right Battery
With your model number in hand, you have two reliable paths to the correct battery:
- Official Shark Website: Go to sharkclean.com, navigate to “Support” or “Accessories & Parts,” and enter your model number. The site will list all compatible parts, including the official Shark replacement battery (e.g., “Shark IZ Series Battery Pack”). This is the safest route for guaranteed compatibility.
- Reputable Third-Party Retailers: Sites like Amazon, eBay, or specialty vacuum part stores are excellent resources. Search using your exact model number plus the word “battery” (e.g., “Shark AZ6002 battery”). Look for listings from sellers with high ratings and reviews that explicitly confirm compatibility with your model. Many offer high-quality, often more affordable, OEM-equivalent batteries.
Pro Tip: When in doubt, compare the physical dimensions and connector shape of your old battery to the product photos of the new one before purchasing. The connector plug must match perfectly.
2. Gathering Your Tools and Preparing Your Workspace
Once your new battery arrives, it’s time to prepare. This job requires minimal tools, but organization is key to avoiding lost screws and frustration.
Visual guide about How to Change Battery in Shark Cordless
Image source: m.media-amazon.com
Essential Tools
For 90% of Shark cordless models, you will need only:
- A small Phillips-head screwdriver. A precision screwdriver set (like those used for electronics or eyeglasses) is ideal. The screws are tiny and can strip easily if you use too large a driver or excessive force.
- A plastic pry tool or spudger (optional but helpful). For models with sealed battery compartments held by clips, a plastic tool helps you gently pry open the casing without scratching the vacuum’s finish. A old credit card can work in a pinch.
Some older models might use a Torx screwdriver (star-shaped), so it’s wise to glance at your screws before you start. Keep a small container or magnetic tray handy to hold the screws securely.
Workspace and Safety Preparation
Set up on a clean, flat, well-lit surface like a kitchen table or workbench. Lay down a soft cloth or towel to protect the vacuum’s finish from scratches. Most importantly, ensure your Shark vacuum is completely powered off and unplugged from any charger. The battery terminals should never be exposed or connected while you’re working. It’s also a good practice to discharge any residual power by pressing the power button for a few seconds after removing the old battery.
3. The Main Event: Step-by-Step Battery Replacement by Series
Now for the core procedure. We’ll break it down by Shark’s major cordless families. The fundamental steps are: 1) Open the battery compartment, 2) Disconnect the old battery, 3) Remove it, 4) Insert the new battery, 5) Reconnect and secure, 6) Close the compartment.
Visual guide about How to Change Battery in Shark Cordless
Image source: m.media-amazon.com
Shark Vertex & Vertex Pro Series (e.g., AZ, IZ with “Pro”)
These popular models (IZ682, AZ6002, etc.) feature a user-friendly, tool-free battery door.
- Step 1: Stand the vacuum upright. Locate the large, rectangular battery door on the back of the main body, just below the handle.
- Step 2: Press the release latch (usually a gray or black button) and firmly pull the battery door outward. It will swing open on a hinge.
- Step 3: You will see the battery pack seated inside. Gently pull the battery straight out by its handle or top edge. It may have a slight resistance from a connector.
- Step 4: If the battery has a separate wire connector (common on Vertex), gently unplug it by squeezing the release tab on the plug and pulling straight out. Do not pull on the wires.
- Step 5: Take your new battery. If it has a separate connector, plug it in first until it clicks. Then, align the battery’s grooves with the slots in the compartment and slide it firmly into place until it seats fully.
- Step 6: Close the battery door until it clicks securely into the latch.
Shark IZ Series (Non-“Pro” Models, e.g., IZ682, IZ362)
These sleek, stick-style vacuums often have a battery integrated into the handle or a small rear compartment secured with screws.
- Step 1: Lay the vacuum flat on its side or face-down on your cloth. Locate the small rectangular panel on the back or underside. It is held by 2-4 tiny Phillips-head screws.
- Step 2: Carefully remove all screws and set them aside. Keep track of their length, as they may differ.
- Step 3: The plastic cover will now come off. You may need to gently pry it with your plastic tool if it’s clipped. Be gentle.
- Step 4: You will see the battery pack, often connected by a plug. Unplug the connector by pressing its tab and pulling straight out. Some models have the battery soldered; for those, you would need soldering skills, but most consumer models use a plug.
- Step 5: Lift the old battery out. Place the new battery in the same orientation. Reconnect the plug firmly until it clicks.
- Step 6: Replace the plastic cover and reinsert all screws, tightening them just snug—do not overtighten and crack the plastic.
Shark Stratos & Anti-Hair Wrap Series (e.g., AZ6002UK, SN585)
These models, known for their DuoClean and Anti-Hair Wrap technology, typically use the same tool-free door as the Vertex series. Follow the Vertex instructions above. The battery door is large and located on the back. The process is identical: unlatch, open, unplug (if applicable), swap, plug, and close.
Shark Pet Pro Series (e.g., SNF360, SNF380)
These often have a more integrated battery design. The access panel is usually on the underside, near the front or rear wheels.
- Step 1: Turn the vacuum upside down. Locate the rectangular or oval access panel held by 2-4 screws.
- Step 2: Remove the screws and pry off the panel.
- Step 3: The battery will be visible. Disconnect the plug carefully.
- Step 4: Some Pet Pro batteries are also secured by a small retaining clip or strap. If present, gently pry or slide the clip to free the battery.
- Step 5: Remove old, insert new, reconnect plug, re-secure clip if there was one.
- Step 6: Replace the access panel and screws.
For All Models: Final Checks
After closing everything up, give the vacuum a gentle shake. You should not hear any rattling from loose parts or batteries. Visually inspect that all doors and panels are flush and secure. Do not attempt to power it on yet.
4. Safety Protocols and Proper Battery Disposal
Handling lithium-ion batteries carries inherent risks if done improperly. Following these protocols protects you, your vacuum, and the environment.
Visual guide about How to Change Battery in Shark Cordless
Image source: thespruce.com
Critical Safety Do’s and Don’ts
- DO work on a non-flammable, stable surface away from pets and children.
- DO inspect the old battery for any physical damage—swelling, punctures, cracks, or leaking fluid. If you see any of this, handle with extreme care, wear gloves if possible, and do not puncture or crush it.
- DO NOT short-circuit the battery terminals. This means never let the positive (+) and negative (-) metal contacts touch each other or a conductive object like a metal tool or jewelry. Keep the terminals clean and avoid placing the battery on a metal surface.
- DO NOT attempt to open, repair, or disassemble the battery pack itself. It is a sealed unit. Tampering with it can cause fire or explosion.
- DO NOT expose the battery to extreme heat, direct sunlight, or moisture during the swap.
How and Where to Recycle Your Old Shark Battery
Lithium-ion batteries are classified as hazardous waste and must never be placed in your regular household trash or recycling bin. They contain materials that can leach into landfills and pose fire risks in waste facilities. Recycling is mandatory and widely available:
- Retailer Take-Back: Stores like Best Buy, Home Depot, Lowe’s, and Staples have in-store recycling kiosks for rechargeable batteries, regardless of where you bought them. This is often the easiest option.
- Municipal Hazardous Waste (HHW) Facilities: Most cities and counties operate drop-off locations for household hazardous waste, which includes all rechargeable batteries. Check your local municipality’s website for locations and hours.
- Call2Recycle: This non-profit program has a network of drop-off points. Use their locator tool on call2recycle.org to find a site near you.
- When Transporting: Tape over the battery terminals with electrical tape to prevent accidental short-circuiting. Place the battery in a non-conductive container like a plastic bag or box.
5. Troubleshooting: What to Do If Your Shark Won’t Turn On After a Battery Swap
You’ve followed all the steps, but your Shark remains dark and silent. Don’t panic. This is common and usually has a simple fix.
First, The Obvious Checks
Ensure the battery is fully seated in its compartment. Sometimes it can look inserted but not be connected properly. Remove it and re-seat it firmly. Confirm the battery door or access panel is completely closed and latched; many models have a safety interlock that prevents power if the door is ajar.
The Reset Procedure: Calibrating the New Battery
A new battery, or sometimes even a freshly reconnected one, needs to “communicate” with the vacuum’s motherboard. A reset often solves this.
- Method 1 (The Standard Reset): Remove the battery from the vacuum. Press and hold the power button on the vacuum for 10-15 full seconds. This discharges any residual power in the capacitors. Reinsert the battery firmly. Connect the vacuum to its original charger and plug it in. Let it charge uninterrupted for at least 3-4 hours, even if the light indicates “full.” This full cycle helps the vacuum’s battery gauge recognize the new cell’s capacity.
- Method 2 (For Some Models): With the battery removed, locate a small pinhole reset button on the vacuum body (often near the charging port or on the underside). Use a paperclip to press and hold it for 5-10 seconds. Then reinsert the battery and charge.
Checking Charger and Connections
Verify your charger is the correct one for your model and that its cable and plug are undamaged. Try charging the new battery directly, if possible (some models allow this). If the battery doesn’t charge in the vacuum, try charging it outside if your model supports it, or test the vacuum with the old (if still functional) battery to isolate the issue. If the new battery doesn’t charge at all, it may be defective—contact the seller for a replacement.
6. Maximizing the Lifespan of Your New Shark Battery
You’ve invested in a new battery. Protect that investment with smart charging and storage habits that can significantly extend its useful life, often to 3-5 years.
Optimal Charging Habits
Modern lithium-ion batteries do not suffer from “memory effect” and prefer partial discharges over full ones.
- Avoid Deep Discharges: Try not to run the battery down to 0% regularly. Recharge it when it reaches about 20-30% remaining. Frequent full discharges stress the cells.
- No Need for “Conditioning”: Unlike old nickel-cadmium batteries, you do not need to fully charge and then fully discharge a new Shark battery. However, for the very first charge cycle, a full charge (to 100%) is recommended to calibrate the power meter.
- Regular Use is Good: If you only use the vacuum once a month, try to run it through a partial cycle every few weeks. Lithium-ion batteries prefer to be used.
Storage Guidelines for Longevity
If you won’t be using your Shark for an extended period (e.g., seasonal storage):
- Store at ~50% Charge: Never store a lithium-ion battery completely full or completely empty. A charge level of 40-60% is ideal for long-term storage.
- Cool and Dry Environment: Store the vacuum (with battery removed if very long-term) in a place with stable, moderate temperatures (ideally 60-70°F / 15-21°C). Avoid garages, attics, or cars where temperatures can soar or plummet.
- Recharge Periodically: If storing for more than 3 months, check the battery every 2-3 months and give it a top-up charge back to the 50% level.
Environmental Factors That Kill Batteries
The biggest enemy of Shark cordless batteries is heat. Regularly using the vacuum until it’s hot to the touch, or storing/charging it in a hot location, will drastically shorten its lifespan. Ensure the vacuum’s air intake vents (usually on the sides or back) are never blocked during use or while charging on its dock.
Conclusion: Empowerment Through Simple Maintenance
Changing the battery in your Shark cordless vacuum is more than just a repair; it’s an act of sustainable consumption and smart homeownership. You’ve now learned that the process hinges on accurate model identification, follows straightforward series-specific steps, and is governed by simple safety rules. You understand how to responsibly dispose of the old power cell and how to nurture the new one for years of reliable service. Armed with a small screwdriver and this knowledge, you’ve effectively added 2-3 years—or more—of powerful, cord-free cleaning to your Shark’s life. The next time that low-power light flickers, you won’t see an endpoint; you’ll see a simple, satisfying DIY project waiting to happen. Your clean home, and your wallet, will thank you.
Frequently Asked Questions
How often should I expect to replace the battery in my Shark cordless vacuum?
With proper care and charging habits, a Shark lithium-ion battery typically lasts 2-4 years or 300-500 full charge cycles. Signs it needs replacement include significantly reduced runtime (less than 50% of original) and a rapidly flashing red charge light.
Can I use a third-party battery instead of an official Shark replacement?
Yes, you can. Many reputable third-party batteries are high-quality, cost-effective alternatives. Ensure you purchase from a trusted seller with excellent reviews and that explicitly lists compatibility with your exact Shark model number. Look for batteries with good warranty terms.
Is it normal for my new Shark battery to feel warm while charging?
Yes, it is normal for the battery to become slightly warm during the charging process. However, it should not become hot to the touch. If it gets excessively hot, disconnect the charger immediately and contact the seller, as this could indicate a defective cell.
Will replacing the battery void my Shark vacuum’s warranty?
If your vacuum is still under the original manufacturer’s warranty, using a non-OEM battery or performing the replacement yourself could potentially void the warranty for the entire unit. Check your warranty terms. For vacuums out of warranty, this is not a concern.
How much does a replacement Shark cordless battery typically cost?
Official Shark replacement batteries range from $70 to $130+, depending on the model and capacity. High-quality third-party equivalents are often 30-50% cheaper, typically costing between $40 and $90. Prices vary by retailer and model popularity.
My new battery is installed but the vacuum still won’t turn on. What should I do?
First, ensure the battery is fully seated and the compartment door is securely closed. Perform a reset: remove the battery, hold the vacuum’s power button for 15 seconds, reinsert the battery, and connect it to the charger for a full 4-hour charge before trying again. If it still fails, the new battery may be defective or incompatible.