Your Shark vacuum’s hose is the secret weapon for tackling dust, debris, and messes in places the main floor head can’t reach. This guide unlocks its full potential, detailing every attachment, proper usage for specific tasks like car detailing and ceiling fan cleaning, and essential maintenance to keep suction powerful. Learn to detach, configure, and wield the hose like a pro to transform your vacuum from a floor cleaner into a versatile whole-home cleaning system. Proper care of the hose and connections prevents clogs and maintains peak performance for years.
You’ve just unboxed your shiny new Shark vacuum, and it’s already making quick work of your hard floors and carpets. But then you spot it: the dust bunnies partying along the baseboard, the cobwebs nestled in the ceiling fan, the stubborn pet hair clinging to the back of the sofa. That’s where the real magic kicks in—the hose. That flexible, often-underutilized extension is your gateway to truly comprehensive cleaning. It’s not just an accessory; it’s the key that unlocks your Shark’s potential as a whole-home cleaning system. This guide will walk you through everything, from identifying the parts to mastering professional-level techniques, ensuring you get every last ounce of performance from your investment.
Key Takeaways
- The hose is a versatile extension: It connects to the main vacuum body and accepts various attachments for above-floor, automotive, and tight-space cleaning.
- Each attachment has a specific purpose: The crevice tool, dusting brush, upholstery tool, and pet multi-tool are engineered for different surfaces and debris types.
- Proper technique maximizes suction: Ensuring tight connections, using the right attachment for the job, and maintaining a clear hose path are critical for effective cleaning.
- Regular maintenance is non-negotiable: Clearing blockages, checking for cracks, and storing the hose correctly prevent loss of suction and extend its lifespan.
- The hose system works across most Shark models: While connectors may vary slightly, the fundamental principle and most attachments are compatible across Navigator, Vertex, IZ, and Stratos series.
📑 Table of Contents
Understanding Your Shark Vacuum’s Hose System
Before you start connecting things, let’s get familiar with the components. The hose on your Shark vacuum is typically a robust, flexible, corrugated tube, usually about 5-6 feet long. One end is permanently attached to the vacuum’s main body or wand, while the other end features the iconic Shark “click-connect” or push-and-twist locking mechanism. This is your universal gateway for all attachments.
The Two Main Hose Styles
While designs evolve, you’ll generally encounter two primary connector types:
- The “Click-Connect” (Most Common): A large, round, plastic connector with two protruding tabs. To attach an accessory, you press the release button on the accessory, align the tabs with the slots on the hose end, push in firmly, and twist slightly until you hear a click. The release button must be held to detach.
- The “Push-and-Twist” (Older/Some Models): A smooth, tapered connector without a button. You simply push the accessory onto the hose and twist it clockwise until it locks. To remove, twist counter-clockwise while pulling.
Pro Tip: Always ensure the connector is clean and free of hair or debris before attempting to attach or detach tools. A clogged connector is the #1 cause of frustrating, seemingly-stuck attachments.
Essential Attachments and Their Uses
Your Shark vacuum likely came with a set of tools clipped to the back of the machine or stored in a bag. Each one is designed for a specific cleaning challenge. Using the wrong tool for the job leads to poor results and wasted time.
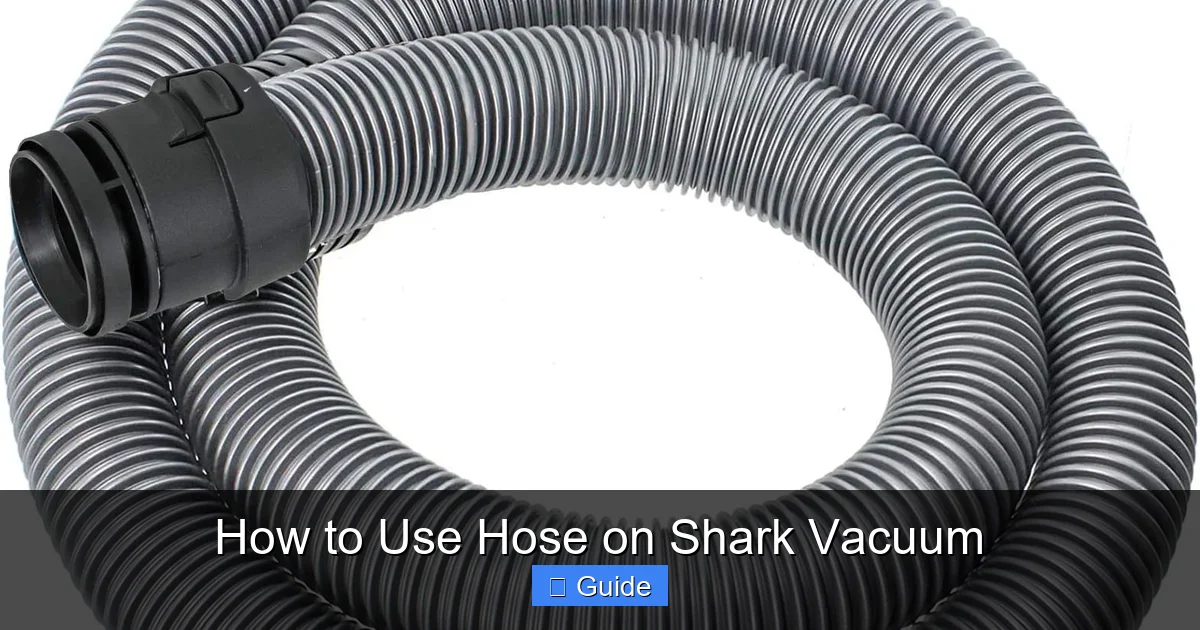
Visual guide about How to Use Hose on Shark Vacuum
Image source: m.media-amazon.com
The Crevice Tool: Your Tight-Space Hero
This is the long, skinny, flat tool, often about 10-12 inches long with a narrow tip. Its sole purpose is to reach where nothing else can.
- Use it for: Between couch cushions and seat backs, along baseboards and molding, inside the tracks of sliding glass doors and windows, behind toilets and radiators, and in the narrow gaps between appliances and walls.
- Technique Tip: Press the flat side firmly against the surface you’re cleaning (like a baseboard) to create a better seal and maximize suction. For deep, dark crevices, use a flashlight to see what you’re pulling out.
The Dusting Brush: For Delicate and Horizontal Surfaces
Recognizable by its circle or oval of soft, flexible bristles. This brush is gentle yet effective.
- Use it for: Dusting ceiling fans (hold the blade and brush the top), air vents, light fixtures, crown molding, window blinds (both sides of the slats), picture frames, and electronics (monitors, keyboards—use low suction). The soft bristles prevent scratching.
- Technique Tip: Use a gentle, sweeping motion. For blinds, angle the brush to get both sides of each slat. On ceiling fans, start at the top of the blade and pull downwards to contain the dust.
The Upholstery Tool: For Fabric and Furniture
This is a wider, flatter tool, usually with a small, stiff brush strip or a smooth soleplate. It’s built for fabric surfaces.
- Use it for: Couches, armchairs, mattresses, car seats, and padded headboards. It’s excellent for lifting embedded pet hair and lint from woven fabrics.
- Technique Tip: Work in a grid pattern, overlapping your strokes. For thick pile or deep textures, use the brush attachment (if it has one) in an agitation motion, then switch to the smooth side for final pickup. Always check your furniture’s cleaning code first.
The Pet Multi-Tool: The Ultimate Hair and Debris Weapon
This is often a combination tool. The most common version has a rubber edge on one side (for pet hair on furniture) and a set of stiff bristles on the other (for ground-in dirt). Some models have a separate, dedicated pet tool.
- Use it for: The rubber edge is magic on pet hair—rub it across a couch or car seat and watch it gather into piles. The bristle side is for scrubbing mud or dried dirt from area rug edges or car floor mats.
- Technique Tip: The rubber edge works on both dry and slightly damp hair. Use short, firm strokes. For best results on pet hair, ensure the surface is dry.
The Mini Motorized Brush (If Equipped)
This is a smaller, powered brush roll that spins, similar to the main floor head. It’s a premium attachment on some Shark models (like certain Vertex or IZ units).
- Use it for: Deep cleaning stairs, upholstered furniture, and car interiors. The rotating bristles agitate and lift embedded debris that static suction alone can’t remove.
- Technique Tip: This tool requires power from your vacuum’s hose. Ensure it clicks securely into the hose—you should hear the motor engage. Move it slowly over the surface to allow the brush roll to do its work.
Step-by-Step: Using the Hose for Different Tasks
Knowing the tools is half the battle. The other half is applying them with the right method for the specific job. Here’s how to tackle the most common hose-based cleaning missions.
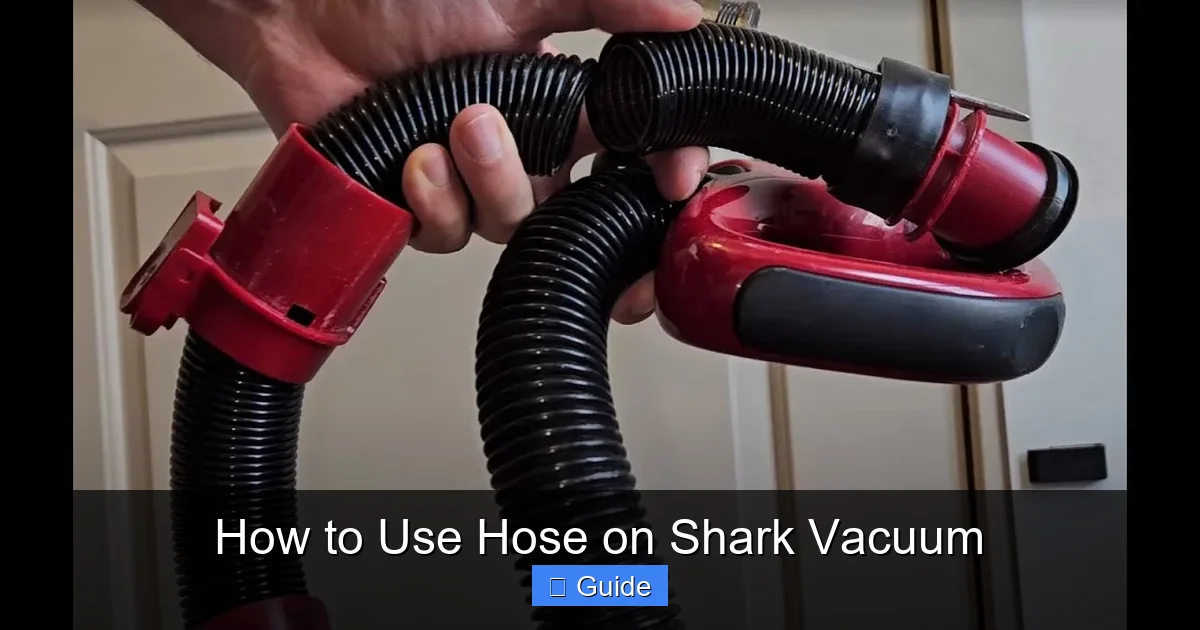
Visual guide about How to Use Hose on Shark Vacuum
Image source: i.ytimg.com
Cleaning Stairs: A Methodical Approach
Stairs are a classic hose challenge. The main head is too bulky, but the hose gives you precision.
- Step 1: Start at the top of the staircase and work your way down for safety.
- Step 2: Attach the upholstery tool or pet multi-tool for the tread (the flat part you step on). The stiff bristles will agitate carpet fibers.
- Step 3: For the riser (the vertical part), switch to the crevice tool to clean the corner where the tread meets the riser, then use the dusting brush for any textured surfaces.
- Step 4: Don’t forget the sides and the wooden banister. Use the dusting brush for the banister and crevice tool for the side gaps.
Detailing Your Car: From Floor Mats to Dashboard
Your Shark is a powerful, portable car vacuum. The hose is your detailing kit.
- Floor Mats & Carpets: Remove the mats. Shake them out first. Use the pet multi-tool’s bristle side for scrubbing ground-in gravel or mud from the fibers. Flip the mat and use the crevice tool for the grippy underside.
- Seats and Cracks: The crevice tool is indispensable for the seams between seat cushions and the center console. Use a sawing motion.
- Dashboard & Vents: Switch to the dusting brush. Its soft bristles are safe for plastic, vinyl, and screens. For air vents, use the crevice tool first to dislodge large debris, then a quick pass with the dusting brush.
- Pet Hair: This is where the rubber edge of the pet tool shines. Rub it firmly over the seats and cargo area. The hair will ball up instantly.
Reaching High and Low: Ceiling Fans and Baseboards
These are two of the most satisfying uses for the hose.
- Ceiling Fans: Always turn off the fan. Place a drop cloth or sheet below to catch dust. Use the dusting brush. Stand on a stable stool. For each blade, hold the top edge with one hand and brush from the center toward the tip with the other. The brush contains the dust better than a dry cloth.
- Baseboards: This is the crevice tool’s moment of glory. Walk along the wall, pressing the flat side of the tool firmly against the top of the baseboard. Move steadily from one end of the room to the other. You’ll be shocked at the amount of dust and debris that accumulates there.
Furniture and Upholstery Deep Clean
Couches and chairs collect everything—crumbs, hair, dust, and mystery particles.
- Step 1: Remove all cushions and shake them out outside or over a trash can.
- Step 2: Use the crevice tool to clean out the deep cracks between cushions and along the frame.
- Step 3: Attach the upholstery tool. For a standard fabric couch, use a slow, overlapping grid pattern, pressing the tool into the fabric to agitate it. Pay extra attention to the headrest and armrests where hair and oils accumulate.
- Step 4: If you have the mini motorized brush, this is the time to use it. Its agitation will pull out deeply embedded debris that standard suction misses.
Maintenance and Care for Longevity
Your hose is a workhorse, but it needs care to perform. Neglecting it is the fastest route to weak suction and breakdowns.
Visual guide about How to Use Hose on Shark Vacuum
Image source: goblutech.com
Unclogging: The Most Critical Skill
A clogged hose is usually the culprit behind a sudden drop in suction. Here’s how to find and fix it.
- Step 1: Detach Everything. Remove the hose from the vacuum body and any attachment from the hose end.
- Step 2: Visual Inspection. Hold the hose up to the light. You’ll often see the clog as a dark patch. Gently try to push it through with a long, thin tool like a broom handle or a straightened wire coat hanger (be gentle to avoid puncturing the hose).
- Step 3: The “Reverse” Method. If the clog is stubborn, try running the vacuum in reverse. Some Shark models have a “reverse” or “clog release” function on the hose/wand connection. If yours does, engage it and the suction will blow the clog back out the other end. If not, you can try carefully detaching the hose from the vacuum and briefly turning the vacuum on while holding the hose end over a trash can—the suction might pull the clog backward (use caution and wear a mask).
- Step 4: Check the Attachments. Clogs are just as common inside the crevice tool or dusting brush. Use a long, thin brush (like a bottle brush) to clean the interior passages of your tools.
Cleaning and Inspection
- Wipe Down: After major cleaning jobs (like a muddy car or a dusty attic), wipe the exterior of the hose with a damp microfiber cloth. For stubborn grime, use a mild soap solution. Never submerge the hose in water.
- Check for Damage: Regularly inspect the entire length of the hose for cracks, splits, or punctures, especially near the ends where it connects. Even a small crack can cause a major loss of suction. Also, check the connector tabs for wear or breakage.
- Clean Connectors: Use a toothpick or a small, dry brush to clear any lint or hair from the locking mechanism slots on both the hose and the tools. A clean connector ensures a secure, airtight fit.
Proper Storage: Avoiding Kinks and Stress
How you store your hose dramatically affects its lifespan.
- Never: Hang the hose by its connector (this stresses the plastic), kink it sharply, or store it under heavy items that can crush it.
- Do: Coil it loosely in a large, gentle loop. Many Shark vacuums have a dedicated hose hook or clip on the back of the machine—use it! If not, use a large Velcro cable tie or a purpose-made hose hanger. Store it in a cool, dry place away from direct sunlight, which can degrade the plastic over time.
Troubleshooting Common Hose Issues
Even with care, issues arise. Here’s how to diagnose them quickly.
“My suction is weak when using the hose, but strong with the floor head.”
This is almost always a clog or an air leak in the hose system.
- Diagnosis: Start by removing the hose from the vacuum body and any tool. Feel for suction at the vacuum’s wand port. If it’s strong there, the clog is in the hose or tool. If it’s weak, the issue is in the main vacuum (filter, brush roll seal).
- Solution: Perform the full unclogging procedure on the hose and all attachments. Then, inspect the seals on the vacuum’s main hose port and the hose connector itself for cracks or damage.
“The hose keeps detaching itself during use.”
This is usually a connection issue.
- Diagnosis: The connector isn’t fully locked. For click-connect types, you likely didn’t push and twist far enough to engage the tabs fully. You should hear and feel a definitive click.
- Solution: Clean both connectors thoroughly. Re-attach by pressing the release button on the tool, aligning the tabs, pushing in until it bottoms out, and giving it a firm quarter-turn. Test the connection by giving it a firm tug before starting to clean.
“There’s a loud whistling or screaming noise from the hose.”
This is a classic sign of an air leak—suction is being pulled through a crack or a loose connection at high speed.
- Diagnosis: Systematically check every connection point: hose-to-vacuum, hose-to-tool. Listen as you gently flex each section of the hose. The noise will get louder at the source of the leak.
- Solution: Re-secure any loose connections. If the hose itself has a crack, it will need to be replaced. Contact Shark customer service for genuine replacement parts.
Pro Tips and Advanced Techniques
Take your hose skills from basic to expert with these insider tricks.
The “Blind” Reach with a Flashlight
For cleaning under heavy furniture or behind appliances, attach the crevice tool and use a small, bright LED flashlight. Tape it to the top of the tool (use painter’s tape so it doesn’t leave residue). This illuminates the dark space, allowing you to see exactly what you’re pulling out and avoid pushing debris further in.
DIY Dusting Mitt
For quick dusting of large, delicate surfaces like wood furniture or pianos, slide a clean, dry microfiber cloth over the dusting brush and secure it with a rubber band. The gentle suction will hold the cloth in place and pull dust into the vacuum bag, preventing it from just being redistributed. Ensure suction is on a low setting.
Extending Your Reach with an Extension Wand
Some Shark models sell a separate, rigid extension wand that clicks into your hose. This is a game-changer for high ceilings, tall bookshelves, or cleaning the tops of door frames. It keeps the weight of the motorized tool (if using one) off your wrist and provides better leverage.
Vacuuming Silk or Velvet
Never use a motorized brush or even the standard upholstery tool directly on delicate fabrics like silk, velvet, or antique lace. The agitation can damage the fibers. Instead, use the dusting brush on the lowest suction setting and hold it slightly above the surface, letting the suction pull the loose dust and hair away without physical contact.
Conclusion: Your Vacuum, Unlocked
The hose on your Shark vacuum isn’t an afterthought—it’s the core of its versatility. By understanding the simple click-connect system, matching each specialized tool to its intended surface, and committing to basic maintenance like unclogging and proper storage, you elevate your cleaning from a chore to an efficient, satisfying process. You’re no longer just pushing dirt around; you’re systematically extracting it from every nook, cranny, and surface in your home and car. Remember, a clean hose is a powerful hose. Make it a habit to check your connections and clear any blockages after a big job. With this knowledge, you’ve fully unlocked the potential of your Shark vacuum, transforming it from a floor cleaner into a complete, whole-home cleaning powerhouse that will serve you faithfully for years to come.
Frequently Asked Questions
How do I detach the hose from my Shark vacuum?
Locate the connection point where the hose meets the main body or wand. For click-connect models, press and hold the large, circular release button while pulling the hose straight out. For push-and-twist models, grip the connector firmly and twist it counter-clockwise while pulling. Always support the vacuum body with your other hand to avoid putting stress on the plastic.
Can I use my Shark hose with other brand attachments?
Generally, no. Shark’s click-connect system is proprietary. Attachments from Dyson, Bissell, or other brands will not fit or lock securely. Using non-Shark tools can damage your hose connector. Always use genuine Shark attachments or third-party tools specifically designed for Shark’s click-connect system.
Why does my hose feel hot after use?
A hose becoming warm is normal during extended, heavy-duty use as air is being rapidly pulled through it. However, if it becomes excessively hot to the touch, it could indicate a severe clog restricting airflow, causing the vacuum motor to work overtime. Turn off the vacuum immediately, disconnect the hose, and thoroughly check for and remove any blockages.
What’s the best way to store the hose on my Shark?
The ideal method is to loosely coil the hose in a large circle and secure it with a Velcro cable tie or the dedicated hose clip/hook on the back of your Shark vacuum. Avoid kinking or sharply bending it. Never hang it by the plastic connector, as this can warp the plastic and break the locking tabs over time.
My hose has a small crack. Can I repair it?
Small cracks or pinholes in the hose wall cannot be reliably repaired with tape or glue and will cause permanent suction loss. The hose must be replaced. Contact Shark Customer Support or check their official parts website to order the correct replacement hose for your specific model number.
Can I use the hose without any attachment for general cleaning?
Technically yes, but it’s not recommended. Using the bare hose end significantly reduces cleaning efficiency as you lose the designed airflow path and seal of an attachment. More importantly, you risk sucking up small items or damaging the hose end. Always use at least the crevice tool or another attachment to control suction and protect your vacuum and surfaces.