Maintaining a clean filter is the single most important act of care for your Shark cordless handheld vacuum. A clogged filter drastically reduces suction power, strains the motor, and can harbor allergens. This guide provides a clear, safe, and thorough process for removing, cleaning, drying, and reinstalling your vacuum’s filter to restore optimal performance and ensure a healthier home.
Key Takeaways
- Clean Regularly: Aim to clean your Shark cordless handheld filter after every 5-7 uses or whenever you notice a drop in suction.
- Use the Right Tools: You typically only need a soft brush (like a clean paintbrush or toothbrush) and cool water. Avoid soap, detergents, or harsh chemicals.
- Wash Gently: If washing, use lukewarm water and gently agitate the filter media. Never wring, twist, or scrub aggressively, as this damages the delicate pleats.
- Dry Completely: Air-dry the filter for at least 24-48 hours in a warm, well-ventilated area, away from direct heat or sunlight. Never use a hair dryer or oven.
- Reinstall Correctly: Ensure the filter is 100% dry and properly seated in its housing before use. A damp filter will damage the motor.
- Know When to Replace: Filters last 6-12 months with regular cleaning. Replace if you see tears, permanent discoloration, or if performance doesn’t improve after cleaning.
- Preventative Care: Empty the dust cup after every use and avoid vacuuming large wet spills or fine construction dust to reduce filter load.
📑 Table of Contents
- Why Cleaning Your Filter is Non-Negotiable for Peak Performance
- Understanding Your Shark Cordless Handheld Filter: Types and Locations
- Essential Tools and Safety First: Your Prep Checklist
- The Step-by-Step Cleaning Process: From Removal to Rinse
- The Critical Drying Phase: Patience is a (Vacuum) Virtue
- Reassembly, Testing, and Proactive Maintenance Tips
- When Cleaning Isn’t Enough: Recognizing Replacement Time
- Conclusion: A Small Chore for Lasting Power and Clean Air
Why Cleaning Your Filter is Non-Negotiable for Peak Performance
Imagine trying to breathe through a thick, clogged scarf. That’s exactly what your Shark cordless handheld vacuum experiences when its filter is dirty. The filter is the vacuum’s lungs. Its job is to trap fine dust, allergens, and debris, allowing clean air to pass back into your room while protecting the sensitive motor from particulate damage. When this filter becomes saturated, airflow grinds to a halt. You’ll immediately notice a significant drop in suction power—your vacuum might feel like it’s just pushing dirt around instead of picking it up. But the problems run deeper than poor cleaning results.
A constantly clogged filter forces the motor to work overtime, generating excess heat and accelerating wear and tear. This can lead to premature motor failure, which is an expensive repair. Furthermore, a dirty filter becomes a breeding ground for bacteria and mold spores, especially if it traps any moisture. Every time you vacuum, you risk recirculating these allergens and microbes back into your home’s air, directly contradicting the health benefits of using a vacuum in the first place. For allergy sufferers, this is a critical issue. Therefore, learning how to properly clean the filter on your Shark cordless handheld isn’t just a maintenance chore—it’s a fundamental practice for preserving your investment, ensuring effective cleaning, and maintaining a sanitary living environment. It’s the difference between a tool that lasts for years and one that fails prematurely.
Understanding Your Shark Cordless Handheld Filter: Types and Locations
Before you start, it’s helpful to know exactly what you’re dealing with. Shark cordless handheld vacuums, like the popular W series (WV, etc.), typically use one or two types of filters. Most models feature a primary, washable, foam pre-motor filter. This is the workhorse filter that captures the bulk of fine dust and debris before the air reaches the motor. It’s usually located inside the dust cup assembly or in a dedicated filter compartment accessible by opening a latch or twisting a cover. Some models also include a secondary, non-washable post-motor HEPA-style filter that traps the tiniest particles. This guide focuses on the main washable foam filter, as it’s the one that requires regular cleaning.
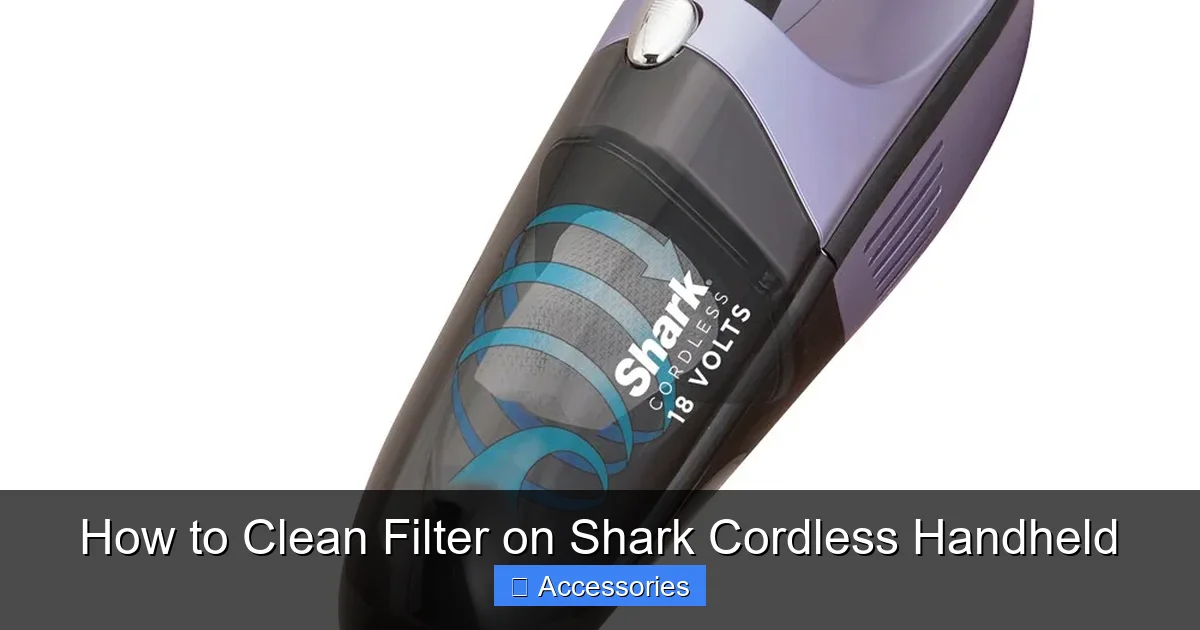
Visual guide about How to Clean Filter on Shark Cordless Handheld
Image source: mobileimages.lowes.com
Identifying Your Filter
To find it, first, ensure the vacuum is turned off and unplugged from its charging dock. Remove the dust cup by pressing the release button. Look inside the air pathway. You’ll typically see a rectangular or oval piece of gray or white foam, often pleated like an accordion, sitting in a plastic frame or holder. It might be secured with a clip or simply press-fit into place. Consult your specific model’s manual for the exact location and part number, but the process is remarkably similar across the Shark cordless lineup. Never attempt to clean a filter that feels paper-thin or is labeled as “non-washable” or “replace only.”
Essential Tools and Safety First: Your Prep Checklist
Cleaning your Shark filter is a simple process, but preparation ensures it’s done right without causing damage. Gather these items before you begin:
- Your Shark Cordless Handheld Vacuum: Obviously, but make sure it’s powered off and completely disconnected from any power source.
- A Soft-Bristled Brush: A clean, dry paintbrush, a dedicated filter cleaning brush, or even a soft toothbrush works perfectly. This is your primary tool for dislodging dry debris.
- A Sink or Large Bowl: For rinsing if a water wash is needed.
- Cool or Lukewarm Water: Never use hot water, as it can set stains and potentially damage the foam’s structure.
- A Clean, Lint-Free Towel or Microfiber Cloth: For initial drying.
- A Well-Ventilated, Warm Drying Area: This is crucial. Think a countertop away from direct sunlight, a drying rack, or a clean corner of a laundry room.
Safety Note: Always perform this maintenance on a clean, dry vacuum. If you’ve just vacuumed up something damp or wet, allow the entire unit, especially the dust cup area, to dry completely before touching the filter. Never insert any objects into the vacuum’s air intake or motor vents. And the golden rule: the filter must be 100% bone-dry before it ever goes back into the vacuum. A damp filter in an electric motor is a direct path to a short circuit and permanent damage.
The Step-by-Step Cleaning Process: From Removal to Rinse
Now, let’s get hands-on. Follow these steps meticulously for a thorough clean that won’t harm your filter.
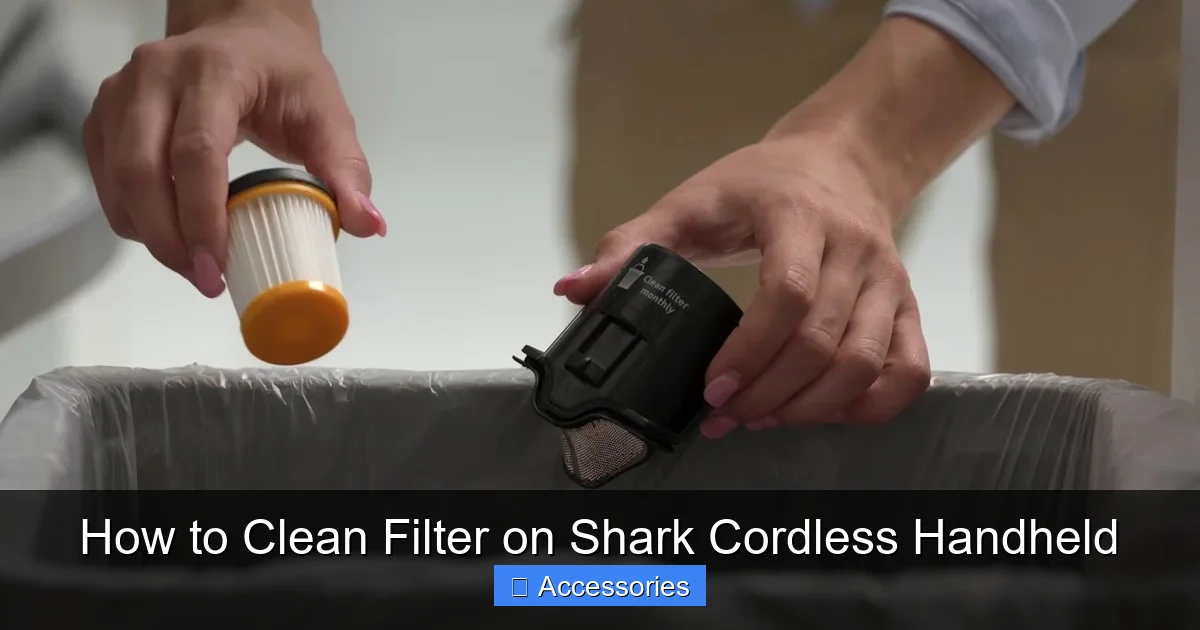
Visual guide about How to Clean Filter on Shark Cordless Handheld
Image source: bestcleanertools.com
Step 1: Access and Remove the Filter
Start by detaching the dust cup from the main body of the vacuum. Press the release button and pull the cup away. Open the dust cup lid by pressing its release tab. Inside, you’ll see the filter assembly. Depending on your model, you may need to twist, unclip, or gently pull the filter frame out of its housing. Handle it by the plastic frame only—avoid touching the foam media with your fingers, as skin oils can attract more dust. Place the filter on a clean surface.
Step 2: The Dry Tap-Out Method (First Line of Defense)
Before even considering water, take the filter outside or over a trash can. Firmly but gently tap the filter frame against the side of the trash can or a solid surface. The goal is to dislodge the bulk of the dry, loose dust and debris from between the pleats. You should see a small cloud of dust. This step alone can restore a significant amount of airflow if the filter is only moderately dirty. After tapping, use your soft-bristled brush. Gently brush along the pleats in the direction of the folds, sweeping dust out. Do not scrub back and forth aggressively. Brush both sides of the filter media.
Step 3: Assessing the Need for a Water Wash
After a thorough tap and brush, inspect the filter. If it still looks visibly gray, dingy, or the pleats are caked with fine, compacted dust that won’t budge, it’s time for a water wash. Foam filters are designed to be washable, but this should not be done after every single use. Over-washing can break down the foam over time. Reserve water washes for when the dry method proves insufficient, typically every 3-5 cleanings depending on your usage and home environment (pet owners and those with allergies will need to wash more often).
Step 4: The Gentle Water Wash
Fill your sink or bowl with cool or lukewarm water. Submerge the filter media (foam part) only. Gently swirl and agitate it with your hands. Let the water do the work. You’ll see dirty water swirl around. For stubborn grime, you can very gently rub a small amount of the foam against itself. Do not use any soap, dish detergent, or cleaning solutions. These can leave a residue that’s difficult to rinse out and can degrade the foam, reducing its ability to trap fine particles. The porous nature of the foam holds onto residues tenaciously. Plain water is perfectly effective at removing the majority of embedded dust when combined with gentle agitation. Drain the dirty water and refill with clean water. Repeat the swishing process until the water runs clear. This may take 2-3 rinses.
The Critical Drying Phase: Patience is a (Vacuum) Virtue
This is the most important—and most often rushed—step in the entire process. Improper drying is the #1 cause of filter-related motor damage. Water must be completely expelled from the depths of the pleated foam.
Visual guide about How to Clean Filter on Shark Cordless Handheld
Image source: realsimple.com
Initial Water Removal
Gently squeeze (do not wring!) the filter frame to press out excess water. You can also press the foam between your palms lightly. Then, lay the filter on your clean, lint-free towel. Fold the towel over and press down firmly to absorb as much surface moisture as possible.
Air-Drying is the Only Safe Method
Place the filter in your designated warm, dry, and well-ventilated area. Position it so air can circulate around all sides. If possible, stand it on its edge or prop it up to allow water to drain from the pleats. Do not lay it flat on a surface, as the bottom will stay damp. Never, under any circumstances, use a hair dryer, heat gun, oven, radiator, or direct sunlight to speed up drying. Intense heat can melt or warp the foam plastic, permanently ruining the filter’s structure and effectiveness. ambient room temperature with good airflow is ideal. Plan for a minimum of 24 hours of drying time. In humid climates, extend this to 48 hours. To be absolutely certain, feel the very center of the thickest pleat. It should feel completely dry, with no cool, damp sensation. When in doubt, wait longer.
Reassembly, Testing, and Proactive Maintenance Tips
Once you’re confident the filter is bone-dry, it’s time to put everything back together.
Correct Reinstallation
Take your dry filter and carefully place it back into its plastic frame or housing. Ensure it sits flush and is properly oriented—there’s often only one correct way it fits. Snap or twist any locking mechanisms back into place securely. Reattach the dust cup lid and then click the full dust cup assembly back onto the vacuum body until you hear it lock. A poorly seated filter will allow unfiltered air to bypass it, rendering it useless and potentially letting dust into the motor.
Test Run and Performance Check
Before your next full cleaning session, do a quick test. Turn the vacuum on for 10-15 seconds in a well-ventilated area. Listen for normal motor sounds—no unusual whining or straining. Feel the exhaust air; it should be steady and not weak. Then, try picking up some light debris on a hard floor. You should immediately notice restored suction power compared to before the cleaning. If suction is still weak, double-check that the filter was completely dry and installed correctly. Also, ensure the dust cup itself is completely empty and the pre-motor filters (if any) in the exhaust path are also clean.
Building a Sustainable Maintenance Routine
To make filter care effortless, integrate it into your vacuum’s lifecycle. After every 3-5 uses, take 30 seconds to remove the dust cup, tap out the filter, and give it a quick brush. This prevents deep, compacted buildup. Schedule a full water wash (with the long drying time) for once a month or as needed. Keep a simple log or set a calendar reminder. Also, always empty the dust cup after every single use—never let it run full. This reduces the workload on the filter. Finally, store your Shark cordless handheld on its charging dock in a cool, dry place. Avoid garages or sheds where temperature and humidity extremes can degrade the filter foam over time.
When Cleaning Isn’t Enough: Recognizing Replacement Time
Filters are consumable parts. Even with the most diligent care, the foam media will eventually break down. Here are the clear signs it’s time for a new filter, not another clean:
- Visible Tears or Holes: Inspect the foam closely under a light. Any rips, punctures, or areas where the foam is separating from the frame mean it’s no longer sealing properly.
- Permanent Staining and Odor: If the filter remains yellowish or grayish even after a thorough wash, or if it holds a persistent musty or sour smell after drying, the pores are permanently clogged with embedded oils and fine dust.
- No Improvement After Cleaning: You’ve followed every step—tapped, brushed, washed, dried for 48 hours—and suction is still weak. The filter media has likely lost its elasticity and porosity.
- Age: As a rule of thumb, with regular cleaning, a Shark foam filter will last 6-12 months. If you’ve had yours for over a year, it’s likely due.
Replacement filters are model-specific. Always search for your exact Shark cordless handheld model number (found on the back or underside) to find the correct OEM (Original Equipment Manufacturer) or a high-quality compatible filter. Investing in a genuine Shark filter ensures perfect fit and material quality that matches the original specifications.
Conclusion: A Small Chore for Lasting Power and Clean Air
Cleaning the filter on your Shark cordless handheld vacuum is not a complicated task, but it is a vital one. It sits at the intersection of machine performance, longevity, and indoor air quality. By taking just a few minutes every few weeks to perform the simple steps outlined—a dry tap-out, an occasional gentle water wash, and a patient, thorough air-dry—you protect your vacuum’s motor from strain, ensure it delivers the powerful, effective cleaning you expect, and prevent the recirculation of trapped allergens. Think of it as a tiny investment of time that pays massive dividends in a reliably strong suction, a longer-lasting appliance, and a healthier home environment. Make filter maintenance a non-negotiable part of your cleaning routine, and your Shark cordless handheld will continue to be a trusted, high-performing tool for years to come.
Frequently Asked Questions
How often should I clean the filter on my Shark cordless handheld?
You should perform a quick dry tap-out and brush after every 3-5 uses. For a full water wash, do this every 1-2 months or whenever you notice a significant drop in suction that a dry cleaning doesn’t fix. Homes with pets, allergies, or high dust levels may require more frequent washing.
Can I use soap or detergent to wash the filter?
No, you should never use soap, dish detergent, or any cleaning solutions. These can leave a sticky residue inside the foam’s pores that is nearly impossible to rinse out completely. This residue will attract more dust and degrade the filter material. Cool or lukewarm water alone is perfectly sufficient and safe for washing.
What happens if I reinstall the filter while it’s still damp?
This is extremely dangerous. A damp filter placed in the vacuum will cause moisture to be drawn into the motor. This can cause an immediate short circuit, leading to motor failure and potentially creating a fire hazard. It can also promote mold growth inside the vacuum. Always ensure the filter is 100% completely dry to the touch, especially in the center of the pleats, before reinstalling.
My suction is still weak after cleaning the filter. Why?
First, confirm the filter was 100% dry and installed correctly. Other culprits could be a full dust cup (empty it!), a clogged pre-motor filter if your model has one, or a blockage in the hose or nozzle. Check for obstructions. If all else is clear and the filter is clean and dry, the filter itself may be permanently damaged and need replacement.
Can I run my Shark handheld without the filter?
You should never operate your vacuum without the filter in place. The filter is a critical safety component that protects the motor from dust and debris ingestion. Running it filter-less will almost certainly cause catastrophic motor damage very quickly and will also blow all the dust and allergens you just vacuumed right back into your air.
How do I know when it’s time to replace the filter instead of cleaning it?
Replace the filter if you see any physical tears, holes, or areas where the foam is separating from the frame. Also replace it if it remains discolored, smelly, or stiff after a thorough wash and dry, or if it’s over 12 months old despite regular cleaning. A new filter will restore lost performance that cleaning cannot.