Shark Robot Bumper Error 6 is a common sensor issue indicating your robot vacuum’s front bumper is obstructed, misaligned, or faulty. This comprehensive guide walks you through immediate troubleshooting, deep-cleaning techniques, and advanced resets to resolve the error yourself. You’ll learn exactly why it happens, how to perform maintenance to prevent it, and when it’s time to seek professional help or consider a replacement, saving you time and money.
You’re standing in your living room, coffee in hand, ready to enjoy a clean floor thanks to your trusty Shark robot vacuum. You tap the “Clean” button on the app, and instead of the familiar whirring and zipping sound, you hear a sad little beep. You look at the app or the robot’s display, and there it is, mocking you: Bumper Error 6. Your heart sinks. What does it mean? Is it broken? Do you need to call a repair person? Take a deep breath and put the phone down. This is one of the most common error codes for Shark IQ and AI series robots, and in the vast majority of cases, you can fix it yourself in under ten minutes with items you already have at home. This article is your complete, friend-to-friend guide to understanding, troubleshooting, and permanently solving Shark Robot Bumper Error 6.
We’re going to demystify this error code completely. You’ll learn exactly what that bumper does, why it gets confused, and walk through a systematic diagnostic process from the simplest 60-second fix to more involved maintenance. We’ll talk about the parts inside that bumper, how to clean them properly, and how to recognize when the problem is beyond a clog and actually requires a part replacement. By the end, you’ll not only have your robot back in action but also possess the knowledge to keep it running smoothly for years. Let’s get that little guy back on the floor where he belongs.
Key Takeaways
- Error 6 means the bumper sensor is blocked or malfunctioning: The Shark robot’s safety bumper has a sensor that triggers when pressed. Error 6 signifies this sensor is stuck “on,” often due to physical obstruction or internal damage.
- Most fixes are simple and DIY-friendly: Over 80% of Bumper Error 6 cases are resolved by thoroughly cleaning the bumper mechanism and checking for obstructions—no technical skills required.
- Debris is the #1 culprit: Hair, string, carpet fibers, and dust bunnies routinely wrap around the bumper wheels and jam the sensor switch inside the bumper assembly.
- Physical misalignment or damage is the second major cause: A hard impact can bend the bumper or its internal spring mechanism, preventing it from returning to its neutral position.
- Preventive maintenance is key: A quick 2-minute bumper wipe-down during weekly filter cleaning dramatically reduces the chance of this error recurring.
- Software glitches can mimic hardware errors: A full power cycle or firmware update can resolve a false-positive Error 6 if the hardware is clean and moves freely.
- Warranty coverage often applies: If your Shark robot is under warranty and the error persists after cleaning, the bumper assembly may need replacement—contact Shark Support with your model and serial number.
📑 Table of Contents
- Understanding the Shark Robot Bumper System and Error 6
- Immediate Troubleshooting: The 5-Minute Fix for Bumper Error 6
- A Deep Dive into the Root Causes of Bumper Error 6
- Advanced Troubleshooting and Repair Techniques
- Preventive Maintenance: Keeping Bumper Error 6 Away for Good
- When to Contact Shark Support or Consider Replacement
- Conclusion: You Are Now a Shark Bumper Error 6 Expert
Understanding the Shark Robot Bumper System and Error 6
Before we start unscrewing things, it’s crucial to understand what we’re dealing with. That big, rubbery bumper that runs around the front edge of your Shark robot isn’t just for show. It’s a critical safety and navigation component. Inside that plastic housing, there’s a simple but effective mechanical switch—often a spring-loaded plunger or a micro-switch. When the robot bumps into an obstacle like a wall, chair leg, or couch base, the bumper compresses inward. This compression triggers the switch, which tells the robot’s brain, “Hey, I hit something! Back up and turn.” It’s a fundamental part of how your robot navigates without getting stuck.
So, what is “Bumper Error 6” telling us? Shark’s error code system is designed to be specific. Error 6 is not a generic “something’s wrong” message. It is a direct signal from the bumper sensor circuit that the switch is in a constant “triggered” state. The robot’s computer is saying, “The bumper is permanently depressed, or the sensor circuit is shorted.” The robot will stop, beep, and refuse to run because it thinks it’s perpetually jammed against a wall. This is a safety feature—imagine if it tried to clean while thinking it was constantly crashing; it would just shove itself into corners endlessly.
The causes for this constant “on” signal fall into three main categories, which we will explore in depth:
- Physical Obstruction: The most frequent cause. Debris like hair, string, carpet fibers, or even a small toy piece gets wrapped around the bumper’s internal wheels or axle, physically jamming the bumper so it cannot spring back to its released position.
- Mechanical Failure/Misalignment: The bumper mechanism itself is damaged. The internal spring that returns the bumper might be broken or weakened. The bumper housing could be cracked or bent from a hard impact, preventing smooth movement. The pivot points might be seized with grime.
- Electrical/Sensor Fault: Less common, but possible. The micro-switch itself has failed and is stuck closed. The wiring from the bumper assembly to the mainboard could be pinched, frayed, or have a loose connection. A software glitch could also misinterpret the sensor signal.
Our troubleshooting path will systematically rule out the first, most likely cause (obstruction) before moving to the second (mechanical) and finally the third (electrical).
Immediate Troubleshooting: The 5-Minute Fix for Bumper Error 6
Before you panic or start disassembling your robot, always start with the fastest, easiest, and highest-success-rate steps. We call this the “power cycle and physical inspection” routine. It takes less than five minutes and resolves the issue in most situations.
Visual guide about Shark Robot Bumper Error 6
Image source: i.ytimg.com
Step 1: The Full Power Cycle
This isn’t just turning it off and on. We need a true reset. First, place the robot on its charging dock. Press and hold the Power button for 10-15 seconds until all lights turn off. You should hear a shutdown chime. Now, unplug the charging base from the wall outlet. Leave everything disconnected for a full 60 seconds. This clears the volatile memory and resets the sensor monitoring circuit. Plug the base back in, place the robot on it, and let it charge for a minute. Then, try to start a cleaning cycle. Sometimes, a transient software glitch causes the error, and this hard reset clears it. If the error returns immediately, move to Step 2.
Step 2: The Tilt-and-Shake Inspection
This is the most critical visual and tactile check. With the robot powered OFF and unplugged from the dock, pick it up. Gently push in on the front bumper with your thumb. You should feel a distinct, springy “click” as the internal switch engages and then a smooth return when you release. Now, tilt the robot on its side or back and give it a gentle shake. Listen closely. Do you hear a tiny rattle? That rattle is often a piece of debris—a hair tangle, a small pebble, or a plastic fragment—loose inside the bumper channel. If you hear a rattle, that’s your culprit.
Step 3: Targeted Debris Removal
Now, let’s get that debris out. You’ll need a few simple tools:
- A bright flashlight
- A pair of tweezers or needle-nose pliers
- A soft-bristled brush (an old toothbrush works perfectly)
- A can of compressed air (optional but helpful)
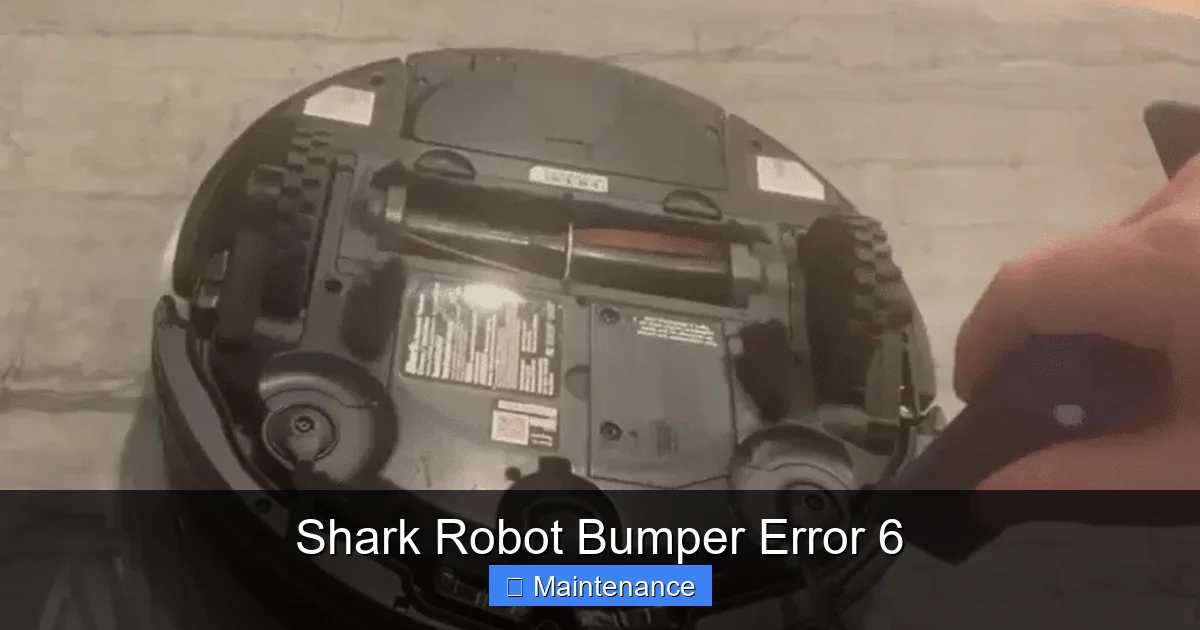
Inspect the entire perimeter of the bumper. Look for obvious hair or string wrapped around the bottom edge or caught between the bumper and the robot’s main body. Use the tweezers to gently pull it out. Next, peer into the gap where the bumper meets the robot’s shell. Shine your flashlight in there. You’re looking for the small wheels that the bumper slides on (usually two small, black rubber or plastic wheels on a metal axle). These wheels and the axle are the prime collection points for fibers. Use the tweezers and brush to meticulously clean around these wheels. Scrape away any built-up gunk. The compressed air can be used to blow out debris from the internal channel—just use short bursts and hold the can upright.
After cleaning, manually press and release the bumper several times. It should move smoothly from side to side with no gritty feeling or binding. Listen for the click. If it feels stiff or doesn’t spring back fully, there’s still debris inside or a mechanical issue.
A Deep Dive into the Root Causes of Bumper Error 6
If the quick fix didn’t work, it’s time for a deeper investigation. Understanding the specific failure mode will guide you to the correct, more permanent solution. Let’s break down the root causes in detail.
Visual guide about Shark Robot Bumper Error 6
Image source: cleanersadvisor.com
The Hair and Fiber Trap: How It Happens
Shark robots, especially the self-emptying models, are powerful. That suction creates a mini-cyclone of air around the front of the robot, pulling in not just dust but also long hairs, carpet fibers, and string. These materials don’t always get sucked into the dustbin. They get caught on the leading edge of the robot, worked their way into the bumper’s guide rails, and begin to wrap around the axle and wheels. Over time, this creates a thick, felt-like mat of debris. This mat physically prevents the bumper from compressing and, more importantly, from returning to its neutral position. The sensor stays “on,” and Error 6 is born. Homes with pets or long-haired individuals are especially prone to this. The debris can also migrate inside the bumper housing itself, jamming the internal spring or switch plunger.
Mechanical Wear and Impact Damage
Robot vacuums are tough, but they take a beating. They bump into furniture, run over thresholds, and can even tumble down stairs (though cliff sensors usually prevent that). A significant impact can have several effects:
- Bent Bumper Housing: The plastic bumper can crack or, more commonly, get bent out of alignment. This misalignment causes it to rub against the robot’s main body, creating friction that stops it from moving freely.
- Broken or Weakened Spring: Inside the bumper, there’s a small metal spring that provides the return force. A hard knock can deform or break this spring. Without tension, the bumper may not snap back, or it may return very slowly, tricking the sensor into thinking it’s still pressed.
- Seized Pivot Points: The bumper slides on small plastic guides or wheels. Years of dust, grime, and dried carpet cleaner can gum up these pivot points, turning a smooth motion into a stiff, jerky one. The sensor might not be triggered by the initial press, but it also doesn’t get the clear “released” signal when the bumper should return.
Electrical and Sensor Failures
This is the least common but most frustrating cause because it requires part replacement. The micro-switch inside the bumper is a small, mechanical component with a finite life. After thousands of presses, the contacts can weld shut or the actuator arm can break, leaving the circuit permanently closed. Alternatively, the thin wire harness that runs from the bumper assembly, through a flexible conduit, to the mainboard can become damaged. Repeated flexing at the pivot point can cause the wires to fray and short, mimicking a constantly pressed switch. Finally, a software bug in the robot’s firmware could cause the mainboard to misread a perfectly good sensor signal, though this is rare and usually fixed by a firmware update.
Advanced Troubleshooting and Repair Techniques
You’ve cleaned obsessively. The bumper moves freely by hand. The error persists. Now we move to the next level of diagnosis. This requires a bit more courage and possibly a screwdriver.
Visual guide about Shark Robot Bumper Error 6
Image source: cleanersadvisor.com
Performing a Bumper Sensor Reset (Model Dependent)
Some Shark models, particularly the newer AI Ultra and IQ series, have a hidden reset procedure for the bumper sensor that can clear a learned “stuck” state. This is not a universal fix but worth trying. The procedure typically involves:
- Placing the robot on a flat, hard floor.
- Press and hold the Clean button on the robot (not the app) for 10 seconds until you hear a tone.
- While still holding, press the Dock button (if present) once.
- Release all buttons and wait for the robot to reboot.
This sequence can force the mainboard to re-calibrate the bumper switch input. Check your specific model’s manual or Shark’s support site for the exact sequence, as it varies.
Accessing and Inspecting the Bumper Assembly
If you’re comfortable with basic tools, a visual inspection of the bumper’s internals is the definitive diagnostic step. DISCONNECT THE ROBOT FROM POWER FIRST. You will need a Phillips head screwdriver.
- Flip the robot over. You will see screws along the bottom edge, usually holding the main plastic bottom cover.
- Remove all screws. Some may be hidden under the rubber bumper pads or the main brush roll cover. Keep screws safe.
- Gently pry off the bottom cover. You will see the drive wheels, brush roll, and battery.
- Look at the front of the robot’s chassis. You will see the bumper assembly attached, typically with 2-4 screws. It’s a long, plastic piece that curves around the front.
- Carefully disconnect any wiring harnesses attached to the bumper (they have small plastic locks—press the tab to release).
- Remove the screws and lift the bumper assembly off.
Now you have the bumper in your hands. Inspect it closely:
- The Switch: Locate the small plastic micro-switch. Press it manually with a pen tip. Does it click audibly and feel springy? Or is it stiff, dead, or does it stay depressed?
- The Spring: Is the small metal spring present, intact, and attached correctly?
- The Channel: Look inside the long plastic channel where the bumper slides. Is it packed with black, felt-like debris? Use tweezers and your brush to clean it out completely.
- The Wheels/Axle: Check the small wheels. Are they cracked? Do they spin freely? Is the axle clean?
- The Housing: Is the plastic cracked anywhere? Is the part that attaches to the robot bent?
If the switch is obviously broken or the spring is missing, you’ve found your problem. If it’s just filthy, a meticulous cleaning here will almost certainly fix it. Reassemble in reverse order, ensuring all connectors click back in place.
Checking for Firmware Updates and Internal Obstructions
Before you give up, ensure your robot’s brain is up to date. Open the Shark app, go to Settings, and check for a firmware update. Install it if available. Sometimes, updates include sensor calibration tweaks.
Lastly, consider an internal obstruction. A small object, like a Lego brick or a sock thread, could have been pushed up into the robot’s nose cone (the area right behind the bumper) and is physically stopping the bumper from fully retracting. With the bottom cover off (as in the previous step), use your flashlight to look up into the front cavity from underneath. You might see the obstruction. Use long tweezers to reach in and remove it.
Preventive Maintenance: Keeping Bumper Error 6 Away for Good
An ounce of prevention is worth a pound of cure. Integrating a few quick habits into your robot’s care routine will make Bumper Error 6 a rare annoyance, if it ever returns.
The Weekly Bumper Wipe-Down
Make this part of your ritual every time you empty the dustbin or clean the filter. Take a dry microfiber cloth and run it along the entire front edge of the robot, wiping away any accumulated dust and hair. Then, take the cloth and wipe around the seam where the bumper meets the main body. This removes the debris before it has a chance to work its way inside. For homes with pets, do this twice a week. It takes 30 seconds.
Monthly Deep Clean of the Bumper Channel
Once a month, or if you have a multi-pet household, perform the “tilt and shake” and targeted cleaning described in the immediate troubleshooting section more thoroughly. Use the toothbrush and tweezers to get into the wheel wells. This is like dental flossing for your robot—it removes the buildup that the weekly wipe misses.
Environmental Adjustments
Look at your home’s layout. Are there dark, thick area rugs with high pile that the bumper constantly sinks into? Consider using a different cleaning zone for those rugs or setting “No-Go” lines around them. Are there furniture legs with ornate carvings where hair tangles? Periodically check and clean around those specific areas. Sometimes, simple changes to the robot’s schedule (e.g., cleaning when you’re home to quickly clear up any tangled cords or socks) prevent the small incidents that lead to big errors.
Proactive Part Replacement
The bumper assembly is a wear item. If you’ve owned your Shark for 3+ years and have battled Bumper Error 6 multiple times despite cleaning, the internal spring or switch is likely fatigued. Shark sells official replacement bumper assemblies. For $25-$40, you can replace the entire unit in 15 minutes with a screwdriver. It’s a far better investment than a service call. Consider it an upgrade to extend your robot’s life.
When to Contact Shark Support or Consider Replacement
You have followed every step. You have cleaned until your fingers cramped. You have inspected the internal bumper and the switch appears fine, the spring is there, and the channel is spotless. The Error 6 persists. Now what?
Diagnosing a Faulty Mainboard Connection
The problem may not be the bumper itself but the wire that connects it to the robot’s brain. That wire is a flexible ribbon cable that runs through a tight bend. It can develop a hairline crack inside its insulation. Visually inspecting it with the robot open is difficult. The telltale sign is if the error occurs only when the bumper is moved to a specific extreme position (e.g., only when turned all the way left). This indicates a broken wire that only loses contact at certain angles. Diagnosing and repairing this requires soldering skills and is generally not recommended for most users.
Warranty and Official Support Channels
If your robot is still under Shark’s limited warranty (typically 1-3 years depending on model and region), this is your best path. Contact Shark Customer Support. Have your model number (found on a label on the underside) and serial number ready. Explain that you have performed all recommended troubleshooting for Bumper Error 6, including a full internal inspection and cleaning of the bumper assembly, and the error persists. They will often, after some back-and-forth, authorize a warranty replacement of the bumper assembly or, in rare cases, the entire mainboard if the port is damaged. Be polite, patient, and detailed in your description of what you’ve already tried. This saves everyone time.
The Cost-Benefit Analysis: Repair vs. Replace
If your robot is out of warranty, you face a decision. A new bumper assembly costs $25-$40 in parts. If you’re handy, it’s a 15-minute DIY job. If you need to pay for labor, the cost could be $80-$120. For an older robot (4+ years), ask yourself: is it worth $100+ to fix a robot that may have other aging components (deteriorating battery, worn wheels, clogged sensors)? The total cost of ownership starts to approach the price of a new, entry-level Shark model. Sometimes, a “Bumper Error 6” on an old robot is the final symptom in a chain of wear, signaling it’s time for an upgrade. For a newer robot (1-2 years old), a $40 part is a no-brainer to extend its life.
Conclusion: You Are Now a Shark Bumper Error 6 Expert
That dreaded “Bumper Error 6” message no longer has to be a source of frustration. It’s simply a communication from your robot’s safety system saying, “My front feels stuck!” Armed with this guide, you know that 90% of the time, the solution is a thorough cleaning of the bumper’s wheels and internal channel—a quick, satisfying task you can do while the robot charges. You understand the mechanics behind the error, the three main causes (debris, mechanical damage, electrical fault), and have a clear, step-by-step path to diagnose and fix each one.
Remember the golden rule: Bumper health is floor health. A clean, freely moving bumper means your Shark can navigate efficiently, bounce off walls correctly, and clean right up to the edges without getting confused. Incorporate that 30-second weekly wipe-down into your routine. Listen for the happy “click” when you test it. By being proactive, you’ll transform your robot from a temperamental appliance into a reliable, autonomous cleaning partner. So next time Error 6 pops up, don’t sigh. Smile, grab your flashlight and tweezers, and get to work. You’ve got this. Your clean floors—and your unbreakable spirit—thank you.
Frequently Asked Questions
What is the main cause of Shark Robot Bumper Error 6?
The primary cause is debris buildup—hair, string, and carpet fibers—wrapping around the bumper’s internal wheels and axle, physically jamming it so it cannot return to its neutral position. This makes the sensor think the bumper is permanently pressed.
Is Bumper Error 6 covered under my Shark robot’s warranty?
It can be, if the bumper assembly itself is faulty and your robot is still within the warranty period. However, you must first complete all basic troubleshooting (power cycling, thorough cleaning) and be prepared to detail this to Shark Support. Damage from impacts or neglect may not be covered.
How do I manually test if my bumper is jammed?
With the robot powered OFF, gently push in on the front bumper with your thumb. You should feel and hear a distinct click, and it should spring back smoothly and quickly when released. If it feels stiff, gritty, or returns slowly, it is obstructed or damaged.
Can I use water or cleaning sprays inside the bumper?
No. Never spray liquid directly into any openings. Use a dry or slightly damp microfiber cloth on the exterior and dry tools like tweezers and a toothbrush for internal debris. Moisture can damage the electronic switch and circuit board inside.
How often should I clean my robot’s bumper to prevent Error 6?
For best results, do a quick exterior wipe-down weekly during your filter cleaning routine. Perform a more thorough internal cleaning of the wheels and channel monthly, or immediately if you have pets or notice the bumper feeling stiff.
Does a firmware update fix Bumper Error 6?
It can, but only if the root cause is a software glitch misinterpreting a good sensor signal. This is rare. Always perform physical cleaning and reset steps first. If the hardware is clean and moves freely, then checking for a firmware update is a good final step before assuming a part is faulty.