Is your Shark Mini Vacuum not holding a charge or refusing to power up? This is a common but frustrating issue, often caused by simple problems like dirty charging contacts, a worn-out battery, or a faulty charger. Before you panic or spend money on replacements, this guide walks you through a systematic, step-by-step troubleshooting process. We cover everything from basic cleaning and reset techniques to diagnosing battery failure and knowing when it’s time to contact Shark support. Most charging problems can be resolved at home with a few minutes of careful inspection and cleaning, saving you time and money.
You go to grab your trusty Shark Mini Vacuum for a quick clean-up, press the power button, and… nothing. The blue light that usually beckons you is dark. You plug it into the wall charger, but the indicator light stays off or blinks an ominous red. Your heart sinks. A Shark Mini Vacuum not charging feels like a sudden betrayal of your clean-home hopes. But before you resign yourself to a costly replacement or a life of bending over with a dustpan, take a deep breath. This frustrating issue is one of the most common reasons owners seek help, and the good news is that the solution is often surprisingly simple, inexpensive, and something you can diagnose yourself at home.
Your Shark Mini Vacuum, whether it’s the popular IZ系列的 or another model in the compact lineup, is a marvel of modern cordless cleaning convenience. Its entire functionality hinges on one critical component: a healthy battery that charges reliably. When that chain breaks—from the wall outlet, through the charger, into the dock or direct port, and finally into the battery itself—the vacuum becomes a very expensive paperweight. The key to fixing a Shark Mini Vacuum not charging problem is to methodically check each link in that chain, starting with the simplest and most likely fixes. This guide will be your step-by-step companion, translating technical jargon into plain English and giving you the confidence to become your vacuum’s own repair technician.
Key Takeaways
- Cleanliness is Key: The #1 cause of charging failure is dirty or obstructed charging contacts on both the vacuum and its dock. Regular cleaning with a dry cloth is essential maintenance.
- Test Your Charger First: A faulty or damaged charger is a frequent culprit. Always test the charger with another compatible Shark vacuum or use a multimeter to confirm it’s outputting power.
- Batteries Have a Lifespan: Lithium-ion batteries degrade over time (2-3 years typical). If your vacuum is older and won’t hold a charge, a battery replacement is likely needed.
- Reset Can Revive: Performing a full reset by removing the battery for 30+ seconds can clear error codes and resolve minor electronic glitches preventing charging.
- Dock Alignment Matters: Ensure the vacuum sits perfectly flush in the charging dock. Even a slight tilt can break the connection. Check the dock’s power source and cable.
- Warranty First: Before buying any parts, check your vacuum’s warranty status. Many charging issues are covered for the first year or two, saving you significant cost.
- Safety First: Never attempt to charge a vacuum with a visibly damaged battery, charger, or charging port. Discontinue use to prevent fire or electric shock risks.
📑 Table of Contents
- Understanding the Charging System: How Your Shark Mini Vacuum “Drinks” Power
- Step-by-Step Troubleshooting: From Quick Fixes to In-Depth Diagnosis
- The Battery: The Most Common Point of Failure
- Charging Port and Internal Circuit Issues
- When to Contact Shark Support and Warranty Claims
- Preventative Maintenance: Keeping Your Shark Mini Charging for Years
- Conclusion: Powering Through the Problem
Understanding the Charging System: How Your Shark Mini Vacuum “Drinks” Power
Before we start poking and prodding, it helps to visualize the journey electricity takes to revive your vacuum. Think of it as a tiny, cordless ecosystem. The power originates from your wall outlet. It travels into the official Shark power adapter (the brick-like charger). From there, it goes to either the charging dock (the stand your vacuum sits on) or directly into a charging port on the vacuum body. Metallic contact points—small, usually silver pads—on the dock and on the bottom of the vacuum must touch perfectly to create a circuit. This current then flows into the lithium-ion battery pack nestled inside the vacuum, replenishing its stored energy. An internal charging circuit and a small computer (the PCB) manage this process, preventing overcharging and communicating status via those helpful LED lights. A failure at any single point—a frayed cable, a smudge on a contact pad, a dead battery—can halt the entire process, resulting in a Shark Mini Vacuum not charging.
The Role of the Charger and Dock
The charger and dock are the most external and therefore most vulnerable parts of this system. The charger cable gets coiled, yanked, and stuffed into drawers. The dock gets kicked, vacuumed over, and accumulates dust and hair in its crevices. The first two rules of diagnosis are: 1) Use only the official Shark charger that came with your vacuum. Third-party or “universal” chargers often provide incorrect voltage or amperage, which can damage the battery or simply not work. 2) Inspect everything physically. Look for chewed cables (pets love them!), frayed insulation, bent pins on the charger plug, or debris packed into the dock’s contact slots.
Battery Basics: The Finite Power Source
It’s easy to think of the battery as a permanent, immortal power source. It’s not. Like all lithium-ion batteries, the one in your Shark Mini has a limited number of charge cycles (typically 300-500 full cycles) and a natural calendar life of about 2-3 years. Over time, its ability to hold a charge diminishes—this is normal degradation. However, a battery that goes from working fine to Shark Mini Vacuum not charging overnight is more likely suffering from a connection issue or a sudden fault, not just age. But if your vacuum is in its third year and showing other signs of weakness (like running for only 5 minutes), the battery is the prime suspect.
Step-by-Step Troubleshooting: From Quick Fixes to In-Depth Diagnosis
We will now embark on a diagnostic journey. Follow these steps in order. Do not skip ahead to buying a new battery until you’ve completed the simple, free checks first.
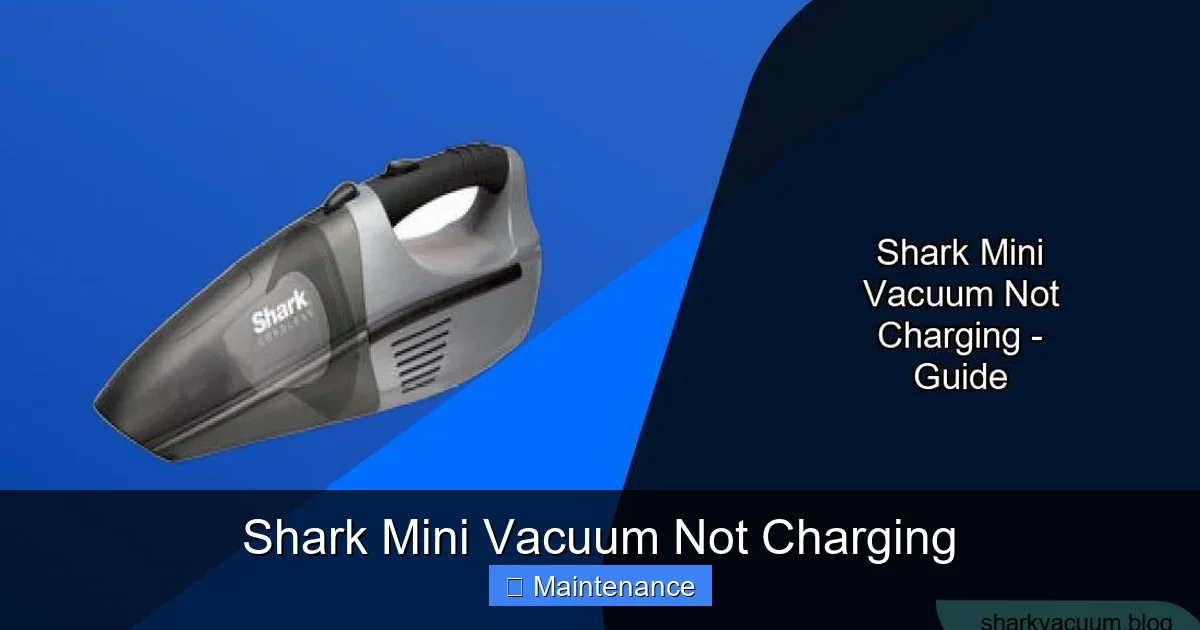
Visual guide about Shark Mini Vacuum Not Charging
Image source: sharkvacuum.blog
Step 1: The Power Source Check (The “Is It Plugged In?” Moment)
It’s the classic IT support question for a reason. Ensure the charger is firmly plugged into a working wall outlet. Test the outlet with another device, like your phone charger. If you’re using a power strip or extension cord, bypass it and plug directly into the wall. These can fail or have switched-off buttons. Also, check the connection at the charger brick itself—the cable should be secure. A loose connection here means zero power is ever leaving the wall.
Step 2: The Visual Inspection & Deep Clean
This is the most critical and effective step for a Shark Mini Vacuum not charging issue. You need to clean the charging contacts.
- For the Vacuum: Turn the vacuum over. Locate the two (or sometimes three) small metal charging pads on the bottom, near the front. Use a dry microfiber cloth, a cotton swab, or a pencil eraser to gently rub these pads. You are removing any film of dust, dirt, or oxidation that acts as an insulator. Do not use liquids or abrasive materials.
- For the Charging Dock: Unplug the dock. Look into the slots or onto the pads where the vacuum’s contacts sit. You’ll likely find a felt-like accumulation of carpet fibers, hair, and dust. Use tweezers, a dry toothbrush, or a compressed air can (short bursts) to clean these out meticulously. Ensure nothing is obstructing the metal pads inside.
- For the Charger Cable End: If your model charges via a port on the vacuum (not a dock), inspect the charger’s plug tip. Clean its metal contacts similarly with a dry cloth.
Pro Tip: After cleaning, align the vacuum carefully on the dock. It should sit perfectly flat and flush, with no wobbling. A misaligned vacuum is a disconnected vacuum.
Step 3: The Reset Ritual
Electronic glitches can happen. A tiny error in the vacuum’s internal memory might tell it “battery is full” or “battery is faulty” even when it’s not. A full power cycle reset often clears this.
- Remove the battery: On most Shark Mini models, the battery is removable. Press the release tabs (usually on the back or underside) and slide the battery pack out.
- Hold for 30 seconds: With the battery out, press and hold the power button on the vacuum for 15-30 seconds. This drains any residual charge from the capacitors, performing a hard reset.
- Reinsert and wait: Firmly click the battery back into its slot until it’s seated. Place the vacuum on the dock. Do not press the power button. Wait at least 15-30 minutes. Many Shark models have a “sleep mode” after deep discharge, and it can take a while for the charging circuit to recognize a valid connection and begin trickle-charging the battery back to a detectable level.
Step 4: Isolate the Charger
If cleaning and resetting didn’t work, we need to see if the charger is the problem. If you have another Shark vacuum with a compatible charger/battery system (same voltage and connector type), test it. Connect the suspect charger to the known-good vacuum. If that other vacuum charges, your charger is likely fine, pointing the finger at your original vacuum’s battery or internal circuitry. Conversely, if the known-good vacuum also won’t charge with the suspect charger, you’ve found your villain: a dead charger.
For the technically inclined, you can use a multimeter set to DC volts to test the charger’s output. Plug it in and touch the probes to the charger’s plug tips (positive to positive, negative to negative). It should read a voltage very close to what’s printed on the charger’s label (e.g., 18V, 20V). No reading or a very low reading means a dead charger.
The Battery: The Most Common Point of Failure
If you’ve meticulously cleaned, reset, and verified the charger is working, but your Shark Mini Vacuum is still not charging, the internal battery is the most probable culprit. Batteries are consumable items.
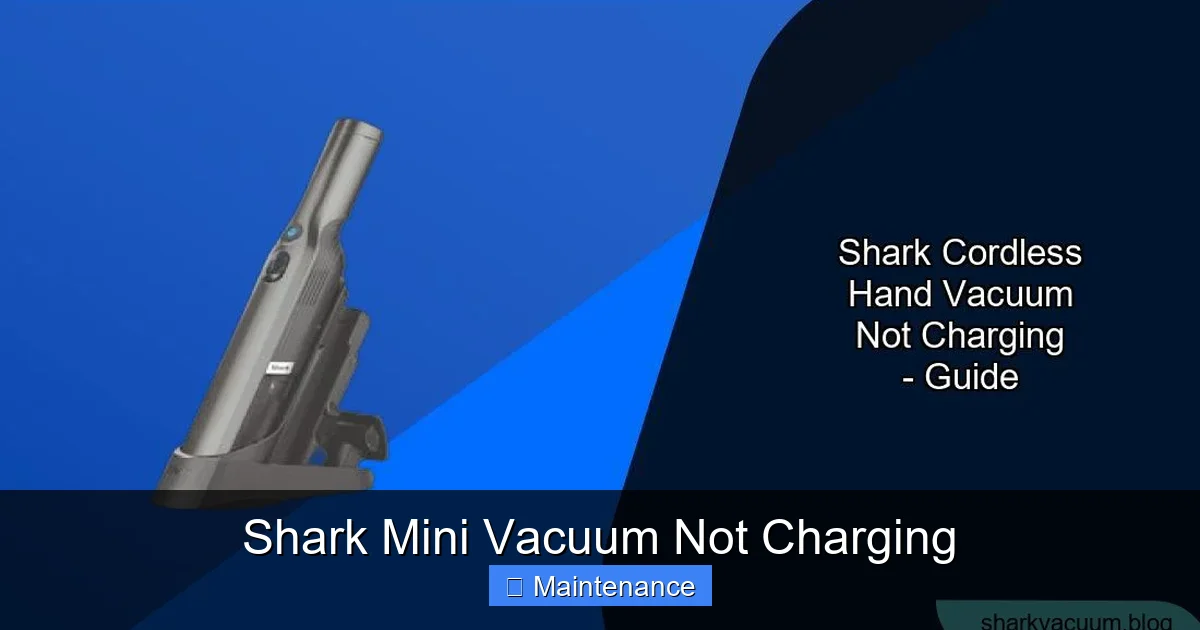
Visual guide about Shark Mini Vacuum Not Charging
Image source: sharkvacuum.blog
Symptoms of a Dead or Dying Battery
- Zero Response: No lights, no sound, nothing when placed on the dock or pressing the trigger.
- Rapid Discharge: It charges to 100% but dies in 2-3 minutes of light use.
- Swelling: STOP USING IMMEDIATELY. If the battery pack feels puffy, bulging, or the vacuum’s shell is slightly deformed, this is a serious safety hazard. Do not charge it. Dispose of it properly at an electronics recycling center.
- Extreme Heat: The battery or vacuum gets unusually hot during charging or use.
- Age: Your vacuum is over 3 years old and has been used regularly.
Replacing the Battery: A DIY Option
Shark generally designs its vacuums with user-replaceable batteries. This is good news! You can order a replacement directly from Shark (part number is on your original battery or in the manual) or from reputable third-party sellers on sites like Amazon or eBay. Crucially, ensure the replacement battery is an exact match for your specific Shark Mini model number. Installing it is usually as simple as removing the old battery (using the release tabs) and clicking the new one in. No tools are often required. After installing a new battery, perform the full reset ritual again. The new battery may need a full charge cycle to calibrate the gauge.
Charging Port and Internal Circuit Issues
What if the battery is new and the charger works, but the vacuum still won’t charge? The fault lies within the vacuum’s own electronics.
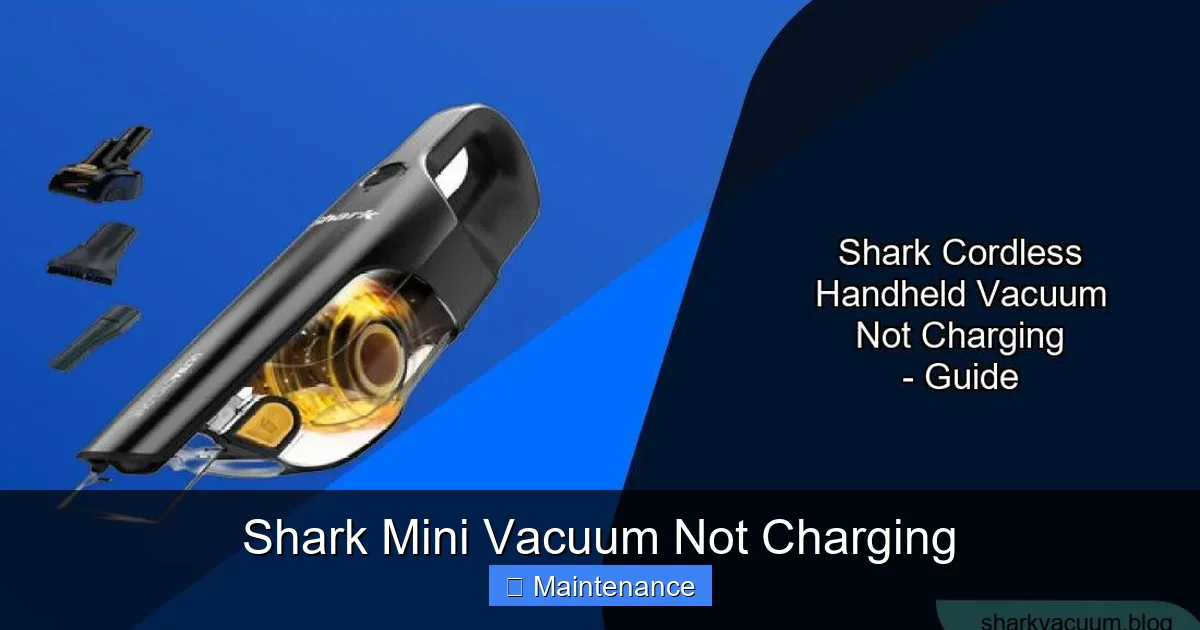
Visual guide about Shark Mini Vacuum Not Charging
Image source: sharkvacuum.blog
Damaged Charging Port (For Direct-Charge Models)
Some Shark Mini models charge via a DC port on the back or side, not a dock. This small, round port can be damaged. Check for bent or broken pins inside the port. Debris can also lodge in there. Use a wooden toothpick or plastic dental tool to gently dislodge any fluff. Do not use metal, as you could short the pins.
Faulty Internal Charging Circuit (PCB)
This is the motherboard of the vacuum. A power surge, water exposure, or general component failure can fry this tiny but vital board. Symptoms include a completely dead vacuum with a good battery and charger, or erratic LED behavior (flashing in unusual patterns). Diagnosing this definitively requires electronics skill and tools. For most users, a faulty PCB means it’s time to weigh the cost of a professional repair against the price of a new vacuum.
When to Contact Shark Support and Warranty Claims
You’ve been through the wringer: cleaned, reset, tested, maybe even replaced the battery. The Shark Mini Vacuum not charging problem persists. Now what?
Gather Your Information First
Before you call or chat, have this info ready: your exact model number (found on the back or underside label), the serial number, date of purchase, and a clear description of all troubleshooting steps you’ve already taken. This shows you’re serious and saves time. Take a video of the issue—show the vacuum on the dock with no lights, or the unlit charger.
Understanding Your Warranty
Shark typically offers a 5-year limited warranty on motors and a 1-year limited warranty on the rest of the vacuum and battery (terms vary by region and purchase channel). If your vacuum is within this window and the issue is a manufacturing defect (not user damage like a fall or liquid exposure), you may be entitled to a free repair or replacement. Be prepared to prove purchase with a receipt. Shark support may offer to send you a prepaid box to ship the vacuum for assessment.
Preventative Maintenance: Keeping Your Shark Mini Charging for Years
An ounce of prevention is worth a pound of cure. Integrate these habits into your routine to avoid future Shark Mini Vacuum not charging headaches.
Make Contact Cleaning a Weekly Ritual
Once a week, after you empty the dustbin, take 30 seconds to wipe the charging contacts on the vacuum’s underside with a dry microfiber cloth. Do the same for the dock pads. This simple habit prevents the #1 cause of failure.
Store It on the Dock, Not in a Closet
Keep your Shark Mini on its charging dock as a permanent home. This ensures it’s always ready and maintains a “trickle charge” that is optimal for lithium-ion battery health. Storing it completely discharged in a hot closet accelerates battery degradation.
Mind Your Charger Cable
Don’t wind the charger cable tightly around its brick. Use the built-in clips if it has them, or loosely coil it. Never yank the cable from the wall—pull from the plug. Keep it away from sharp edges, vacuum cleaner wheels, and curious pets.
Use It Regularly
Paradoxically, letting a lithium-ion battery sit unused and at 0% charge for months is terrible for it. Try to use your vacuum at least once every two weeks, even for a quick once-over, and let it recharge afterward. This keeps the battery chemistry active.
Conclusion: Powering Through the Problem
Dealing with a Shark Mini Vacuum not charging is a test of patience, but it’s a winnable battle for the vast majority of cases. The power is quite literally in your hands. By starting with the free, simple steps—a thorough cleaning of the contacts, a proper reset, and verifying your power source—you solve the problem 80% of the time. Understanding that the battery is a wear item helps set realistic expectations for the lifespan of your device. And knowing your warranty rights provides a safety net. Don’t rush to discard your vacuum. Become its advocate, follow this guide, and you’ll likely have that satisfying blue charging light glowing again soon. Your spotless floors are waiting.
Frequently Asked Questions
Why is my Shark Mini Vacuum not charging even after I cleaned the contacts?
If cleaning didn’t work, the issue is likely deeper. The battery may be at the end of its life and can no longer hold a charge, or the vacuum’s internal charging circuit (PCB) could be faulty. Try the full reset procedure (remove battery, hold power button) and test with a known-good charger if possible. If those fail, battery replacement is the next step for older units.
How long should a Shark Mini Vacuum battery last before it needs replacement?
With proper care and regular charging, the lithium-ion battery in your Shark Mini should last for approximately 2-3 years or 300-500 full charge cycles. Degradation is normal; you’ll notice it holding less charge over time. If the battery is swollen, leaking, or fails to charge within a year, it may be a defective unit covered under warranty.
Can I use a third-party or universal charger for my Shark Mini Vacuum?
We strongly advise against it. Shark vacuums require a specific voltage and amperage from their dedicated chargers. Using an incompatible third-party charger can damage the battery, the vacuum’s internal electronics, or simply not work at all. Always use the official Shark charger that came with your device or a certified replacement part from Shark.
What do the different charging lights mean on my Shark Mini?
Typically, a solid blue or green light indicates a full charge. A flashing or blinking light usually means charging is in progress. A solid red light often signals a fault, such as a battery temperature issue (too hot/cold) or a communication error. A completely unlit vacuum when on the dock usually means no power is reaching the unit—start with your power source and charger check.
My Shark Mini Vacuum was working fine, then suddenly stopped charging. What happened?
A sudden failure is often triggered by a minor event. A power surge from the outlet could have affected the charger. A piece of debris might have finally lodged itself perfectly between the contacts, breaking the circuit. The battery could have experienced an internal cell failure. The reset procedure (removing the battery for 30+ seconds) is designed to clear the type of electronic “memory” error that causes sudden, unexplained failures.
Is it worth repairing a Shark Mini Vacuum that won’t charge, or should I just buy a new one?
It depends on the age and model. If your vacuum is under 2 years old and under warranty, repair via Shark is your best (free) option. For a 3-4 year old vacuum, a new battery ($40-$70) is a cost-effective fix. If the internal circuit board is damaged or the vacuum is older than 5 years, the repair cost may approach the price of a new, upgraded model. Consider the repair cost versus the value and features of a new Shark Mini.