Don’t panic if your Shark robot vacuum stops working—most issues are simple fixes you can do at home. Common problems like a vacuum that won’t charge, has lost suction, or keeps getting stuck usually stem from clogs, dirty sensors, or software glitches. Regular maintenance is the #1 key to preventing breakdowns and keeping your Shark robot cleaning efficiently for years.
Key Takeaways
- Most “not working” issues are maintenance-related: Hair and debris clogs in the brush roll, wheels, or suction path are the #1 culprit behind poor performance and error codes.
- Battery problems often mimic a dead unit: A vacuum that won’t turn on or dies quickly usually needs a battery reset, proper charging contact cleaning, or eventually a battery replacement.
- Clean sensors are non-negotiable: Dirty cliff, bumper, or navigation sensors cause the robot to stop, circle, or get stuck. A weekly wipe with a microfiber cloth prevents this.
- Software glitches require a hard reset: If your robot acts erratically, won’t connect, or displays strange errors, power cycling the robot and its app often resolves the issue.
- Know your error codes: Your Shark robot uses beeps and lights to communicate specific problems. Listening and observing is the first step to accurate diagnosis.
- Preventative care saves money: A consistent 10-minute weekly cleaning routine (brushes, filters, sensors, wheels) extends your vacuum’s life and avoids costly repairs.
- When to seek professional help: If you’ve done all troubleshooting and the motor smells burnt, makes grinding noises, or the body is physically damaged, contact Shark Support.
📑 Table of Contents
- Introduction: Your Shark Robot Vacuum Has Stopped Working—Now What?
- Section 1: The Power Problem – Battery & Charging Issues
- Section 2: The Cleaning Failure – Brush Roll & Suction Problems
- Section 3: The Lost Explorer – Sensor & Navigation Failures
- Section 4: The Jammed Machine – Clogs & Mechanical Jams
- Section 5: The Glitchy Brain – Software, App & Connectivity Issues
- Section 6: When All Else Fails – Reset & Professional Help
- Conclusion: A Working Robot is a Maintained Robot
Introduction: Your Shark Robot Vacuum Has Stopped Working—Now What?
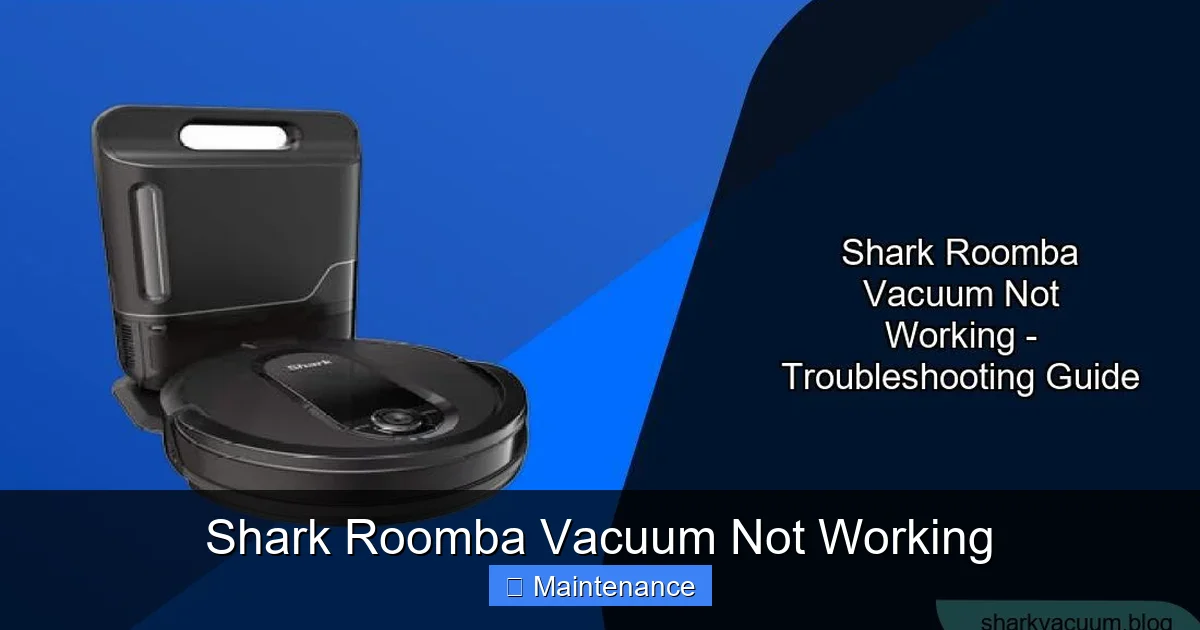
You set your trusty Shark robot vacuum to clean while you’re out, but when you come home, there it sits—stuck under the couch, beeping plaintively, or worse, completely dark and silent on its dock. That familiar sinking feeling of frustration is all too common. Before you resign yourself to a hefty repair bill or the hassle of a replacement, take a deep breath. The vast majority of “Shark Roomba vacuum not working” scenarios are not terminal failures. They are, in fact, almost always diagnosable and fixable with some straightforward, at-home troubleshooting.
First, a crucial clarification: Shark and Roomba (made by iRobot) are competing brands. You likely own a Shark-branded robot vacuum, such as a model from the Shark IQ, Shark AI Ultra, or Shark ION series. This guide specifically addresses troubleshooting for Shark robot vacuums. The principles of maintenance are similar across all robot vacuums, but the specific error codes, parts, and reset procedures are unique to Shark models. This guide will focus on those Shark-specific details to get your cleaning companion back on track.
Think of your robot vacuum like a car. It needs clean air filters (its own filter), clear airways (no clogs), charged batteries, clean sensors (like a camera and GPS), and updated software. When one system fails, the whole operation grinds to a halt. Our goal here is to systematically check each system, from the simplest wipe-down to more involved resets, so you can identify the exact point of failure. We’ll walk through every common symptom, decode what your vacuum is trying to tell you, and provide clear, step-by-step solutions. Let’s get your Shark robot working again.
Section 1: The Power Problem – Battery & Charging Issues
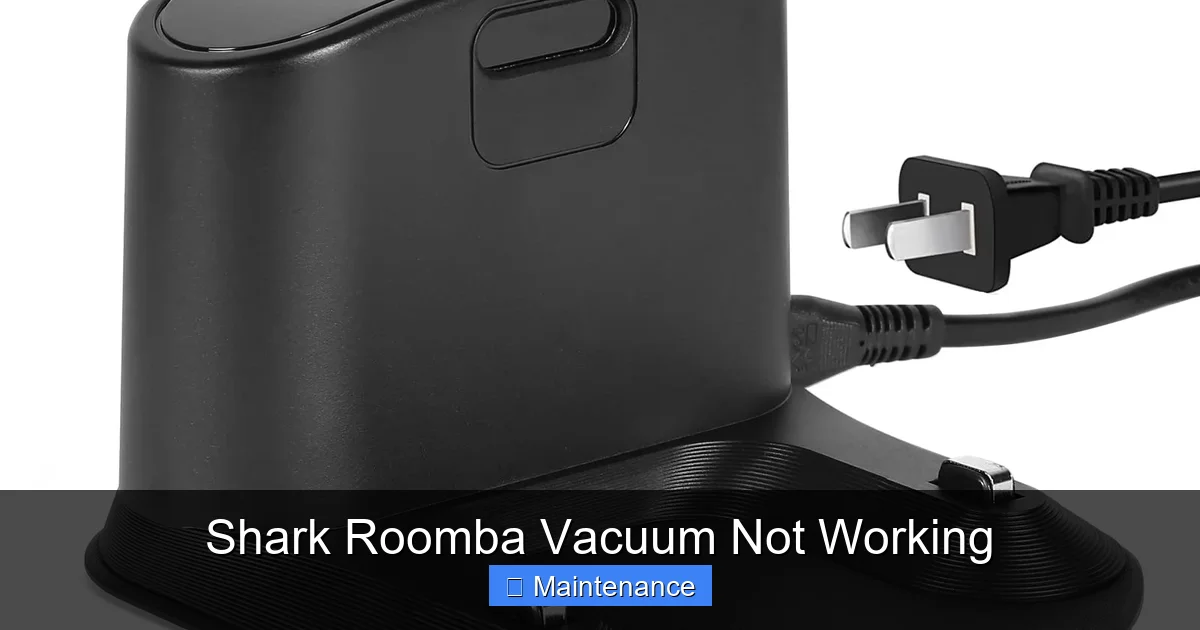
If your Shark robot vacuum won’t turn on, won’t charge, or dies after just a few minutes, the issue almost always lies within the power subsystem. This includes the battery itself, the charging contacts on both the robot and the dock, and the power adapter. Don’t assume a dead battery right away; start with the simplest checks.
Visual guide about Shark Roomba Vacuum Not Working
Image source: sharkvacuum.blog
Symptom: Robot Won’t Turn On At All (Completely Dead)
This is the most alarming symptom. The robot is a paperweight. Before anything else, perform this absolute basic check: Is the power adapter plugged into a working wall outlet? Unplug it from the wall and plug in a lamp or phone charger to confirm the outlet has power. Next, inspect the adapter and cable for any visible damage, fraying, or chew marks from pets. If the adapter is damaged, it needs replacement.
Assuming power is reaching the dock, the next step is the connection between the dock and the robot. Lift the robot and place it directly on the dock. You should see a light indicator on the robot (usually a ring light or a small LED) turn on, typically solid white or pulsing, indicating charging. If no light appears:
- Clean the Charging Contacts: The small metal pins on the bottom of the robot and the corresponding metal strips on the dock must be perfectly clean for electricity to flow. Use a dry, lint-free microfiber cloth to vigorously rub both sets of contacts. For oxidized or grimy contacts, lightly dampen the cloth with a tiny amount of isopropyl alcohol (90%+), let it dry completely, then try again.
- Check for Physical Obstruction: Ensure nothing is jammed under the robot preventing it from making full contact with the dock. A piece of lint or a small toy can break the connection.
- Try a Manual Reset: Locate the power button on your Shark robot (often on the side or underneath a small flap). Press and hold it for 10-15 seconds to force a hard reset. Release, place it on the dock, and wait 5 minutes to see if charging begins.
Symptom: Robot Charges But Battery Dies Very Quickly
If your robot runs for only 5-10 minutes on a full charge, the battery capacity has severely degraded. This is a normal part of the product lifecycle for lithium-ion batteries, which typically last 2-3 years with regular use. However, you should rule out other causes first.
- Ensure a Full Charge Cycle: Let the robot charge on the dock for a full 3-4 hours without interruption. A partial charge will give a false reading.
- Run a Full Clean Cycle Without Interference: Start a clean from the app or the robot’s “Clean” button and let it run until it automatically returns to the dock. If it dies mid-cycle, note the runtime.
- Calibrate the Battery (If Applicable): Some Shark models have a battery calibration feature in their app settings. Run this process if available. It helps the robot’s computer accurately gauge remaining battery life.
- Battery Replacement is the Fix: If, after a full charge and calibration, runtime is still under 30 minutes for a standard clean, the battery has lost its ability to hold a charge. You will need to purchase a replacement battery specific to your Shark model. Shark sells official parts, and many third-party retailers offer compatible batteries. Replacement is usually a simple process of removing a few screws on the bottom of the robot.
Pro Tip: Extending Your Battery’s Life
To maximize battery lifespan, avoid always running deep-clean cycles on maximum suction. Use “Eco” or “Quiet” modes for daily cleans. Store the robot on its dock, not on the floor, to maintain a trickle charge. If you won’t use it for a month or more, store it with a 50-80% charge in a cool, dry place.
Section 2: The Cleaning Failure – Brush Roll & Suction Problems
Your robot is moving, but it’s not picking up dirt. It might sound like it’s working, but your floors stay dusty. This points directly to the cleaning head: the brush roll (the main rolling brush) and the suction pathway. This is the most common area for maintenance neglect.
Visual guide about Shark Roomba Vacuum Not Working
Image source: m.media-amazon.com
The Clogged Brush Roll: The Prime Suspect
The brush roll is a magnet for hair, string, carpet fibers, and pet fur. When it gets wrapped, it can’t spin properly, drastically reducing cleaning efficacy. In severe cases, the motor will strain and shut off to prevent damage.
- How to Inspect and Clean: Flip the robot over. You’ll see the brush roll under a protective guard. Most Shark models have a simple release mechanism—a tab or a few screws—to remove the guard. Gently pull out the brush roll. You will likely see a thick mat of hair wrapped around the axle and bristles. Use scissors or a dedicated brush-cleaning tool (often included with the vacuum) to meticulously cut and remove all debris. Be careful not to cut the bristles themselves. Spin the brush roll by hand; it should rotate freely with no resistance.
- Check the Brush Roll Bearings: After cleaning, hold the brush roll at both ends and try to wiggle it side-to-side. There should be minimal play. Excessive wobble means the bearings are worn out, and the brush roll assembly needs replacement.
- Reinstall Correctly: Ensure the brush roll is seated properly in its housing before reattaching the guard. An incorrectly installed brush roll can jam or not engage with the motor.
Suction Loss: The Hidden Clogs
Even with a perfectly clean brush roll, suction can be blocked further down the line. Dirt travels from the floor, into the brush roll housing, through a tube, and into the dustbin. A clog anywhere in this path kills suction power.
- Inspect the Brush Roll Housing: With the brush roll removed, look into the cavity where it sits. Use a flashlight. You’ll often find a felt-like plug of dust and hair packed at the front intake. Pull it out with needle-nose pliers or a hook tool.
- Check the Suction Tube: Follow the path from the brush roll housing to the dustbin. There is usually a flexible rubber or plastic tube. Detach it (it may have a clip or just pull off) and look inside. Shine a light through it. If you can’t see light, it’s clogged. Use a long, flexible brush (like a bottle brush) or a straightened wire coat hanger (wrapped in tape to avoid sharp edges) to gently dislodge the debris.
- Empty and Clean the Dustbin Thoroughly: Don’t just tap it out. Open the dustbin lid and scrape the inside with a flat tool. The fine dust can cake onto the sides and the mesh filter inside the bin. Rinse the bin with water (ensure it’s completely dry before reinserting) and clean the mesh filter with a brush.
- Replace the Main Filter: The rectangular foam or pleated paper filter inside the dustbin assembly is not a one-time part. It needs regular replacement (every 2-3 months with heavy use). A clogged filter is a major cause of suction loss. Washable foam filters can be rinsed with cold water and air-dried for 24 hours. Paper filters must be replaced.
Section 3: The Lost Explorer – Sensor & Navigation Failures
Is your Shark robot vacuum spinning in circles, bumping into walls repeatedly, getting stuck on nothing, or simply refusing to leave its dock? It’s likely suffering from sensor failure. Robot vacuums rely on a suite of optical and mechanical sensors to see their environment, avoid drops, and navigate. When these get dirty or faulty, the robot becomes disoriented and “blind.”
Visual guide about Shark Roomba Vacuum Not Working
Image source: vacuums.best
Critical Sensor Cleaning Checklist
Sensors need to be perfectly clean to function. Make this a weekly habit. You’ll need a dry microfiber cloth and, for stubborn grime, a cotton swab lightly moistened with isopropyl alcohol.
- Cliff Sensors (The “Eyes” on the Bottom): These are the 4-6 small, clear/black windows on the underside of the robot, near the front. They use infrared beams to detect stairs and drop-offs. If one is dirty, the robot thinks it’s on a cliff and will refuse to move or will constantly back away from edges. Wipe each one meticulously.
- Bumper Sensor & Switches: The rubber bumper around the front edge houses sensors that detect contact. Press the bumper in multiple places to ensure it’s not stuck. Wipe the rubber and the seam where it meets the robot’s body. Debris can jam the bumper, making the robot think it’s constantly bumping into things.
- Navigation Camera/Lidar Window (If Equipped): Higher-end Shark AI models have a rotating Lidar dome or a forward-facing camera window on top. This is its “brain’s eye.” A fingerprint or dust film here will severely degrade mapping and navigation. Gently clean this dome or window with a lens cloth.
- Wheel Encoders: The small wheels have internal sensors that count rotations to measure distance. If the rubber tires are packed with grit, it can slip and throw off navigation. Pick off any large debris from the wheel treads.
Environmental & Physical Obstructions
Sometimes the issue isn’t the robot’s sensors but its environment.
- Reflective or Dark Surfaces: Cliff sensors can be fooled by very dark, non-reflective floors (like some black carpets) or highly polished, reflective surfaces (like marble or glass). The sensor sees the floor as a “hole.” Try placing a piece of white tape over the cliff sensors temporarily to override them for cleaning on that surface.
- Low-Pile Rugs & Thresholds: The robot might get stuck on the fringe of a rug or a high door threshold. Use rug grippers or temporarily block thresholds with a thin piece of cardboard during cleaning.
- Check for Physical Damage: Inspect the bumper for cracks. A misaligned or damaged bumper can keep pressure on the internal switch, telling the robot it’s constantly bumping into things.
Section 4: The Jammed Machine – Clogs & Mechanical Jams
This category covers when the robot physically cannot move or its mechanisms are blocked. The motor might hum, the wheels might spin, but the robot doesn’t budge.
Wheel & Tread Inspection
The drive wheels are powerful but vulnerable to hair and string.
- Remove the Wheels: Most Shark robots have pop-off wheels. Gently pry them off from the axle. You will almost certainly find a “hair tumor” wrapped around the axle and inside the wheel housing. Use scissors to cut it away. Clean the axle and the inside of the wheel hub.
- Check Wheel Movement: Spin the wheel by hand. It should rotate smoothly on its internal gear. If it’s gritty or stiff, the wheel assembly needs cleaning or replacement.
The Side Brush Conundrum
The spinning side brush (the broom-like brush on the side) is another hair magnet. If it’s clogged, it won’t spin, reducing edge cleaning. Worse, a jammed side brush can create enough resistance to stall the main motor.
- Remove and Clean: It usually unscrews or pops off. Cut away all hair wrapped at the base and between the bristles. Check the small gear drive that connects it to the motor—clean any debris from the gear teeth.
Internal Motor Jam (Advanced)
If you hear a high-pitched whine or a grinding noise, and the brush roll doesn’t spin, the motor’s gears may be stripped or jammed by a dense object that worked its way deep inside. This is a more serious repair. You can try removing the entire brush roll housing (usually several screws on the bottom) to inspect the motor gear. If the plastic gears are stripped or a toothpick/pen cap is lodged inside, you may need to replace the brush motor assembly. If you’re not comfortable with this, it’s time to call Shark Support.
Section 5: The Glitchy Brain – Software, App & Connectivity Issues
Your robot’s hardware might be perfect, but if its software or connection is faulty, it will seem “not working.” This includes failure to start from the app, getting lost, or displaying nonsensical error codes.
The Universal Fix: Power Cycle Everything
This solves 70% of software glitches. Do it in this order:
- Power off the robot (hold the physical power button).
- Unplug the charging dock from the wall for 30 seconds.
- Restart your smartphone/tablet and your Wi-Fi router.
- Plug the dock back in.
- Place the powered-off robot on the dock and let it charge for 5 minutes.
- Power the robot back on.
- Open the Shark app and try to reconnect.
This process clears temporary caches, resets network connections, and re-initializes the robot’s internal state.
Wi-Fi & App Connection Problems
- Ensure 2.4GHz Network: Almost all robot vacuums only connect to 2.4GHz Wi-Fi bands, not 5GHz. Check your router settings. You may need to create a separate 2.4GHz network name (SSID).
- Signal Strength: The dock needs a decent Wi-Fi signal. If your router is far away, consider a Wi-Fi extender.
- App & Firmware Updates: Go to your app store and ensure the Shark app is updated. In the app, go to your robot’s settings and check for firmware updates. Install any available updates, as they often fix bugs and connectivity issues.
- Delete and Re-add the Robot: In the app, remove the robot from your account. Then, go through the full setup process again, as if it were new. This forces a fresh connection.
Decoding Beeps & Error Lights
Your robot is trying to talk to you! A pattern of beeps or a flashing light ring indicates a specific error. Consult your user manual’s error code section. Here are common examples (patterns vary by model):
- Rapid, continuous beeping: Usually a cliff sensor error or the robot is stuck.
- Two short beeps, pause, repeat: Often a side brush or main brush jam.
- Three short beeps: Typically a wheel jam or the robot is stuck.
- A solid red light on the dock: Dock communication error.
Identifying the code narrows your troubleshooting to one specific area (e.g., “beep code 2” = check brushes).
Section 6: When All Else Fails – Reset & Professional Help
You’ve cleaned everything, checked connections, and power cycled. The robot still doesn’t work correctly. It’s time for more drastic measures or outside help.
Performing a Factory Reset
This erases all maps, schedules, and settings, returning the robot to its out-of-box state. It’s the nuclear option for software corruption. Note: You will have to remap your home and set up schedules again.
- The method varies by model. Common methods include:
- Holding the “Clean” button and a “Spot Clean” button simultaneously for 10 seconds.
- Using a small pin to press and hold a recessed “Reset” hole on the underside or side for 10 seconds.
- Finding a “Factory Reset” option deep within the robot’s settings in the companion app.
Always check your specific model’s manual for the exact reset procedure. After resetting, set it up fresh on the dock and in the app.
Recognizing When to Contact Shark Support
If you’ve exhausted all the steps above, the fault is likely internal. Contact Shark Customer Support (via phone or chat on their website) if you experience:
- A distinct burning smell or smoke from the unit.
- Loud grinding, screeching, or clicking noises from the motor area.
- Physical damage from a drop or impact (cracked body, broken bumper).
- The robot powers on but one wheel or the brush roll motor does not spin at all, even after cleaning and resetting.
Have your model number and serial number (found on the underside label) ready. If the unit is under the limited warranty (typically 1-3 years depending on model), you may be eligible for a repair or replacement. Shark may provide a prepaid shipping label for you to send it in.
Conclusion: A Working Robot is a Maintained Robot
Facing a “Shark Roomba vacuum not working” situation is never fun, but it’s rarely the end of the world. As we’ve detailed, the root cause is overwhelmingly a lack of maintenance—hair in the brushes, dust in the sensors, a clogged filter, or a software hiccup. The power lies in adopting a simple, consistent cleaning ritual. Dedicate 10-15 minutes once a week: wipe those sensors, clean the brush roll, empty the bin, check the wheels, and ensure the dock is clean and plugged in. This tiny investment of time saves you from hours of frustration and extends the life of your valuable cleaning appliance by years.
Remember the diagnostic flow: Power → Brushes/Suction → Sensors/Wheels → Software → Reset/Support. Start at the top and work your way down. Listen to the beeps, watch the lights, and observe the robot’s behavior. It’s giving you clues. By becoming a proactive maintainer rather than a reactive fixer, you’ll enjoy a consistently clean home with a robot vacuum that reliably does its job. Now, grab your microfiber cloth and get cleaning—your Shark robot is counting on you!
Frequently Asked Questions
Why is my Shark robot vacuum beeping and not moving?
The beeping is an error code. A common cause is a jammed brush roll or wheel. Immediately turn the robot over and inspect the main brush, side brush, and both drive wheels for hair or debris wrapped around them. Clear any obstructions, which resolves the issue in most cases.
Why does my Shark robot keep getting stuck on flat floors?
This is almost always a sensor issue. The cliff sensors on the bottom are likely dirty and falsely detecting a “drop.” Power off the robot, flip it over, and thoroughly clean all the small sensor windows on the underside with a dry microfiber cloth.
How do I know if my Shark robot’s battery is dead?
If a fully charged robot runs for less than 15-20 minutes on a standard clean cycle, the battery is failing. First, try cleaning the charging contacts on both the robot and dock. If runtime doesn’t improve after a full 4-hour charge, the battery needs replacement.
My Shark robot won’t connect to my Wi-Fi. What do I do?
First, ensure your router is broadcasting a 2.4GHz network (most robots cannot connect to 5GHz). Power cycle your robot, dock, phone, and router. Then, in the Shark app, delete the robot and go through the full setup process again, carefully following the Wi-Fi connection steps.
How often should I clean the filters in my Shark robot?
The main foam or paper filter inside the dustbin should be cleaned (if washable) or replaced every 2-3 months with regular use. For pet owners or homes with a lot of dust, clean or replace it monthly. A clogged filter is a primary cause of suction loss.
What does a solid red light on my Shark robot mean?
A solid red light on the robot itself typically indicates a critical error like a severe jam, wheel stall, or internal fault. Turn the robot over and immediately check the brush roll, wheels, and side brush for any hair or object preventing them from spinning freely. Clear the obstruction and reset the robot.