Flashing lights on your Shark Robot vacuum and its charging dock are not random; they are a coded language indicating specific statuses or errors. Typically, a rapidly blinking light on the robot itself points to an internal issue like a jammed brushroll, dirty sensors, or a software glitch. Meanwhile, a flashing light on the dock usually signifies a power problem, a poor connection with the robot, or a fault in the docking station. Most of these issues can be resolved at home with simple cleaning, a full system reset, and ensuring a clear path between the robot and its base.
You’re in the middle of your day, and you glance over to see your trusty Shark robot vacuum. Instead of its usual peaceful, methodical cleaning or its calm, solid charging light, it’s flashing at you. Maybe it’s the robot itself, a frantic series of blue or red blinks. Or perhaps it’s the sleek charging dock, pulsing with an unwelcome light. Your first thought might be, “Oh no, is it broken?” Take a breath. That flashing is not a death sentence for your appliance; it’s a conversation. Your Shark robot and its dock are trying to tell you something specific. Understanding this language of light is the first and most crucial step in troubleshooting. This guide will decode every flash, blink, and glow you’re likely to encounter with a Shark robot vacuum and its Clean & Dock system, transforming you from a worried owner into a confident at-home technician.
Key Takeaways
- The lights are a diagnostic tool: Different colors and patterns (solid, slow blink, fast flash) correspond to specific operational states or error codes, not random failures.
- Cleanliness is paramount: The most common cause of flashing is physical obstruction—clogged brushes, full dustbin, dirty charging contacts on both the robot and dock, and grimy cliff/bumper sensors.
- Resets are powerful first steps: Performing a soft reset (power cycle) on both the robot and the dock, or a factory reset via the app, resolves many temporary software and communication glitches.
- Environment matters: Ensure the dock is on a flat, hard surface against a wall, with at least 1.5 feet of clear space on either side and 5 feet in front. Avoid carpets, rugs, or direct sunlight.
- Connectivity is key: For app-connected models, a weak Wi-Fi signal can cause the robot to lose its way and flash error lights. The dock must also be within your home network’s range.
- Know when to seek help: If cleaning and resetting don’t stop persistent, specific flashing patterns (often documented in the manual), the issue may be a faulty battery, motor, or motherboard requiring professional service.
- Prevention beats repair: A weekly maintenance routine of clearing brushes, emptying the bin, wiping sensors/contacts, and checking wheels dramatically reduces the chance of encountering flashing errors.
📑 Table of Contents
- Decoding the Language of Light: What Those Flashes Mean
- The Usual Suspects: Top 5 Causes of Flashing Lights
- Your Step-by-Step Troubleshooting Guide
- Proactive Maintenance: Preventing the Flashing Before It Starts
- When to Escalate: Advanced Troubleshooting & Support
- Beyond the Basics: Optimizing Your Shark System
- Conclusion: Your Robot is a Partner, Not a Mystery
Decoding the Language of Light: What Those Flashes Mean
Before we grab a screwdriver or a cloth, we must become fluent in “Shark-ese.” The brand uses a relatively consistent system across its Ion, AI Ultra, and Matrix series, but always have your specific model’s manual handy for definitive codes. Generally, lights are located on the robot’s top or bumper and on the front of the dock. The behavior—solid, slow pulse, fast flash—is as important as the color.
Common Robot Light Patterns & Their Meanings
- Solid Blue Light: This is the “all systems go” sign. The robot is powered on, has a good battery charge, and is either idle, cleaning, or navigating.
- Slow Pulsing Blue Light: Typically indicates the robot is actively charging on the dock.
- Fast Flashing Blue Light: This is often a connectivity or Wi-Fi issue. The robot is powered but cannot connect to your home network or the Shark app. It may also appear during initial setup.
- Solid Red Light: A critical error. This usually means the robot has encountered an obstacle it cannot overcome, a wheel is jammed, the brushroll is tangled, or the cliff sensors have detected an edge (like it’s stuck on a rug). It’s a “stop and check me” signal.
- Flashing Red Light (2-3 blinks): This is the most common “trouble code.” It frequently points to a dirty charging contact on the robot’s underside that won’t connect with the dock. It can also indicate a full dustbin or a clogged filter.
- Flashing Red Light (Alternating with other colors): May indicate a deeper system fault, battery failure, or internal hardware problem.
Common Dock Light Patterns & Their Meanings
- Solid Green Light: The dock is powered, connected to Wi-Fi (if applicable), and ready to receive the robot for charging.
- Flashing Green Light: The dock is powered but not connected to Wi-Fi. It’s in setup mode or has lost its network connection.
- Solid Amber/Yellow Light: The dock is receiving power but may be in an error state. Often, this pairs with a robot error. It can also mean the dock’s internal power supply is overheating.
- Flashing Amber/Red Light: A serious dock fault. This could be a failed power adapter, an internal short, or a problem with the dock’s charging pins. Unplug the dock for a full reset.
- No Light at All: The dock has no power. Check the outlet, power adapter, and cable for damage. Ensure the adapter is firmly plugged into both the wall and the dock.
The interaction is key. Often, the robot will flash red (e.g., 2 blinks) while trying to dock, and the dock might flash amber in response. This duo points directly to a dirty contact or misalignment issue. Your job is to observe this “conversation” and respond accordingly.
The Usual Suspects: Top 5 Causes of Flashing Lights
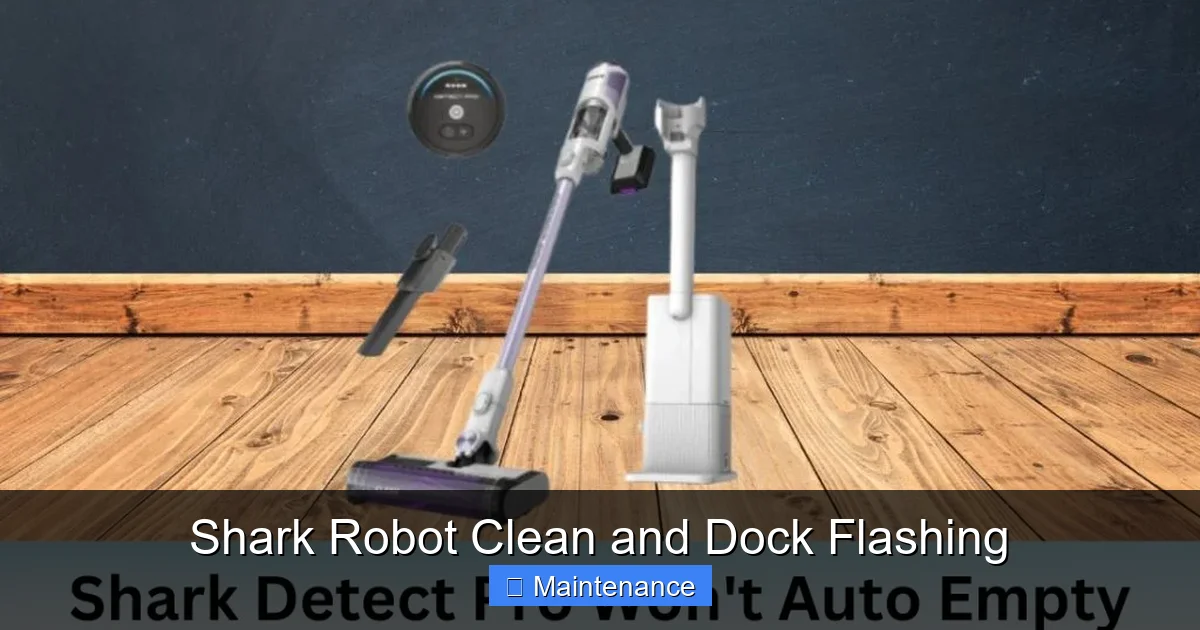
Now that we know what the lights mean, what physically causes them? Over 80% of flashing issues stem from these five preventable or easily-fixable problems.

Visual guide about Shark Robot Clean and Dock Flashing
Image source: sharkvacuum.blog
1. Dirty Charging Contacts: The #1 Culprit
This is the monarch of all Shark robot errors. The small, metallic charging pins on the robot’s underside and the corresponding metal strips on the dock are magnets for dust, hair, and grime. A thin film of debris acts as an insulator, preventing the electrical connection needed to charge the battery. The robot, sensing it’s not charging, will flash a red error code (often 2 blinks) and refuse to dock properly. The dock may also flash in protest.
2. Physical Obstructions & Jammed Components
Your vacuum’s job is to encounter dirt. Sometimes, it encounters too much. A tightly wound hair ball around the main rubber brushroll, a clogged roller bearing, a wheel packed with carpet fibers, or a completely full dustbin will trigger a red solid light or flashing red. The robot’s safety mechanisms shut it down to prevent motor burnout.
3. Dirty Sensors: The Robot’s Eyes and Ears
Shark robots use a suite of sensors: cliff sensors (black windows on the bottom) to avoid stairs, bumper sensors to detect collisions, and optical encoders on the wheels to track movement. Dust, pet hair, or sticky spills coating these sensors cause them to malfunction. The robot might think it’s on a cliff (flashing red), be unable to navigate (erratic flashing), or fail to dock accurately.
4. Power and Dock Issues
Is the dock’s power adapter plugged in firmly? Is the outlet controlled by a wall switch? Is the adapter damaged or frayed? A dock that isn’t receiving stable, adequate power will have a dim or non-existent light and cannot charge the robot, leading to the robot’s battery dying and flashing low-power codes.
5> Software Glitches and Communication Failures
Like any smart device, your robot can experience a software hiccup. A corrupted navigation map, a failed Wi-Fi handshake, or a bug in an update can cause the robot to get “stuck” in an error state, flashing blue or red without a clear physical cause. This is often resolved by a full power cycle or reset.
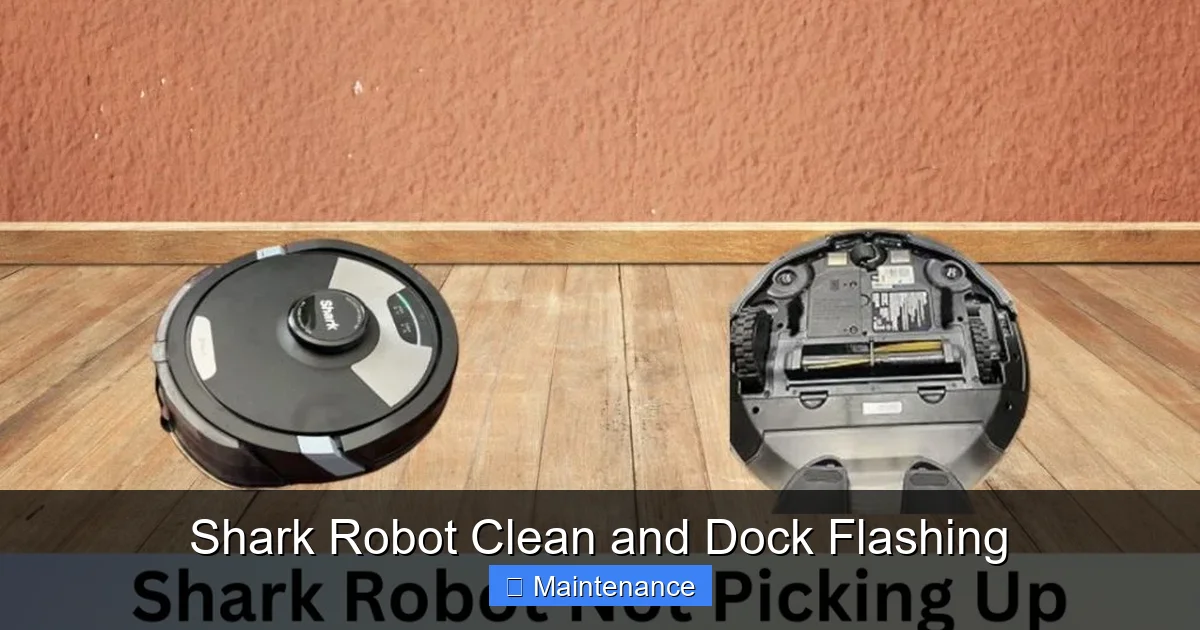
Your Step-by-Step Troubleshooting Guide
Don’t just randomly clean things. Follow this logical, escalating sequence of fixes. You’ll solve the problem 90% of the time before needing to contact support.
Visual guide about Shark Robot Clean and Dock Flashing
Image source: sharkvacuum.blog
Step 1: The Immediate Physical Inspection & Clean
Unplug the dock for safety. Turn the robot upside down. This is your baseline.
- Clear the Brushroll: Use the included cleaning tool or scissors to cut away any hair or fibers wrapped around the rubber brush and its bearings. Spin it by hand to ensure it rotates freely.
- Empty the Dustbin: Open it and tap out all debris. Check the mesh filter inside; if it’s clogged with fine dust, rinse it with cool water (let dry completely for 24 hours).
- Check Wheels: Manually spin both drive wheels. Remove any visible hair or gunk from their axles and rubber treads. Check the swivel caster wheel at the front.
- Wipe Sensors and Charging Contacts: Use a dry, lint-free microfiber cloth to gently clean the black cliff sensors on the bottom. This is critical: Use a cotton swab lightly moistened with isopropyl alcohol (let dry) to clean the metal charging contacts on the robot’s belly and the metal strips on the dock. Do not use liquids directly on the dock’s electronics.
- Clean the Bumper: Wipe the front bumper with a dry cloth. Listen for a click when you press it in; it should depress and rebound smoothly.
Step 2: Reset and Re-seat
After cleaning, perform a soft reset.
- Robot Reset: Locate the power button (often on the side or top). Press and hold it for 10-15 seconds until you hear a beep or see the lights turn off. Release, wait 10 seconds, then press again to power on.
- Dock Reset: Unplug the dock’s power adapter from the wall outlet. Wait 30 full seconds. Plug it back in firmly. Wait for the dock light to become solid green (or its ready state).
- Manual Docking: Gently place the robot directly onto the dock, aligning the charging contacts. Push it back slightly to ensure firm contact. You should hear a chime and see a solid or slow-pulsing charging light within 5-10 seconds.
Step 3: The Environment Check
Is the dock set up correctly?
- Location: It must be on a hard, flat floor (not carpet or a rug). Against a wall is best.
- Clearance: Leave at least 1.5 feet of open space on both sides of the dock and 5 feet directly in front of it. This gives the robot a long, clear approach path.
- Lighting: Avoid placing the dock in direct, strong sunlight, which can interfere with the robot’s optical sensors.
- Level: Use a small level. If the dock or floor is sloped, the robot may not make proper contact.
Step 4: App and Firmware Investigation
For Wi-Fi models:
- Check App Status: Open the Shark app. Is the robot listed as “Offline” or showing an error icon? The app often provides more specific error messages than the lights.
- Reconnect to Wi-Fi: In the app, go to your robot’s settings and run the Wi-Fi reconnection process. Ensure your router is broadcasting on a 2.4GHz band (most Sharks do not support 5GHz).
- Update Firmware: In the app settings, check for and install any available firmware updates. These often contain bug fixes for docking and navigation issues.
Proactive Maintenance: Preventing the Flashing Before It Starts
An ounce of prevention is worth a pound of troubleshooting. Incorporate this simple weekly and monthly routine.
Visual guide about Shark Robot Clean and Dock Flashing
Image source: sharkvacuum.blog
Weekly Quick-Check (5 Minutes)
- Empty the dustbin after every 2-3 runs, or whenever it’s full.
- Tap out the filter over a trash can to dislodge fine dust.
- Visually inspect the brushroll for hair wrap. Cut it away immediately.
- Wipe the charging contacts on the robot with a dry cloth.
- Check the wheels for any debris caught in the treads.
Monthly Deep-Clean (15 Minutes)
- Remove the brushroll entirely. Take off the rubber blades if your model allows. Wash them with mild soap and water. Dry completely.
- Clean the dock: Wipe down the entire dock, especially the charging strips, with a slightly damp cloth. Ensure the area under and around the dock is free of clutter.
- Clean all sensors: Use a cotton swab for the cliff sensors and the optical window on the bumper. Do not scratch these surfaces.
- Inspect the power cable for any signs of wear or chews (from pets).
Seasonal & Situational Care
- Long Hair/Pet Owners: Check the brushroll and wheels after every single run. Consider purchasing a “tangle-free” brushroll accessory if available for your model.
- Carpeted Homes: More frequent filter cleaning is needed as carpets kick up fine dust. Consider a HEPA-style replacement filter every 3-6 months.
- Storage: If not using the robot for an extended period (e.g., a month-long vacation), store it with a ~50% charge and power it off. Store the dock unplugged.
When to Escalate: Advanced Troubleshooting & Support
You’ve cleaned meticulously, reset everything, checked the environment, and updated the software. The flashing persists. Now what?
Diagnosing Persistent, Model-Specific Codes
Some flash patterns are more serious. A robot that flashes red 4 times, then blue, or cycles through colors repeatedly, may be indicating a failed battery, a faulty motor, or a corrupted mainboard. Consult your user manual’s error code section. It will have a chart like: “4 red flashes = Battery Error. Contact Customer Service.” Do not attempt to disassemble the robot yourself if you see these codes.
Utilizing Shark’s Official Resources
- Shark Customer Support: Have your model number (on the underside label) and serial number ready. Describe the exact light pattern and the steps you’ve already taken. They can often confirm if it’s a known issue with a fix or a warranty replacement.
- Shark’s Online Knowledge Base: Search for your model number plus “flashing light” or “docking error.” Shark maintains detailed articles and videos for common issues.
- Warranty Check: Most Shark robots come with a 1-5 year limited warranty. If the unit is under warranty and the issue is a manufacturer defect, you are entitled to a repair or replacement. Do not void the warranty by attempting complex internal repairs.
Beyond the Basics: Optimizing Your Shark System
Once you’ve solved the flashing mystery, let’s ensure it stays solved. A well-tuned system is a happy system.
Dock Placement Strategy
The ideal dock location is a corner against a wall, with the robot’s approach parallel to the wall. This gives the robot a long, straight run to align itself. Avoid placing it in the middle of a room or behind furniture. If you have a home with multiple floors, place a dock on each level if possible, or consistently place the single dock on the most frequently cleaned floor.
Map Management for AI/Navigation Models
For robots with LiDAR or AI navigation (Shark IQ, Matrix, etc.):
- Keep maps updated: If you rearrange furniture, edit the map in the app to reflect new no-go zones or furniture placements. An outdated map can cause navigation confusion.
- Use No-Go Zones: Proactively set up no-go zones around pet bowls, delicate rugs, or areas you never want the robot to enter. This prevents it from getting stuck and flashing errors.
- Run Complete Cycles: Let the robot finish its full map-building run without interrupting it unless absolutely necessary. Interruptions can corrupt the map data.
Battery Health and Longevity
The battery is the heart of the system. To prolong its life:
- Avoid deep discharges: Try not to let the robot run until it completely dies on the floor. It should automatically seek the dock when battery gets low.
- Use Eco Mode: For regular cleaning, Eco mode uses less suction and conserves battery, leading to less heat stress on the cells.
- Know the lifespan: Robot vacuum batteries typically last 2-3 years with regular use. If your robot is older and suddenly won’t hold a charge (flashes low battery immediately), the battery may need replacement. Shark sells official replacement batteries.
Conclusion: Your Robot is a Partner, Not a Mystery
The “Shark Robot Clean and Dock Flashing” phenomenon is not a curse; it’s a dialogue. By learning to interpret the lights, you’ve unlocked the ability to perform basic maintenance and diagnostics that keep your investment running smoothly for years. Remember the hierarchy of fixes: always start with the simplest, most common solution—a thorough physical cleaning of contacts, brushes, and sensors. Then move to resets and environmental checks. Only after exhausting these steps should you consider deeper software issues or warranty service. A few minutes of proactive care each month will prevent countless hours of frustration. Your Shark robot is designed to make your life easier. By understanding its signals, you ensure it can fulfill that mission, quietly and efficiently, without demanding your constant attention. So next time you see that flash, smile. You now know exactly what to do.
Frequently Asked Questions
What does it mean if my Shark robot flashes red 2 times and then pauses?
This is the most common error code and almost always indicates dirty charging contacts. Clean the metal pins on the bottom of the robot and the metal strips on the dock with a dry cloth or cotton swab with a drop of isopropyl alcohol. Ensure the robot is seated firmly on the dock.
My dock has a flashing green light, but the robot won’t connect to it. What’s wrong?
A flashing green dock light means it’s powered but not connected to Wi-Fi. This doesn’t prevent charging, but it does prevent app control. Re-run the Wi-Fi setup in the Shark app, ensuring your router is on the 2.4GHz band and the dock is within range of your signal.
The robot flashes blue rapidly and won’t start cleaning. How do I fix it?
Rapid blue flashing is a Wi-Fi or connectivity error. First, power cycle your robot and your router. Then, in the Shark app, forget the robot’s network connection and re-add it, following the setup prompts carefully. Ensure no VPNs or firewall settings are blocking communication.
My robot seems fine, but it won’t charge on the dock. The dock light is off.
If the dock has no light, it has no power. Check that the power adapter is plugged securely into both the wall outlet and the dock. Test the outlet with another device. If the adapter is warm or damaged, it may need replacement.
How often should I clean the sensors and charging contacts?
For optimal performance, wipe the charging contacts and sensors with a dry microfiber cloth once a week. If you have pets or a particularly dusty home, do this every few days. Use a cotton swab for stubborn grime on the contacts, but always ensure everything is dry before powering on.
My robot is still flashing a specific error code after all cleaning and resets. Is it broken?
If you’ve followed all troubleshooting steps and a specific, repeating error code persists (e.g., 4 red flashes), it likely indicates a hardware failure like a bad battery, motor, or sensor. At this point, you should contact Shark Customer Support with your model and serial number to initiate a warranty claim if applicable.