Regularly removing and emptying your Shark vacuum’s dust cup is crucial for maintaining powerful suction and appliance longevity. This comprehensive guide provides step-by-step, model-specific instructions to safely detach, clean, and reattach the dust cup, preventing clogs and ensuring optimal performance. We cover common issues, essential tools, and best practices for all popular Shark series.
Key Takeaways
- Unplug First: Always disconnect your Shark vacuum from the wall outlet before attempting to remove the dust cup to prevent accidental startup.
- Model Matters: The exact removal process varies significantly between Shark Navigator, Rotator, Vertex, and IZ系列 series; always identify your specific model number.
- Release Mechanisms: Most dust cups use a combination of a release button, latch, or twist-lock; locate and fully disengage this before pulling the cup straight down.
- Clean Thoroughly: Remove the cup, tap out debris, wash with mild soap (air-dry completely), and clean the pre-motor filter to maintain suction power.
- Check Seals: Inspect the rubber gasket or seal on the dust cup and the vacuum body for tears or debris; a poor seal causes loss of suction.
- Reattach Correctly: Ensure the dust cup is fully seated and the latch clicks securely before testing suction; an improper seal is a common cause of post-cleaning issues.
📑 Table of Contents
- Why Regularly Removing Your Shark Vacuum Dust Cup is Non-Negotiable
- Essential Tools and Preparation: Before You Touch Anything
- Step-by-Step: How to Remove the Dust Cup on Major Shark Series
- Troubleshooting: What to Do When Your Dust Cup is Stuck
- The Complete Cleaning and Reassembly Protocol
- Establishing a Proactive Maintenance Schedule
- Conclusion: A Simple Habit for a Powerful Clean
Why Regularly Removing Your Shark Vacuum Dust Cup is Non-Negotiable
Let’s be honest: the dust cup is the heart of your Shark vacuum’s collection system. When that cup gets full, your vacuum doesn’t just stop picking up dirt—it starts pushing it back onto your floors. You might notice your Shark vacuum leaving trails of fine dust or struggling on carpets it previously handled with ease. This isn’t a sign of a broken machine; it’s a cry for help from a clogged dust cup. Regularly removing, emptying, and cleaning this component is the single most important piece of maintenance you can perform. It’s not just about emptying a bin; it’s about preserving the powerful suction Shark is famous for. A full dust cup chokes the airflow, forcing the motor to work harder, which can lead to overheating, premature wear, and eventually, costly repairs. Making this a habit ensures your vacuum remains efficient, your home stays truly clean, and your investment lasts for years.
The Domino Effect of a Neglected Dust Cup
Think of your vacuum’s internal pathways as a highway for air and debris. The dust cup is the main toll booth. When it’s jammed full, traffic (airflow) comes to a standstill. This reduced airflow has several knock-on effects. First, suction power plummets. The motor can’t pull air through a blocked path. Second, the pre-motor foam filter, designed to catch fine particles before they reach the motor, gets slammed with an excessive load of fine dust. This clogs the filter even faster, creating a double whammy of reduced suction. Third, the motor itself strains, running hotter and louder as it fights against the blockage. Over time, this stress can shorten the motor’s lifespan. Finally, a full, damp dust cup becomes a breeding ground for odors and bacteria. Every time you vacuum, you’re potentially recirculating stale air and microbes back into your living space. By simply removing and emptying the cup weekly (or more often with heavy use/pets), you interrupt this entire negative chain of events.
Essential Tools and Preparation: Before You Touch Anything
Before you even think about pulling on parts, a moment of preparation saves time, frustration, and potential damage. The process is simple, but having the right setup makes it foolproof. The golden rule, which cannot be stressed enough, is to always unplug your Shark vacuum from the electrical outlet. This eliminates any chance of the vacuum accidentally turning on while your fingers are near moving parts or the power button. It’s a basic safety step that is often overlooked in the heat of frustration over a stuck cup.
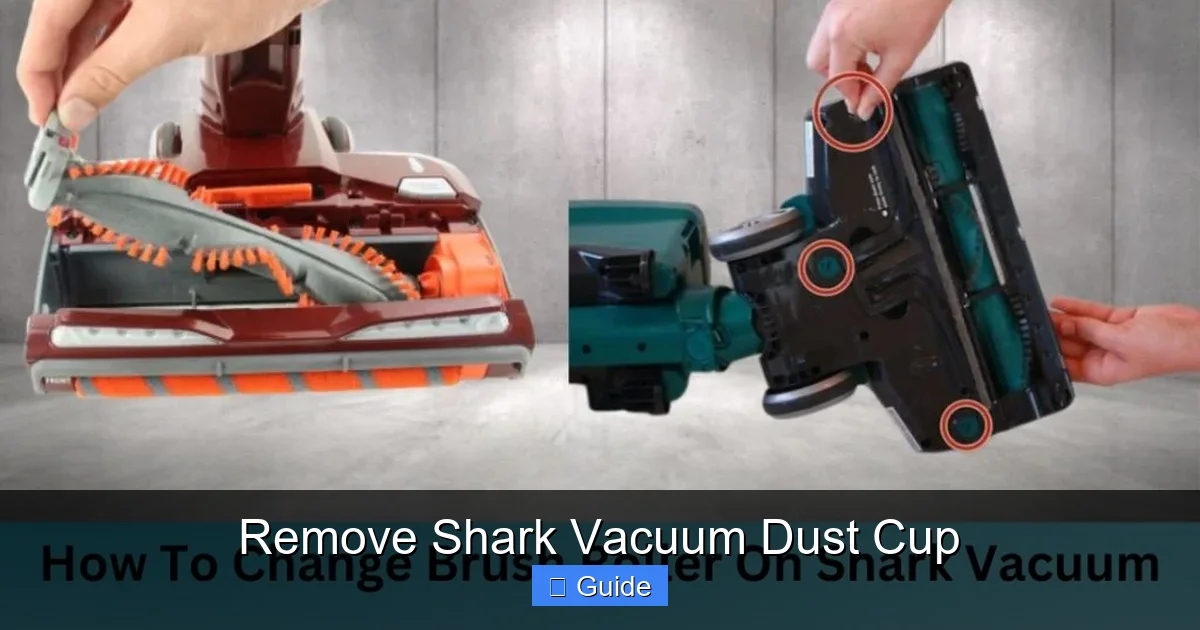
Visual guide about Remove Shark Vacuum Dust Cup
Image source: sharkvacuum.blog
Your Minimalist Toolkit
You don’t need a workshop. Gather these items:
- A flat, stable surface: Your kitchen table or a clean floor space. This gives you room to work and place parts without them rolling away.
- A small trash can or bag: For immediate disposal of the bulk debris. Don’t just tap it over your floor!
- Mild dish soap and warm water: For washing the dust cup. Avoid harsh chemicals, bleach, or abrasive scrubbers that can damage the plastic.
- A soft, lint-free cloth or microfiber towel: For drying the dust cup and wiping down the vacuum body.
- Optional but helpful: A soft-bristled brush (like a clean paintbrush or dedicated vacuum brush) to dislodge dust from the cup’s fins and filter housing.
Identifying Your Shark Model: The First Critical Step
Shark has numerous series—Navigator, Rotator, Vertex, IZ系列, Stratos, etc.—and the dust cup removal varies. Your model number is typically on a silver sticker on the back or bottom of the vacuum body, or on the charging base for cordless models. It will look like “NV356”, “NV602”, “AZ6002”, “HV322”, etc. Write this number down. If you can’t find it, the physical design is your best clue. Does the dust cup have a large, clear front with a prominent red release button on top? That’s likely a Navigator or Rotator. Is it a smaller, rectangular, bagless canister? That might be a Vertex or an older model. Is the entire pod removable? That’s common in newer Shark Vertex and Stratos models. Knowing your model points you to the correct procedure.
Step-by-Step: How to Remove the Dust Cup on Major Shark Series
Now for the core task. We’ll break down the most common designs. The universal principle is: Locate the release mechanism, disengage it fully, and pull the cup straight down or out perpendicular to the vacuum body. Never twist or yank at an angle unless the design specifically calls for it, as this can break latches or seals.
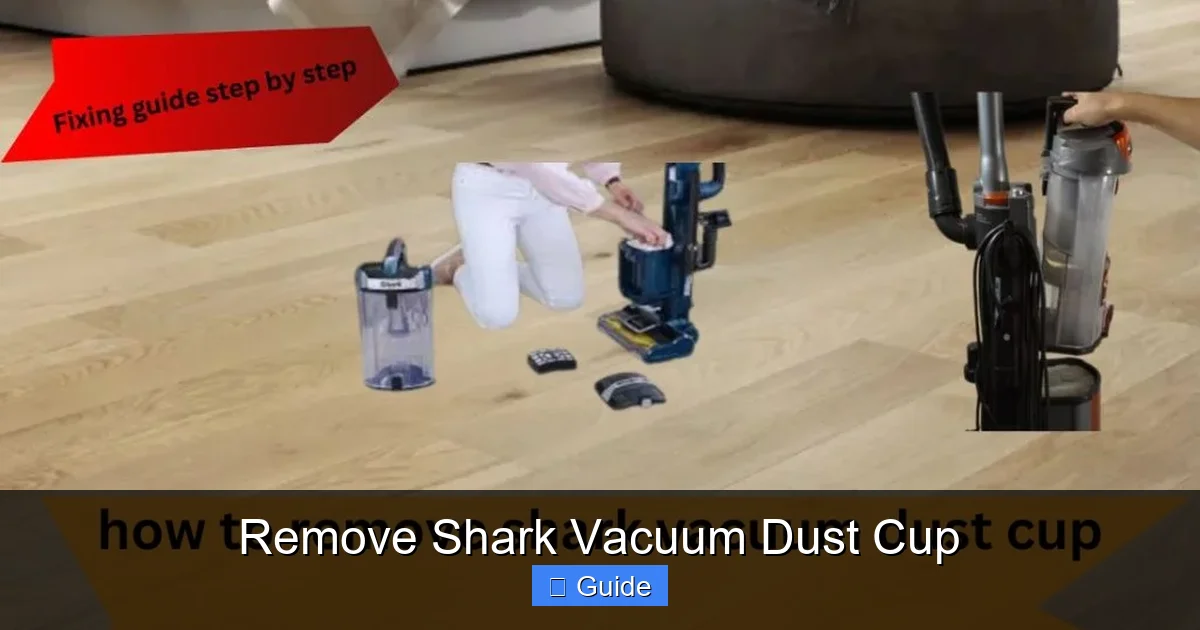
Visual guide about Remove Shark Vacuum Dust Cup
Image source: sharkvacuum.blog
For Shark Navigator & Rotator Series (e.g., NV350, NV356, HV322, HV381)
This is the classic Shark design many are familiar with. The large, transparent, cylindrical dust cup sits on top of the floor head.
- Position the Vacuum: Lay the vacuum flat on its side or front on your stable surface. This prevents it from tipping and gives you clear access to the cup’s base.
- Locate the Release Button: On the top of the dust cup assembly, near the handle connection, you’ll see a large, usually red, button labeled “OPEN” or with an arrow icon.
- Press and Hold: Firmly press this button. You should feel it click. You must hold it down while performing the next step.
- Pull the Dust Cup Down: While holding the button, grasp the handle of the dust cup (the part you normally lift to empty) and pull it straight down and away from the vacuum body. It will come free in one piece, including the internal filter cartridge.
- Separate the Filter Cartridge (Optional): Inside the dust cup, you’ll see a cylindrical foam filter on a plastic cartridge. To deep clean, twist this cartridge counter-clockwise and lift it out of the cup. The fine dust filter (often pleated paper) is usually on the side of the vacuum body—you can access it now.
For Shark Vertex & Stratos Series (e.g., AZ6002, AZ6003, HZ6002)
These models often feature a more integrated, pod-like design. The entire “dust cup assembly” is a single removable unit that includes the motor chamber and filter housing.
- Position the Vacuum: Stand it upright or lay it carefully on its back.
- Find the Latch: Instead of a top button, look for a large, prominent plastic latch on the front or side of the dust cup pod. It’s usually a wide, curved piece of plastic you pull up or out.
- Disengage the Latch: Pull this latch firmly towards you or upwards. You will hear a distinct “pop” or “click” as it releases from its housing on the vacuum body.
- Pull the Pod Straight Out: With the latch disengaged, grasp the handle on the dust cup pod and pull it directly forward, away from the vacuum. It should slide out smoothly on a track. Do not twist.
- Open the Cup: On the pod itself, there is usually a secondary release button or latch to open the clear plastic shell and empty the debris. Press this and swing the bottom of the cup open.
For Shark IZ Series & Cordless Stick Vacuums (e.g., IZ400, IZ682, SV780)
Cordless models often have the most compact and sometimes trickier mechanisms. The dust cup is usually at the back, near the motor.
- Stand the Vacuum Upright: Ensure it’s stable.
- Locate the Release: This is frequently a small button on the back of the dust cup, near where it attaches to the main body. On some IZ models, it’s a sliding latch on the side.
- Press/Slide the Release: For a button, press it in. For a latch, slide it to the “open” position. You may need to use your thumb for better leverage.
- Tilt and Pull: Instead of pulling straight down, you often need to tilt the top of the dust cup away from the vacuum body first (about 30 degrees), then pull it down and out. This disengages it from a hook or groove at the top.
- Separate Components: The fine dust filter is usually accessed by removing a small cover on the side of the main body after the cup is off.
Troubleshooting: What to Do When Your Dust Cup is Stuck
So you’ve found the button, pressed it, but the cup won’t budge. Don’t force it. Forcing is the #1 cause of broken latches and cracked plastic. Here’s your systematic approach to a stuck dust cup.
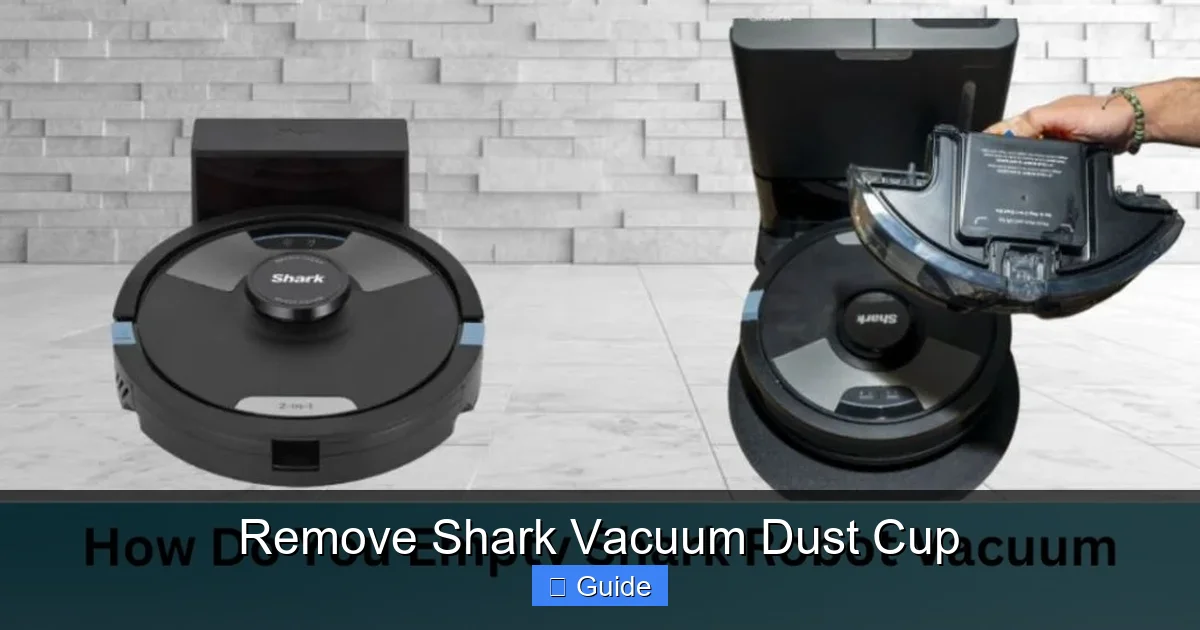
Visual guide about Remove Shark Vacuum Dust Cup
Image source: sharkvacuum.blog
The “Double-Check and Gentle Persuasion” Method
First, ensure you’ve fully disengaged the primary lock. Press the release button or move the latch again, holding it firmly. Sometimes you need to apply a little downward pressure on the cup itself *while* holding the release to overcome a vacuum seal or debris jam. Use the palm of your hand to tap gently but firmly on the sides of the dust cup housing. This can dislodge any fine dust that has compacted and created a suction seal against the gasket. If it’s a pull-latch, make sure it’s pulled to its absolute maximum position; sometimes they don’t look fully open.
Inspecting for Obstructions and Debris Jams
Look into the cavity on the vacuum where the dust cup sits. Use a flashlight. Can you see a visible buildup of compacted dust, hair, or carpet fibers around the seal or on the tracks? This is common with pet owners or in homes with long hair. Use your soft-bristled brush or a dry cotton swab to carefully clean out this area. Pay special attention to the rubber gasket (seal) that runs around the edge of the opening. If this gasket is pushed in, torn, or has a piece of debris trapped under it, it will prevent a clean release. Gently pry it back into place with a plastic tool (like a guitar pick) if needed.
When All Else Fails: The “Controlled Force” Technique
If you’ve cleaned the area and are sure the lock is disengaged, you may need a bit more force. Do not use screwdrivers or metal tools as levers. Place a clean, soft cloth over the dust cup handle for grip. With one hand holding the release mechanism fully engaged, use your other hand to grasp the dust cup handle and apply a steady, firm pulling force straight down/out. A slight rocking motion—forward and back, not side-to-side—can sometimes break the static seal. Listen for a “pop.” If you hear a crack or snap, stop immediately—you’ve broken a plastic tab. At this point, consult your user manual or Shark customer support. Forcing it further will cause more damage.
The Complete Cleaning and Reassembly Protocol
You’ve successfully removed the dust cup. Now, a quick empty isn’t enough. A proper clean ensures performance and prevents future jams.
Emptying and Washing the Dust Cup
Take the dust cup to your trash can. Hold it over the bin and press the empty button (if it has one) or tap the sides firmly, bottom-up, to dislodge the bulk debris. For fine dust that cakes on, use a dry paper towel or cloth to wipe the interior. Do not rinse with water yet. Once the loose debris is out, take the cup to the sink. Use warm water and a drop of mild dish soap. A soft sponge or cloth is fine. Pay attention to the “cyclone” fins or spiral channels inside—this is where fine dust loves to cling. Use your soft brush to scrub these areas. Rinse thoroughly until the water runs clear. This is critical: the dust cup must be 100% bone dry before reassembly. Any moisture will turn dust into mud, clog the system, and potentially damage the motor. Leave it on a drying rack or towel in a well-ventilated area for at least 24 hours.
Cleaning the Filters and Housing
While the cup dries, clean the filters. The pre-motor foam filter is usually washable. Remove it from its housing (twist or lift), rinse under lukewarm water, squeeze out excess water, and let it air-dry completely for 24 hours—same as the cup. The post-motor pleated filter (often rectangular) is usually not washable; tap it gently over the trash to remove dust. If it’s very dirty, it’s cheaper and more effective to replace it (they are inexpensive). Now, use your dry cloth or brush to clean out the dust cup housing on the vacuum body. Remove all the fine dust and hair from the gasket seat and the air channels. This ensures a perfect seal when you put everything back.
Reassembly: Achieving the Perfect Seal
This step is where mistakes happen. Ensure everything is dry. First, reinsert the clean pre-motor foam filter into its housing on the vacuum body, ensuring it’s seated flat and correctly oriented (there’s usually only one way it fits). Now, take your completely dry dust cup. Align it with the opening on the vacuum. Make sure the tabs on the cup line up with the slots on the body. Push it in firmly and evenly until you hear or feel a distinct click. For latch models, ensure the latch fully engages and locks. For button models, give the cup a gentle downward tug; it should not move at all. A slight gap or a cup that wiggles means it’s not seated properly, and you will have zero suction. Double-check by looking from the side—the gap between the cup and the body should be uniform all the way around.
Establishing a Proactive Maintenance Schedule
Don’t wait for the “empty me” indicator (if your model has one) or for suction to drop. By then, damage to filters and airflow may have already occurred. A scheduled approach is effortless.
The “Weekly Quick Clean” Routine
Once a week, take 60 seconds to remove the dust cup, empty it over the trash, and give it a few good taps. Use the brush tool to sweep out the cyclone fins. Check the pre-motor filter for discoloration; if it’s gray, it’s time for a wash. This 5-minute habit prevents 95% of major clogs and maintains peak performance. If you have pets, shed heavily, or vacuum fine construction dust, do this twice a week.
The “Monthly Deep Clean” Overhaul
Once a month, perform the full procedure described above: completely remove the cup, wash it, wash the foam filter, and thoroughly clean the housing. Inspect the rubber gasket on both the cup and the vacuum body. Look for cracks, tears, or areas that have lost elasticity. A compromised gasket is a silent suction killer. If you see damage, replacement gaskets are available from Shark or third-party sellers on sites like Amazon. This is also a good time to check the brush roll for hair wraps—a tangled brush roll reduces cleaning efficiency and strains the motor.
Knowing When to Replace Parts
Even with perfect care, parts wear out. The pre-motor foam filter should be replaced every 3-6 months with regular use. The post-motor pleated filter typically lasts 6-12 months. The dust cup itself can become scratched or cloudy over time, but it rarely needs replacement unless cracked. The most common failure point is the release latch or button mechanism. If it becomes floppy, doesn’t click, or breaks, you’ll need a replacement part. Shark sells most common parts on their website, or you can search for your model number on appliance parts sites. Replacing a $15 latch is far cheaper than a new vacuum.
Conclusion: A Simple Habit for a Powerful Clean
Removing your Shark vacuum’s dust cup isn’t a chore; it’s a fundamental act of care for a tool that works hard for you. By understanding your specific model’s mechanism, following the safe removal steps, committing to a regular cleaning schedule, and performing a thorough monthly maintenance routine, you unlock the full, lasting potential of your Shark vacuum. You’ll maintain that legendary suction, prevent frustrating clogs and loss of power, extend the life of critical components like the motor and filters, and ensure the air in your home is truly being cleaned, not just recirculated. Bookmark this guide, find your model number, and make that first removal today. A few minutes of simple maintenance translates directly into years of reliable, powerful cleaning performance. Your vacuum—and your floors—will thank you.
Frequently Asked Questions
How often should I remove and empty my Shark vacuum dust cup?
For optimal performance, empty the dust cup after every use, especially if you have pets or children. At a minimum, do a full removal and cleaning (washing if washable) every 2-3 weeks with regular use. Never let it become completely full.
My Shark vacuum’s dust cup is stuck and won’t come off. What should I do?
First, ensure the vacuum is unplugged. Fully depress the release button or move the latch to its maximum open position. Gently tap the sides of the cup with your palm. If it’s still stuck, inspect the seal area for compacted debris and clean it out with a dry brush. Apply steady, firm pressure while holding the release. Never use excessive force or tools, as this can break plastic components.
Can I wash the dust cup and filters with any soap?
Use only mild dish soap and lukewarm water for the dust cup and washable foam filters. Avoid harsh chemicals, bleach, or abrasive cleaners, as they can degrade plastic and rubber seals. Always allow all parts to air-dry completely for at least 24 hours before reassembling.
Why does my Shark vacuum have no suction after I cleaned the dust cup?
>The most common reason is improper resealing. Ensure the dust cup is pushed in firmly until it clicks or the latch locks completely. Check that the rubber gasket is clean, undamaged, and seated properly. Also, verify the pre-motor foam filter is fully dry and correctly installed; a wet filter blocks airflow instantly.
Is the dust cup dishwasher safe?
Shark does not recommend using a dishwasher. The high heat can warp the plastic and damage the seal. Hand washing with mild soap and a soft cloth is the safest method to preserve the cup’s integrity and fit.
My Shark Navigator’s dust cup release button feels loose. Is it broken?
A loose or non-clicking button often indicates an internal plastic tab has worn out or broken. While you can still sometimes remove the cup by holding the button down and pulling, it’s a sign the mechanism is failing. You should order a replacement release button/latch assembly for your specific model number to avoid a future complete failure where the cup becomes permanently attached.