Regularly cleaning your Shark vacuum cleaner is non-negotiable for maintaining its powerful suction and extending its lifespan. This involves a routine of emptying the dust cup after every use, washing filters monthly, and performing a deep clean of the brush roll and hose every few months. Neglecting these tasks leads to clogs, foul odors, and reduced performance. Follow this complete guide to keep your Shark vacuum operating at its best, ensuring a genuinely clean home every time you vacuum.
So, you’ve invested in a Shark vacuum cleaner. You love its powerful suction, its maneuverability, maybe its sleek design. But have you ever stopped to think about what’s happening *inside* that powerful machine as you push it across your floors? It’s not magic—it’s physics, and a lot of moving air. That air, carrying dust, hair, dander, and microscopic debris, has to travel through a precise system. When that system gets clogged with the very stuff it’s supposed to collect, your Shark’s performance drops dramatically. A dirty vacuum doesn’t clean well; it just moves dirt around, can spread allergens, and puts unnecessary strain on the motor, shortening its life. The solution? A consistent, thorough cleaning routine. This isn’t just about dumping the dust cup; it’s about a complete internal and external spa day for your trusty cleaning companion. Let’s walk through, step-by-step, how to properly clean your Shark vacuum cleaner, from the simplest daily habit to the deeper monthly maintenance.
Key Takeaways
- Safety First: Always unplug your Shark vacuum before beginning any cleaning or maintenance to prevent accidental startup and electric shock.
- Empty the Dust Cup After Every Use: This is the single most important habit. A full cup restricts airflow, kills suction, and can cause debris to blow back out.
- Filters Require Scheduled Care: Washable pre-motor filters need a monthly rinse and 24-48 hour air dry. Never reinstall damp filters. HEPA filters often need replacing, not washing.
- Brush Roll Hair Removal is Critical: Hair and string wrap around the brush roll bearings, stifling rotation and burning out the motor. Cut and remove wraps meticulously every 1-2 months.
- Clean the Hose and Attachments: Clogs in the wand or hose are common. Use a long tool or coat hanger to dislodge debris, and wash the crevice tool with soapy water.
- Check and Clean External Vents: Small air vents on the vacuum body and motor housing must be clear of dust and lint to allow proper cooling and prevent overheating.
- Reassemble Correctly and Test: Ensure all components—filters, dust cup, brush roll—are fully seated and locked before plugging in. Test for normal operation and suction before storing.
📑 Table of Contents
- Why Cleaning Your Shark Vacuum is So Important
- Essential Tools and Preparation for the Job
- Deep Cleaning the Dust Cup and Filtration System
- Restoring the Brush Roll: The Hair and String Surgery
- Clearing Clogs in the Hose, Wand, and Attachments
- Exterior and Final Reassembly
- Troubleshooting: When Your Cleaned Shark Still Underperforms
- Establishing a Shark Vacuum Cleaning Schedule
Why Cleaning Your Shark Vacuum is So Important
Before we dive into the “how,” let’s establish the “why.” Understanding the consequences of neglect makes the task feel less like a chore and more like a critical investment.
The Domino Effect of a Clogged System
Your Shark vacuum’s power comes from creating a strong airflow. The motor sucks air in through the brush roll/nozzle, through the hose, into the dust cup or bag, then through the filters, and finally out the exhaust. Imagine trying to breathe through a straw packed with mashed potatoes. That’s your vacuum with a clogged hose or a full dust cup. The motor works harder, generates more heat, and eventually loses efficiency or fails. A clean system means effortless suction and a motor that lasts for years.
Hygiene and Odor Prevention
That dust cup and those filters are a petri dish for odors. Captured pet hair, food crumbs, and wet spills (if you’ve accidentally picked up moisture) will begin to decompose, creating that classic “stinky vacuum” smell. This smell can be blown back into your home during use, defeating the purpose of cleaning entirely. Regular, thorough cleaning eliminates this food source for bacteria and mold.
Protecting Your Investment
A Shark vacuum is a significant purchase. Proactive maintenance is the cheapest insurance policy you can buy. Replacing a burned-out motor or a entire brush roll assembly because of neglect costs a fortune compared to the 15 minutes it takes to clean the brush roll bearings every month.
Essential Tools and Preparation for the Job
You don’t need a professional workshop. A clean, well-lit area (like the garage or a utility room) and a few common household items are all you need.
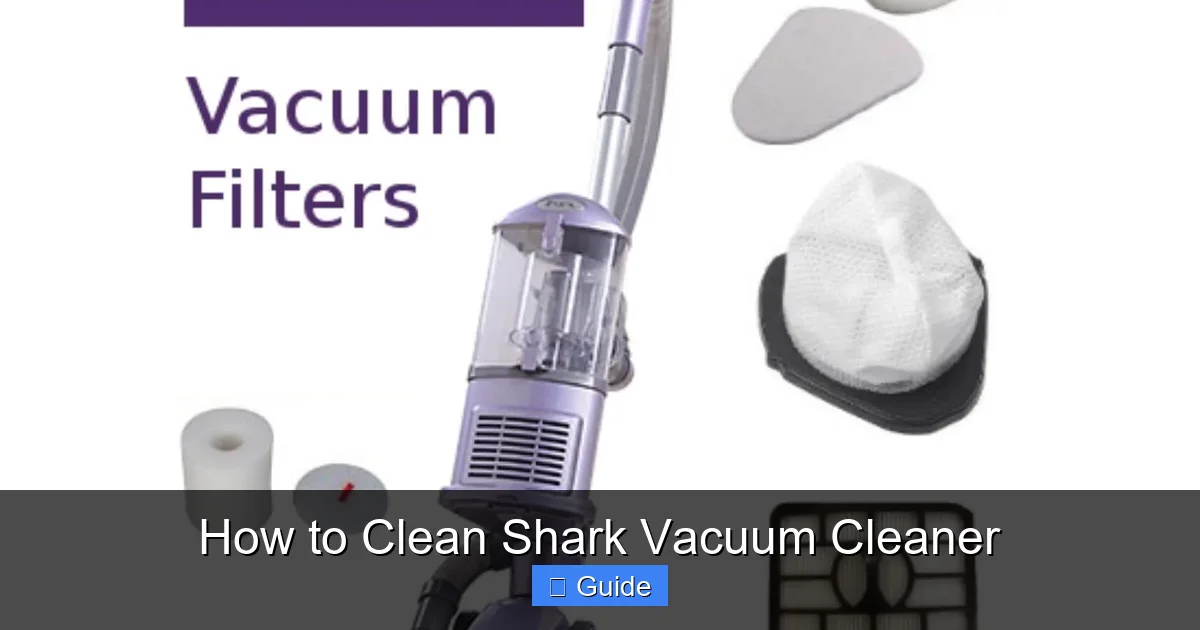
Visual guide about How to Clean Shark Vacuum Cleaner
Image source: cleanerstalk.com
Gather Your Supplies
- Soft, lint-free cloths or microfiber towels: For wiping down exteriors and internal components.
- Mild dish soap: For washing the dust cup, filters (if washable), and attachments. Avoid harsh chemicals or bleach.
- Old toothbrush or small, soft-bristled brush: Perfect for scrubbing filter housings, brush roll niches, and vent grilles.
- Screwdriver (often Phillips head): Needed to remove the brush roll cover on many Shark models. Check your specific model’s manual if unsure.
- Scissors or wire cutters: The #1 tool for cutting hair and string from the brush roll. Be careful!
- A long, flexible tool: A straightened wire coat hanger, a bottle brush, or a specialized vacuum hose cleaning brush to dislodge clogs.
- Gloves: Optional, but recommended if dealing with particularly dirty or damp debris.
The Golden Rule: Unplug and Disassemble
This cannot be stressed enough. Always ensure your Shark vacuum is completely powered off and unplugged from the wall outlet before you touch any internal parts. Disassemble the vacuum as much as you can for the deep clean. Typically, this means: detaching the hose/wand, removing the dust cup, taking out the filters, and accessing the brush roll. Consult your specific model’s user manual for exact disassembly instructions—they vary between Shark Navigator, Rotator, Vertex, and stick vac models.
Deep Cleaning the Dust Cup and Filtration System
This is the heart of your Shark’s cleaning system. The dust cup (or bag, on some models) and filters are where the fine dust and allergens are trapped. Keeping them clean is paramount for suction and air quality.
Visual guide about How to Clean Shark Vacuum Cleaner
Image source: wikihow.com
Step 1: Emptying the Dust Cup Properly
Even if it looks empty, give it a tap. Hold the dust cup over a trash can and press the release button or lever. Do not just shake it out. Use your hand or a tool to scrape out any fine dust that cakes onto the interior walls and the mesh filter screen inside the cup. For models with a “cyclonic” design, ensure the spiral chamber is clear. Rinse the dust cup with lukewarm water. Use your brush to scrub any stubborn residue. Never use hot water, as it can warp plastic parts. Shake out excess water and let it air dry completely for at least 24 hours. Never reinstall a damp dust cup or filters. Moisture in the system will destroy the motor and grow mold.
Step 2: Washing the Filters
Locate your filters. Most Sharks have at least two: a foam pre-motor filter (near the motor) and a pleated felt or HEPA post-motor filter (for exhaust air). Refer to your manual to identify which filters are washable. Generally, the foam filter is washable. The HEPA filter is often not washable and must be replaced every 6-12 months (or as indicated by an indicator light).
- Washable Foam Filter: Rinse it under cool, running water. Gently squeeze it—do not wring or twist, as this can tear the foam. If very dirty, use a drop of mild dish soap. Rinse until the water runs clear.
- Washable Felt/Pleated Filter: Some models have these. Rinse gently under low-pressure water from the *clean side* outward to push dirt out, not deeper in. Again, no wringing.
Place all washed filters on a clean towel in a well-ventilated area, away from direct sunlight or heat. They must be 100% bone dry before reinstalling. This can take 24-48 hours. Using a hair dryer on a cool setting can speed this up, but be cautious of heat.
Step 3: Cleaning the Filter Housings
While the filters dry, use your damp cloth and toothbrush to clean out the filter housings inside the vacuum body. You’ll be amazed at the fine dust that accumulates here. Wipe down the plastic housing and any mesh screens. This ensures clean air passes *through* your clean filters.
Restoring the Brush Roll: The Hair and String Surgery
A jammed brush roll is the #1 cause of poor cleaning performance on carpets. It spins slower or not at all, and the vacuum struggles. This is almost always due to hair and carpet string binding the bearings.
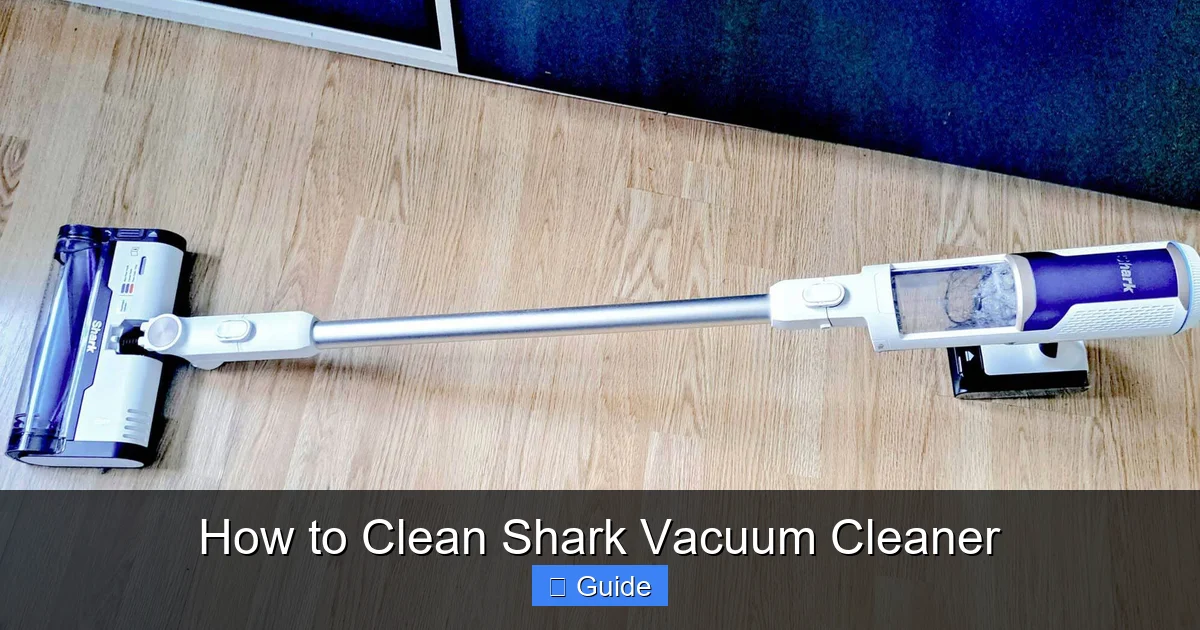
Visual guide about How to Clean Shark Vacuum Cleaner
Image source: cdn.mos.cms.futurecdn.net
Accessing the Brush Roll
Lay the vacuum on its side. On most upright Shark models, you’ll find a rectangular plate on the bottom of the nozzle held by 4-6 screws or quick-release clips. Remove this plate to expose the brush roll. On stick vacs, it’s often easier to access.
The Cutting Technique
You’ll see hair, string, and maybe even carpet fibers tightly wound around the brush roll, especially near the ends where the bearings are. Do not try to pull it off. This can damage the bristles. Instead, take your scissors and carefully cut the hair/string all the way around the circumference. It will fall into two pieces that you can easily lift away. Use the toothbrush to clean out the bearing housings at each end. Spin the brush roll by hand—it should rotate freely and smoothly. If it’s gritty or stiff, the bearings may be damaged and the brush roll needs replacing.
Cleaning the Brush Roll Itself
With the hair removed, wipe down the plastic body of the brush roll with a damp cloth. Check the bristles. If they are melted, bent, or missing, it’s time for a replacement brush roll. A damaged brush roll won’t agitate carpet fibers effectively.
Clearing Clogs in the Hose, Wand, and Attachments
Loss of suction often means a blockage in the air pathway. This is usually in the hose or wand, especially if you’ve vacuumed up small hard objects or large amounts of paper.
Finding the Clog
Detach the hose from the vacuum body and from the wand. Look through both ends. Use a strong light. You might see the obstruction. If not, try to push a long, flexible tool (like a coat hanger with a small hook on the end) gently through the hose. Be careful not to puncture it. Alternatively, disconnect the wand sections and check each one.
Clearing the Path
Once you locate the clog, use your tool to hook and pull it out, or push it through from the other end. For stubborn clogs, you can try dislodging it by dropping a small, heavy object (like a marble or nut) through the hose and tapping it along the length. For the crevice tool and other attachments, simply wash them in warm, soapy water. Use a bottle brush to scrub the inside of long, narrow tools. Rinse thoroughly and let dry.
Checking the Intake and Exhaust
Don’t forget the openings! Look into the vacuum’s main intake (where the hose plugs in) and the exhaust vents (usually on the back or top). Use your vacuum’s crevice tool in reverse (blowing mode, if your model supports it) or a can of compressed air to blow out any dust bunnies clogging these ports. Wipe the external vent grilles with a damp cloth.
Exterior and Final Reassembly
The outside of your Shark gets just as dirty as the inside, with dust, floor debris, and fingerprints. A clean exterior isn’t just for looks; it prevents dirt from being re-introduced to your clean floors.
Wiping Down the Body
Dampen a microfiber cloth with a solution of water and a tiny drop of dish soap. Wipe down the entire vacuum body, handle, and power head. Pay special attention to the wheels, which track dirt. Use a toothbrush to scrub the wheel wells and any textured grips. Avoid getting moisture into any openings, especially electrical ports and the motor fan vents. Wipe with a clean, dry cloth immediately after.
Reassembly: The Critical Final Steps
This is where mistakes happen. Before you put anything back:
- Confirm Everything is Dry: Dust cup, filters, brush roll, washed attachments. No exceptions.
- Check Filter Orientation: Filters have a specific direction (often labeled “This Side Up” or with an arrow for airflow). Installing them backward blocks all suction.
- Seat the Dust Cup: Ensure it clicks securely into its housing. An improper seal means all the dust will blow out the back.
- Lock the Brush Roll Cover: Make sure the plate is screwed or clipped down firmly. A loose cover can cause the brush roll to jam or fall off.
- Attach the Hose Securely: Push the hose onto the intake port until you hear/feel a click. A loose hose connection is a major suction leak.
The Test Run
Before you return the vacuum to its storage spot, plug it in and do a quick test. Turn it on. Listen for the normal motor sound—no high-pitched squeals or grinding. Feel the suction at the end of the wand. It should be strong. Run it on a hard floor for a few seconds and check that debris is being sucked into the cup. If suction is weak, re-check your filter installation and look for any missed clogs.
Troubleshooting: When Your Cleaned Shark Still Underperforms
You’ve done all the steps, but something’s still off. Here are the next things to check.
Persistent Bad Odor After Cleaning
If you’ve washed everything and it still smells, the odor may be trapped in the motor fan blades or the inner walls of the hose. Try running the vacuum with the dust cup removed (in a well-ventilated area like a garage) for a minute to let it “blow out” any lingering smells. If the smell is chemical or burning, stop immediately and contact Shark customer service—this could indicate an electrical issue.
Suction is Strong on Floor, Weak on Carpet
This usually points to an issue with the brush roll. Is it spinning? If not, the drive belt (on some belt-driven models) may be broken or slipped, or the brush roll motor (on some Shark models) may be faulty. If it’s spinning but slow, the bearings are likely gunked up or worn from hair wraps. Re-cleaning the brush roll bearings or replacing the brush roll assembly is the fix.
Hissing or Air Leak Sound
A high-pitched hiss means air is escaping somewhere. Check: 1) Is the dust cup fully seated and the lid locked? 2) Are all filters installed correctly and undamaged? 3) Is the hose connection tight at both ends? 4) Is there a crack in the hose or wand? A piece of tape can be a temporary fix for a small crack.
Establishing a Shark Vacuum Cleaning Schedule
Consistency is key. Here’s a simple, effective schedule based on usage:
- After Every Use: Empty the dust cup completely. Tap it out. Wipe the rim and the area where it sits in the vacuum with a dry cloth.
- Weekly: Check the brush roll for hair wraps (especially if you have pets or long hair). A quick visual and finger-sweep can prevent major tangles. Wipe the exterior and wheels.
- Monthly (or every 3-5 uses for heavy pet hair): Perform the full filter wash (if washable). Do a thorough brush roll hair removal and bearing clean. Check and clear any small clogs in the wand crevice tool.
- Every 3-6 Months: Do a complete deep clean as outlined in this guide. Inspect the hose for damage. Check the condition of the drive belt (if applicable). Replace non-washable HEPA filters as per the manual’s recommendation or if the filter is visibly dark and clogged.
- Annually: Consider a professional inspection if you use your vacuum heavily, or if you notice new noises, vibrations, or significant power loss despite all maintenance.
By integrating these habits, your Shark vacuum will remain a powerful, hygienic, and reliable workhorse for years to come, saving you money on replacements and ensuring every vacuuming session results in a truly clean home.
Frequently Asked Questions
Can I wash the HEPA filter in my Shark vacuum?
No, most Shark HEPA filters are not washable and are designed to be replaced. Washing them will damage the delicate media and ruin their filtration capability. Check your manual to confirm your filter type. Only foam pre-motor filters are typically washable.
My Shark vacuum smells bad even after I cleaned the dust cup and washed the filters. What else could it be?
The smell may be trapped in the motor fan or deep inside the hose. Try running the vacuum without the dust cup attached (in a garage or outside) for 30-60 seconds to blow out any lingering odor. If the smell is a persistent chemical or burning odor, stop using it and contact Shark support, as this could indicate an electrical fault.
How do I know if my brush roll bearings are damaged and need replacing?
After removing all hair, try to spin the brush roll by hand. It should rotate smoothly and quietly. If it feels gritty, makes a grinding noise, or has noticeable play/wobble, the bearings are worn out. A brush roll with bad bearings will also cause the vacuum to feel harder to push and may make a squealing sound. The entire brush roll assembly is usually replaced as a unit.
My vacuum has good suction on hard floors but none on carpet. Is it the brush roll?
Very likely, yes. On carpet mode, the brush roll must be spinning to agitate the carpet and lift debris. If it’s not spinning (due to a hair jam, broken drive belt, or failed brush roll motor), you’ll have almost no cleaning performance on carpet. First, remove the brush roll and clean it thoroughly. If it still doesn’t spin freely or doesn’t spin when reinstalled, check the drive belt (if your model has one) or consider a brush roll replacement.
Can I use any soap to clean the dust cup and washable filters?
Use only a mild, clear dish soap like Dawn or Ivory. Avoid detergents with lotions, moisturizers, or heavy fragrances, as these can leave a residue that clogs the filter media. A tiny drop is sufficient. Rinse extremely thoroughly until the water runs completely clear to remove all soap residue.
What’s the most common mistake people make when cleaning their Shark vacuum?
Reinstalling damp components. Whether it’s a washed filter or a rinsed dust cup, any moisture left inside the vacuum system will be sucked into the motor, causing it to overheat, rust internal parts, and grow mold. Always allow a full 24-48 hours of air drying in a warm, dry place before reassembly. Patience is critical.