Keeping your Shark Ion vacuum clean is non-negotiable for maintaining powerful suction and extending its lifespan. This guide provides a detailed, model-agnostic breakdown of cleaning every component—from the dustbin and filters to the brush roll and hose. You’ll learn the exact tools needed, safe washing techniques, and crucial maintenance schedules to prevent clogs and odors. Following these simple steps ensures your cordless stick vacuum performs like new for years.
Key Takeaways
- Disconnect Power First: Always remove the battery and unplug the vacuum before any cleaning or disassembly for safety.
- Clean After Every Use: Tap out the dustbin and wipe the exterior after each vacuuming session to prevent debris buildup.
- Wash Filters Monthly: The pre-motor foam and felt filters must be hand-washed with water only and dried completely for 24+ hours.
- Inspect & Clean Brush Roll: Hair and fibers wrap around the brush roll weekly; use scissors to cut them away carefully.
- Check the Hose & Crevices: A bent paperclip or thin brush is essential for clearing blockages in the wand and suction path.
- Avoid Harsh Chemicals: Never use soap, detergents, or submerge electrical components; water and a soft cloth are sufficient.
- Reassemble Correctly: Ensure filters are bone-dry and all parts click securely into place before the next use to maintain seal integrity.
📑 Table of Contents
- Why Cleaning Your Shark Ion Vacuum is Critical
- Essential Tools & Safety First
- Deep Clean the Dustbin and Cyclone System
- Filter Maintenance: The Heart of Airflow
- Cleaning the Brush Roll and Brush Housing
- Unclogging the Hose, Wand, and Suction Path
- Exterior Care, Sensors, and Final Reassembly
- Establishing a Maintenance Schedule
- Conclusion
Why Cleaning Your Shark Ion Vacuum is Critical
You invested in a Shark Ion vacuum for its powerful, cordless convenience. But that powerful suction doesn’t come from a magic motor alone—it’s a sealed system where every component must work in perfect harmony. When the dustbin overflows, filters get clogged with fine dust, or the brush roll is matted with hair, you create a bottleneck. This forces the motor to work harder, drastically reducing suction power, shortening runtime, and generating unpleasant odors. Regular, thorough cleaning isn’t just about hygiene; it’s about protecting your investment. A well-maintained Shark Ion can deliver consistent performance for 5+ years, while a neglected one can feel like a completely different, weak machine in under a year. Think of it like changing the oil in your car—it’s simple, routine maintenance that prevents catastrophic (and expensive) failure.
Essential Tools & Safety First
Before you touch a single screw, gather your supplies. Having everything at hand makes the process smooth and prevents the temptation to skip steps. You’ll need: a Phillips-head screwdriver (some models), a soft-bristled brush (an old toothbrush works perfectly), a microfiber cloth, a sink or large basin, a straightened paperclip or thin plastic pick, and a pair of scissors. Most importantly, always remove the battery from the vacuum. This is the single most important safety rule. The Shark Ion’s motorized brush roll can start unexpectedly if power is connected while you’re probing it with tools. Place the battery in a safe, dry spot away from your work area. Work in a well-lit space, preferably over a trash can or large sheet of newspaper to catch dislodged debris.

Visual guide about How to Clean Shark Ion Vacuum
Image source: sharkvacuum.blog
Understanding Your Shark Ion Model
Shark has several Ion models (I F250, IZ400, etc.), but the core cleaning principles are identical. The main variations are in the dustbin design (some have a top-empty vs. front-empty) and filter configuration (some have a foam pre-motor filter and a felt post-motor filter, others combine them). Always consult your specific user manual for part locations and any model-specific disassembly instructions. The manual is your best friend for identifying parts like the “cyclone chamber” or “seal ring” that are critical to clean.
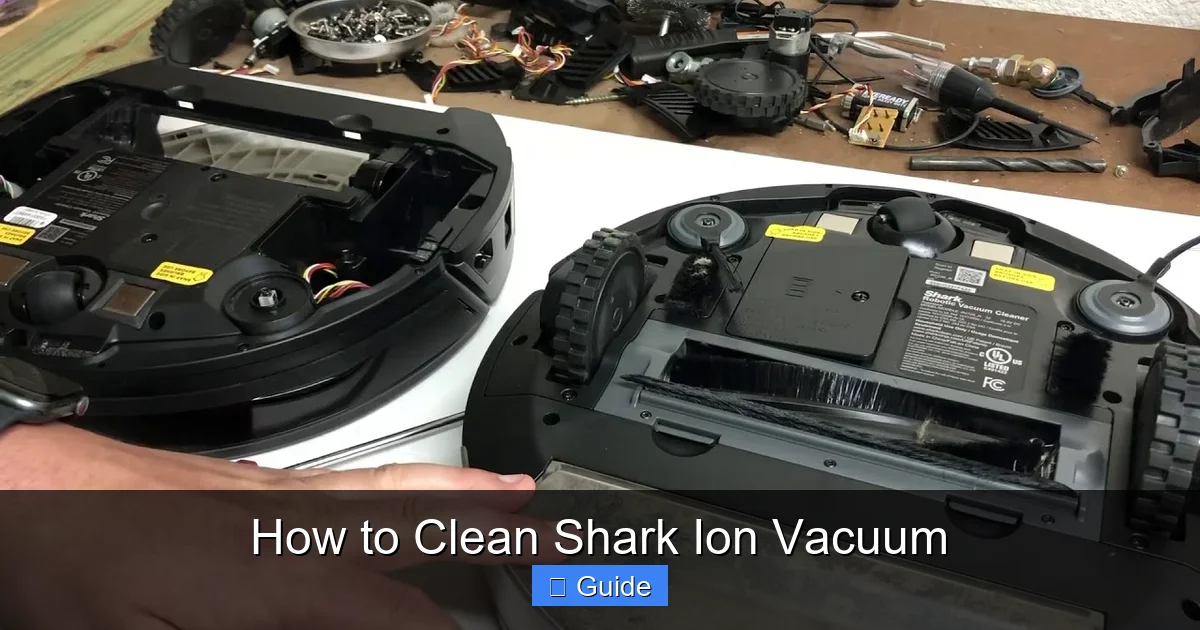
Deep Clean the Dustbin and Cyclone System
The dustbin is your first line of defense and the most frequently soiled part. A clogged bin means no airflow, period. Start by pressing the release button and detaching the dustbin from the vacuum body. Take it to a trash can and give it a firm tap over the can to dislodge large debris. For finer dust that cakes inside, you’ll need water.

Visual guide about How to Clean Shark Ion Vacuum
Image source: thefreebieguy.com
Step-by-Step Dustbin Washing
First, remove the filter(s) from inside the dustbin. They are not designed to get wet during a routine bin clean. Take the dustbin to a sink. Use your soft brush and warm water to scrub the interior, paying special attention to the cone-shaped cyclone chamber where dust spins. This area develops a static charge that clings to fine dust. A damp microfiber cloth wrapped around the brush handle can help reach deep inside. Rinse thoroughly until water runs clear. This is crucial: Do not use soap or detergent, as residues can attract more dust and create odors. Shake out excess water and set the bin upright in a well-ventilated area to air-dry completely for at least 24 hours. Never reassemble with a damp bin.
Filter Maintenance: The Heart of Airflow
Filters are the lungs of your Shark Ion. They trap the finest particles that escape the dustbin. There are typically two: a foam pre-motor filter (protects the motor from dust) and a felt post-motor filter (catches the smallest particles for clean exhaust). These filters clog silently and are the #1 cause of lost suction. They require monthly washing if you use your vacuum regularly.
Visual guide about How to Clean Shark Ion Vacuum
Image source: i.ytimg.com
How to Wash Shark Ion Filters Correctly
Locate the filters. The pre-motor foam filter is usually inside the dustbin or just behind it. The post-motor felt filter is often on the back or side of the vacuum body. Remove them. Rinse them under cool running water. Gently squeeze and massage the foam filter to push out dirty water. For the felt filter, be gentler—it can tear if handled roughly. Do not wring either filter. Shake off excess water. Place them on a clean towel in a warm, dry spot with good airflow. They must be 100% bone-dry before reinsertion. This can take 24-48 hours. Using a hair dryer on a cool setting can speed this up, but never use heat. A damp filter will restrict airflow and can damage the motor. Never put filters in the washing machine or dishwasher.
Filter Replacement Schedule
Washing extends life, but filters degrade. The foam filter lasts about 6-12 months with monthly washes. The felt filter lasts 9-12 months. If a filter is torn, discolored, or doesn’t spring back after washing, replace it. Using old, damaged filters allows dust to reach the motor, causing premature wear. Buy genuine Shark replacement filters for your exact model number to ensure proper fit and filtration.
Cleaning the Brush Roll and Brush Housing
The motorized brush roll is where action happens, and it’s a magnet for hair, string, and carpet fibers. If left to wind around the bearings, it will cause the brush to stall, create burning smells, and eventually burn out the motor. Inspect it every 2-3 uses.
Removing and De-hairing the Brush Roll
Lay the vacuum on its side. On the underside of the brush roll housing, you’ll find a release tab or a screw. Press the tab or remove the screw, and the brush roll assembly will drop out. You’ll likely see a thick mat of hair wrapped around the bristles and axles. Take your scissors and carefully cut through the hair lengthwise along the brush roll. Don’t pull; just cut and then pull the severed sections away. Use the soft brush to clean out the housing, removing all lint and debris from the bearings and the rubber seals. Check the rubber seals for tears; if damaged, they need replacement to maintain suction. Reinstall the brush roll, ensuring it spins freely before securing it.
Unclogging the Hose, Wand, and Suction Path
Loss of suction is often a simple clog somewhere in the air pathway. The narrow wand and hose are common culprits. Start at the brush roll housing—look inside the intake hole. Use your paperclip to gently dislodge any large debris. Then, detach the wand from the vacuum body and from the dustbin. Look through it; you should see clear daylight. If not, insert the straightened paperclip carefully to hook and pull out the obstruction. For stubborn clogs in the flexible hose, disconnect it from both ends. Push a long, flexible brush (like a bottle brush) through it from one end to the other. Never use a rigid object that could puncture the hose. Reconnect all parts firmly; a loose connection creates an air leak that kills suction.
Exterior Care, Sensors, and Final Reassembly
The exterior gets dirty from being dragged across floors and set down. Wipe the entire vacuum body, handle, and battery contacts with a dry or slightly damp microfiber cloth. Avoid spraying liquid directly on the vacuum. Pay special attention to the charging contacts on both the vacuum body and the battery. Use a cotton swab dipped in a tiny bit of isopropyl alcohol to clean oxidation, then dry immediately. Also, locate the floor sensing roller (the small free-spinning wheel under the front). Gently brush away any hair wrapped around its axle; a stuck sensor roller can cause the vacuum to not move properly on hard floors.
Final Checks Before Use
Once all parts are completely dry, reassemble. Click the dustbin securely onto the body—you should hear a firm snap. Ensure the filters are seated correctly in their housings. Reinsert the battery until it clicks. Give the vacuum a quick, dry run without the brush roll (if your model allows) to blow out any residual dust in the motor housing. Then, do a full test on a small area. Listen for normal motor sounds and feel for strong suction at the wand tip. If suction is still weak, double-check that all filters are dry and all seals are engaged.
Establishing a Maintenance Schedule
Consistency is easier than doing a massive overhaul. Here’s a simple calendar: After Every Use: Tap out the dustbin, wipe the exterior and charging ports. Weekly: Check and clean the brush roll. Monthly: Wash the filters (if used regularly). Every 6 Months: Deep clean the entire dustbin/cyclone system, check hose for clogs, inspect brush roll bristles for wear, and clean all sensors. Annually: Replace filters and inspect the battery for any swelling or damage. This routine takes less than 30 minutes a month but saves you from hours of frustration with a weak vacuum and prevents costly repairs.
Conclusion
Cleaning your Shark Ion vacuum is not a chore; it’s a fundamental part of ownership that directly impacts its performance and your satisfaction. By dedicating a few minutes to these straightforward steps—emptying the bin, washing the filters, de-hairing the brush roll, and clearing the airway—you ensure your vacuum remains a powerful, reliable tool. Remember, a clean vacuum is an efficient vacuum. It picks up more dirt in less time, runs longer on a charge, and won’t fill your home with the smell of dusty, overheating motors. Make this guide your maintenance bible, and your Shark Ion will reward you with spotless floors for years to come. A well-cared-for machine is a happy machine, and a happy machine makes for a very happy homeowner.
Frequently Asked Questions
How often should I clean my Shark Ion vacuum?
You should perform light cleaning (empty dustbin, wipe exterior) after every use. Deep cleaning the filters should be done monthly with regular use. The brush roll requires inspection and hair removal every 2-3 uses. A full system deep clean is recommended every 6 months.
Can I wash the Shark Ion filters with soap?
No, you should never use soap, detergent, or cleaning chemicals on Shark Ion filters. Simply rinse them under cool running water, gently squeeze out excess water, and allow them to air-dry completely for 24-48 hours. Soap residues can damage the filter media and create odors.
My Shark Ion has no suction but the dustbin is empty. What’s wrong?
This is almost always a clog or a filter issue. First, ensure all filters are completely dry and properly installed. Then, check the hose, wand, and brush roll housing for blockages using a paperclip or thin brush. A severely clogged cyclone chamber inside the dustbin can also cause this.
How do I remove hair from the Shark Ion brush roll?
Lay the vacuum on its side and release the brush roll assembly. Use a pair of scissors to cut the hair lengthwise along the roll, then pull the cut sections away. Never try to pull hair off by the roots, as this can damage the bristles. Clean the housing and bearings with a dry brush afterward.
When should I replace the filters in my Shark Ion?
Even with monthly washing, filters degrade. Replace the foam pre-motor filter every 6-12 months and the felt post-motor filter every 9-12 months. If a filter is torn, discolored, or doesn’t regain its shape after washing, replace it immediately to protect the motor.
My Shark Ion smells bad after use. How do I fix this?
A bad odor usually means debris is sitting damp in the dustbin or filters. Ensure you empty the bin after every use and let it air-dry completely before reattaching. Wash the filters immediately and ensure they are 100% dry. You can also wipe the inside of the dustbin with a cloth dampened with a 50/50 water and white vinegar solution (rinse well with water afterward) to disinfect and deodorize.