Disassembling your Shark Rotator vacuum is a straightforward process that empowers you to perform deep cleanings, troubleshoot clogs, and replace worn parts, saving you money on service calls. By following a systematic, model-agnostic approach—always starting with unplugging the machine and organizing your screws—you can safely take apart the brush roll, hose, wand, and main body. This guide provides detailed, model-neutral instructions to help you confidently maintain your vacuum’s performance and extend its lifespan.
So, your Shark Rotator vacuum isn’t sucking like it used to. Maybe it smells funky, the brush roll has stopped spinning, or you’re just tired of that lingering layer of dust on “clean” floors. Before you resign yourself to an expensive service call or the landfill, there’s a powerful skill you can master: disassembly. Taking your Shark Rotator apart isn’t just for technicians. It’s a straightforward, empowering process that lets you perform a deep clean the factory never intended you to do, clear stubborn clogs, and replace inexpensive wear-and-tear parts like belts and brush rolls. This comprehensive, model-neutral guide will walk you through every step, turning what seems like a complex machine into a simple collection of understandable parts. We’ll focus on safety, organization, and the most common disassembly points across the entire Rotator family.
Think of your vacuum not as a sealed black box, but as a modular system. The power travels from the wall plug, through the cord, into the main body, down the wand, and finally to the brush roll. Debris travels the opposite path, from floor to brush roll, up the hose, through the wand, and into the dust cup. By understanding this path, you know exactly where to look when performance drops. The key is patience and the right preparation. Grab a Phillips-head screwdriver, a flat-head screwdriver, some containers for screws, and maybe a camera. Let’s get started on giving your Shark Rotator the thorough internal spa day it deserves.
Key Takeaways
- Safety First: Always unplug the vacuum and work on a clean, flat surface to prevent electrical hazards and lost parts.
- Organize Methodically: Use a segmented container or labeled bag for screws and small components from each section you disassemble.
- Model Variations Exist: While this guide covers core principles for all Rotator models (NV350, NV352, NV356, etc.), consult your specific user manual for unique clip or screw locations.
- Focus on Common Clog Points: The brush roll housing, hose connectors, and wand joints are primary areas for debris buildup and require regular disassembly for cleaning.
- Cleaning is the Primary Goal: Disassembly is most often needed to remove hair, fibers, and dirt from mechanical parts, not for complex internal motor repairs.
- Document Your Process: Taking smartphone photos at each stage is the best way to ensure correct reassembly, especially for wiring connectors and clip placements.
- Know When to Stop: If you encounter resistance or cannot identify a component, stop. Forcing parts can cause irreversible damage, and motor/electrical work is best left to professionals.
📑 Table of Contents
- Essential Preparation and Universal Safety Precautions
- Disassembling the Upper Body and Dust Cup System
- Disassembling the Hose, Wand, and Extension Tube
- Disassembling the Brush Roll Housing and Head
- Disassembling the Main Body and Motor Compartment
- Reassembly: The Reverse Process with Precision
- Establishing a Proactive Maintenance Schedule
- Conclusion: Knowledge is the Best Tool
Essential Preparation and Universal Safety Precautions
Rushing into disassembly is the number one cause of frustration and damage. These first five minutes of prep will save you hours of confusion later.
The Golden Rule: Unplug and Secure
This cannot be stressed enough. Always, always unplug your Shark Rotator from the electrical outlet before touching a single screw. The vacuum contains capacitors and motors that can hold a charge, and you risk electric shock or short-circuiting the electronics. Once unplugged, lay the vacuum on its side on a large towel or sheet on the floor. This protects your finishes and keeps small parts from rolling under furniture. Ensure the area is well-lit.
Gather Your Toolkit
You don’t need a mechanic’s garage. For 95% of Shark Rotator disassembly, you need:
- Phillips-head screwdriver: The #2 size is most common for the external body screws.
- Small flat-head screwdriver: Perfect for prying apart plastic clips without marring the surface, and for releasing hose locks.
- Needle-nose pliers: Incredibly useful for pulling out stubborn hair from brush roll bearings and gripping small pins.
- Segmented container or several small bowls: Label them with masking tape: “Body,” “Wand,” “Brush Roll Housing.” Never mix screws from different sections.
- Smartphone or camera: Take a wide-angle photo of the fully assembled vacuum from multiple angles. Then, take a close-up photo before you remove each screw or disconnect any clip. This visual reference is your best friend during reassembly.
Understand Your Specific Model
While the core architecture of all Shark Rotators (the upright models with the swivel steering and detachable canister) is nearly identical, there are minor differences. The NV350, NV351, NV352, NV356, and newer AZ variants all follow the same disassembly logic. Your best secondary reference is the physical user manual that came with the vacuum. If you’ve lost it, search online for “Shark Rotator [Your Model Number] manual PDF.” The exploded diagrams in the manual are gold. The model number is on a silver sticker on the back or bottom of the main body.
Disassembling the Upper Body and Dust Cup System
This is your starting point and often the most rewarding, as this is where the majority of dust and debris accumulates in hidden crevices.
Visual guide about How to Disassemble Shark Rotator Vacuum
Image source: sharkvacuum.blog
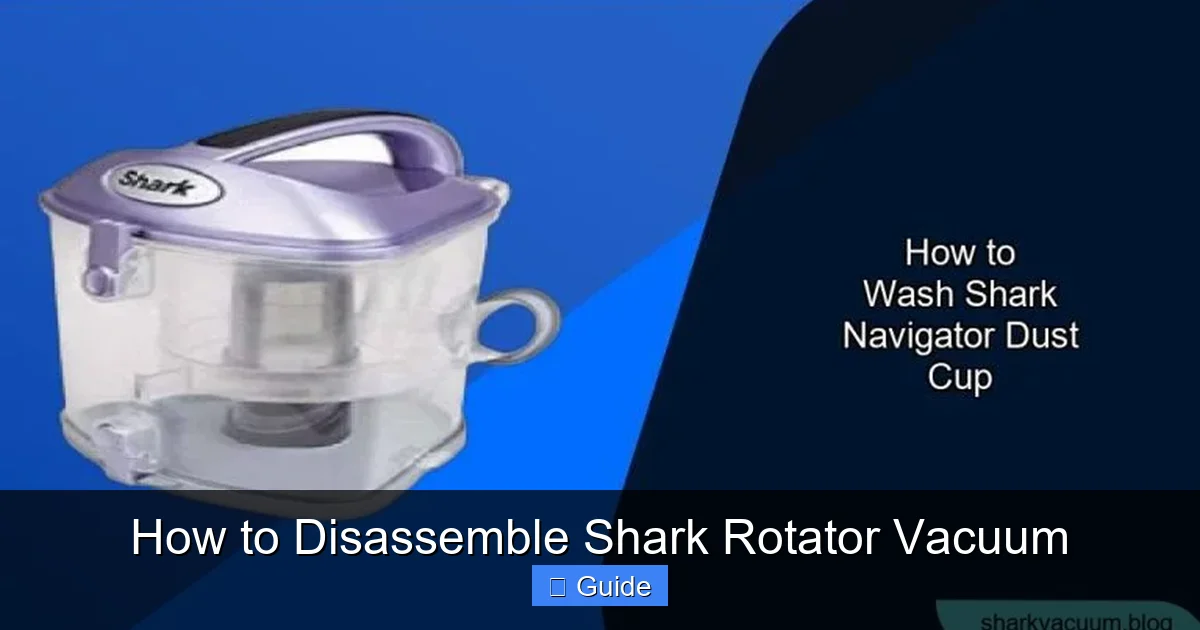
Step 1: Remove the Dust Cup and Exhaust Filter
Locate the large, usually translucent, dust cup release button on the top or back of the main body. Press it and lift the dust cup straight up and off. Empty its contents into the trash. Now, look inside the cavity where the cup sits. You’ll see a secondary filter—often a black, pleated foam or mesh filter. This exhaust filter catches fine dust that escapes the primary cup. Gently pull it out. This filter is washable (let it dry completely for 24 hours before reinserting). Set it aside to clean later.
Step 2: Access the Interior Air Path
With the dust cup off, you have a clear view into the “cyclone” chamber and the hose connector. This is a prime spot for fine dust to cake onto the plastic walls. Use a damp microfiber cloth to wipe this entire area thoroughly. You’ll likely see a rubber one-way valve (a small flap) in the hose connector. Check it for tears or blockages. This valve prevents dirt from blowing back out. If it’s damaged, it’s a cheap replacement part.
Step 3: Detach the Upper Handle and Cord Wrap
The handle and power cord are attached to the rear of the main body. There are typically two screws securing the upper rear plastic housing. Locate them—they may be under a small rubber plug or sticker. Remove these screws. Now, gently pry the plastic housing piece away from the main body. You’ll see clips along the seam; work your flat-head screwdriver around them carefully. Once this rear panel is off, you’ll see the cord strain relief and the wiring that runs down into the wand interface. Do not disconnect these wires unless you are replacing the entire handle assembly. Your goal here is usually just to clean the interior of this rear housing, which collects a surprising amount of dust. Wipe it clean. If you need to fully separate the handle, you must disconnect the wire harness connector (usually a black plastic clip you press to release). Take a photo before disconnecting any wires.
Disassembling the Hose, Wand, and Extension Tube
The suction pathway is a series of connected tubes. Blockages happen here, and hair wraps around the wand couplings.
Visual guide about How to Disassemble Shark Rotator Vacuum
Image source: sharkvacuum.blog
Step 1: Detach the Hose from the Vacuum
At the back of the main body, where the dust cup was, is the hose connector. It’s secured by a rotating collar or a push-button lock. For the collar type, twist it counter-clockwise to unlock and pull the hose straight out. For the push-button type, press the button and pull. With the hose detached, inspect the connector on the vacuum and the hose end. Use a flashlight. You’ll often find a thick mat of hair, carpet fibers, or a small toy clogging the very end. Use needle-nose pliers to meticulously pull every strand out. This simple clean can restore 30% of lost suction.
Step 2: Separate the Wand Sections
Your Rotator likely has a two-part wand: an upper section that connects to the handle and a lower section that connects to the brush roll head. The connection is a simple push-and-twist lock. To separate, hold the lower section firmly, push the release button (if present), and twist the upper section counter-clockwise while pulling straight out. If there’s no button, just twist and pull. Once separated, look down into both ends. You’ll see the same problem: hair and gunk packed around the inner ridges. Clean these out thoroughly. This is also where you might find a small, clear plastic “straw” or debris catcher—remove and clean it.
Step 3: Disassemble the Extension Tube (if applicable)
Some models have a separate, shorter metal or plastic extension tube that screws onto the lower wand. Unscrew it. Clean its threads and interior. Pay special attention to the rubber gasket seals at each connection point. A dried-out, cracked, or missing gasket will cause major air leaks and kill suction. If a gasket is damaged, order a replacement (they are inexpensive and model-specific).
Disassembling the Brush Roll Housing and Head
This is the heart of the cleaning action and the most common source of problems: a jammed or hair-wrapped brush roll. Complete disassembly here is crucial.
Visual guide about How to Disassemble Shark Rotator Vacuum
Image source: sharkvacuum.blog
Step 1: Remove the Brush Roll Head from the Wand
Lay the vacuum flat. At the end of your lower wand, you’ll find the brush roll head. It attaches with a simple quarter-turn lock. Align the arrows (if present) or push the head onto the wand, then twist it clockwise until it locks. To remove, twist it counter-clockwise and pull straight off.
Step 2: Open the Brush Roll Housing
Place the head on a table with the brush roll facing up. On the underside (the side that contacts the floor), you’ll see either: A) Several screws around the perimeter, or B) A series of plastic clips. This is the most model-variable step. Look for any hidden screws under rubber plugs or stickers. If it’s clip-based, insert your flat-head screwdriver into the seam at one corner and gently pry. Work your way around the housing, releasing each clip. The top cover should pop off, revealing the brush roll and belt assembly.
Step 3: Extract and Clean the Brush Roll
With the cover off, the brush roll (the cylindrical brush with bristles) will be sitting on bearings, held in place by a belt and often a small plastic end cap on each side. Important: Note which side the belt is on. It usually rides on a small spindle on one end. First, pull the brush roll straight up and out. This is where the hair massacre happens. You’ll see hair, string, and carpet fibers wound tightly around the axle and deep in the bristles. Use your needle-nose pliers to cut and pull this material out. Be meticulous; even a small amount can imbalance the roll and strain the motor. While you have it out, spin the brush roll by hand. It should rotate smoothly and freely. If it’s gritty or stiff, the bearings are likely clogged or worn. You can try cleaning them with a cotton swab and rubbing alcohol, but often a new brush roll assembly is the fix.
Step 4: Remove and Inspect the Drive Belt
With the brush roll out, the belt will be dangling or sitting in a groove on a motor pulley inside the housing. Pull it off the motor pulley. Inspect it thoroughly. Look for cracks, glazing (a shiny, hardened surface), or stretching. A worn belt slips and causes a burning smell. Belts are cheap; replace it if there’s any doubt. While you’re here, check the motor pulley itself. It should be clean and free of debris. Wipe it with a dry cloth.
Step 5: Clean the Housing Interior
Now the housing is empty. This is where dirt, hair, and small debris get trapped in the corners and around the belt path. Use a damp cloth and your flat-head screwdriver wrapped in a cloth to scrape out packed dirt. Pay attention to the area where the housing seals against the main body—a gasket or foam seal here can trap dirt. Clean it gently.
Disassembling the Main Body and Motor Compartment
This is the deepest level of disassembly and is usually only needed for major clogs in the internal airways or to replace the main motor filter. Proceed with extra caution.
Step 1: Remove the Lower Rear Housing
Return to the main body, still on its side. Below where the hose connects, there is often a large, curved plastic panel that forms the bottom rear of the vacuum. This panel protects the motor and fan. It is held by multiple screws (often 4-6) and sometimes clips. Remove all screws and store them in your “Body” container. Gently pry this panel off. You will now see the fan housing (a plastic cover over the fan blades) and the main motor.
⚠️ Critical Warning: Do not attempt to remove the fan housing or access the motor unless you are 100% sure a solid object (like a coin, sock, or plastic piece) is lodged in the fan itself. The fan is delicate. If you just want to clean dust, use a soft brush and compressed air (short bursts) from the outside through any openings. Never stick tools into the fan blades while the motor is attached, as you can bend the blades and cause catastrophic imbalance.
Step 2: Access the Internal Air Ducts
With the rear panel off, you can see the big white duct that connects the hose inlet to the dust cup chamber. This is another classic clog spot. Shine a flashlight down it. If you see an obstruction, use a long, flexible tool (like a bent wire coat hanger with a hook on the end, wrapped in tape to avoid scratching) to gently dislodge and pull it out. Work from both ends if possible. This duct may also have a secondary foam filter inside—remove and clean it if your model has one.
Step 3: The Main Motor and Foam Filter
In the center of the opened body, you’ll see the main motor, surrounded by a larger, usually rectangular foam filter. This is the final line of defense for the motor. Remove it. It is almost always washable. Wash it with mild soap and water, squeeze it *very* dry, and let it air-dry for a full 24 hours. A damp filter will damage the motor. While the filter is out, you can see the motor’s fan. Use a can of compressed air to blow dust *out* from the motor area, not *into* it. Hold the can upright to avoid liquid spray.
Reassembly: The Reverse Process with Precision
Reassembly is where most people make mistakes. Rushing here undoes all your hard work.
General Philosophy: Work Backwards, Clean as You Go
Reassemble in the exact reverse order of disassembly. Before placing any cover back, wipe the mating surfaces clean. A single grain of dirt can prevent a clip from seating properly. As you place each component, refer to your photos. Ask yourself: “Did I reconnect that wire harness? Is this belt on the correct pulley? Are all the screws back in their correct holes?”
Specific Reassembly Tips for Tricky Parts
- Brush Roll Belt: Stretch the new (or cleaned) belt over the motor pulley first, then twist and slide the brush roll into the housing, looping the other side of the belt onto the brush roll’s spindle. It’s easier to put the belt on the brush roll first and then stretch it to the motor, but you risk pinching your fingers. Use a screwdriver to help lever it onto the motor spindle if needed.
- Plastic Clips: Never force a clip. Align the two plastic halves perfectly. Start at one corner and press firmly until you hear/feel a snap, then move to the next. Forcing it will break the clip.
- Wiring Connectors: They are keyed—they only fit one way. Look for the tiny plastic tab and matching slot. Push until you hear a click. Give the wire a gentle tug to ensure it’s locked.
- Final Check: Before plugging in, manually rotate the brush roll by turning the belt with your finger. It should spin freely without binding. Check that the hose and wand connections are secure.
The First Test: Listen and Feel
Plug the vacuum in for a 30-second test on a hard floor. Listen for any unusual grinding, squealing, or rattling. Feel the suction at the end of the hose. It should be strong. If you hear a high-pitched squeal, the belt is likely slipping or not seated. If there’s a grinding, the brush roll bearings are probably damaged or a foreign object is still inside. Unplug immediately and re-inspect.
Establishing a Proactive Maintenance Schedule
Disassembly doesn’t have to be a crisis intervention. By incorporating these tasks into a regular routine, you’ll prevent most major issues.
Monthly Light Maintenance (5 Minutes)
This requires no tools. Empty the dust cup after every use, but once a month: Remove and wash the pre-motor foam filter and the exhaust filter. Let them dry completely. Use the crevice tool attachment to suck out debris from the hose connector, wand ends, and brush roll housing vents. Visually inspect the brush roll for hair wrap and cut it away with scissors before it gets tight.
Quarterly Deep Clean (30 Minutes)
Follow this guide’s steps for full disassembly of the hose, wand, and brush roll head. Clean all internal airways, remove all hair from the brush roll bearings, and wash every removable filter. Inspect the drive belt for wear. This is the schedule that will keep your Shark Rotator performing like new for years.
Annual Full Teardown and Inspection
Once a year, go the full distance: remove the main body rear panels and clean the internal ducts and motor filter. Inspect all plastic components for cracks. Check the wiring for any fraying. Lubricate the wheel axles with a drop of silicone grease if they become squeaky. This thorough inspection will catch small problems before they become big, expensive ones.
Conclusion: Knowledge is the Best Tool
Your Shark Rotator vacuum is an investment in a clean home. Like any tool, it performs best when it’s well-understood and well-maintained. By learning how to disassemble and reassemble it, you’ve taken control of that investment. You’ve moved past being a mere user and become a caretaker. You’ll save money on service calls, reduce waste by extending the life of your machine, and enjoy the profound satisfaction of a vacuum that truly *sucks*—in the best way possible. Remember the core principles: safety first, organization is key, take pictures, and never force a part. With this guide as your roadmap, you can confidently tackle any cleaning, clog, or repair task your Shark Rotator throws at you. Now, go forth and disassemble with confidence!
Frequently Asked Questions
How often should I fully disassemble my Shark Rotator for cleaning?
For optimal performance, perform a full disassembly and deep clean of the brush roll, hose, and wand every 3-4 months if you have pets or high-traffic carpets. For standard use, a thorough cleaning twice a year is sufficient to prevent clogs and maintain suction power.
What’s the most common mistake people make when reassembling a Shark Rotator?
The most frequent error is forgetting to reconnect a wire harness after cleaning the upper body, which results in a non-functional vacuum. The second most common is misaligning or forcing plastic clips, causing them to snap. Always use your reference photos and ensure connectors click fully into place.
Will disassembling my vacuum void the warranty?
Generally, no. Normal maintenance like cleaning filters, clearing clogs, and replacing wear items (belts, brush rolls) does not void the warranty. However, if you damage components during disassembly or attempt to repair the motor/electronic controls yourself, that specific issue may not be covered. Keep your manual handy.
What should I do if a plastic clip breaks during disassembly?
Do not try to glue it, as the stress will cause it to fail again. The best solution is to order a specific replacement part from Shark or a third-party supplier (like a rear housing panel or brush roll housing top). Running the vacuum with a broken housing can allow debris to enter the motor and cause damage.
My vacuum smells like burning after reassembly. What’s wrong?
This is almost always due to a slipping or misaligned drive belt. Unplug the vacuum immediately. Remove the brush roll housing and verify the belt is correctly looped over both the motor pulley and the brush roll spindle. A worn, stretched, or oily belt (from cleaning solutions) will also slip and cause this smell. Replace the belt if there’s any doubt.
Are all Shark Rotator models disassembled the same way?
Yes, the core architecture and disassembly sequence are identical across the upright Rotator line (NV300, NV350, NV351, NV352, NV356, AZ series). The primary differences are the location of a few screws, the style of hose lock (twist vs. push-button), and the exact clip configuration on the brush roll housing. Always consult your specific model’s manual for the final confirmation on screw locations.