A non-spinning beater brush is a common Shark Professional vacuum issue, usually caused by clogs, hair wrap, a broken belt, or a tripped brush motor. This guide provides a complete diagnostic roadmap, from simple cleaning to part replacement. Most problems are fixable at home with basic tools in under 30 minutes. Learn how to identify the exact cause and restore your vacuum’s deep-cleaning power.
Key Takeaways
- Clogs and hair wrap are the #1 culprit: Check the suction hose, brush roll housing, and all connecting airways first. A complete blockage stops the brush from spinning.
- The drive belt is a frequent failure point: A broken, stretched, or slipped belt will disconnect the motor from the brush roll. Visual inspection is key.
- The brush motor itself can fail or overheat: Listen for a humming sound. If the motor is hot or silent, it may need replacement.
- Always disconnect power before inspection: Safety is paramount. Unplug the vacuum and check for any reset buttons on the brush motor housing.
- Regular maintenance prevents 90% of issues: Cleaning the brush roll and checking the belt every 2-3 uses stops problems before they start.
- Not all models are identical: Consult your specific Shark Professional model’s manual for disassembly instructions and part numbers.
- Diagnose systematically: Follow a logical path from suction check to brush roll inspection to avoid missing the simple fix.
[FEATURED_IMAGE_PLACEHOLDER]
📑 Table of Contents
- Introduction: When Your Shark’s Brush Goes Silent
- Understanding the System: How the Shark Professional Beater Brush Works
- Diagnostic Step 1: The Quick & Easy Checks (5 Minutes)
- Diagnostic Step 2: The Physical Inspection – Hunting for Clogs and Hair Wrap
- Diagnostic Step 3: The Belt System – Diagnosis and Replacement
- Diagnostic Step 4: The Motor and Electrical System
- When to Replace the Brush Roll Itself
- Preventive Maintenance: Keeping Your Brush Spinning for Years
- Conclusion: Reviving Your Cleaning Powerhouse
Introduction: When Your Shark’s Brush Goes Silent
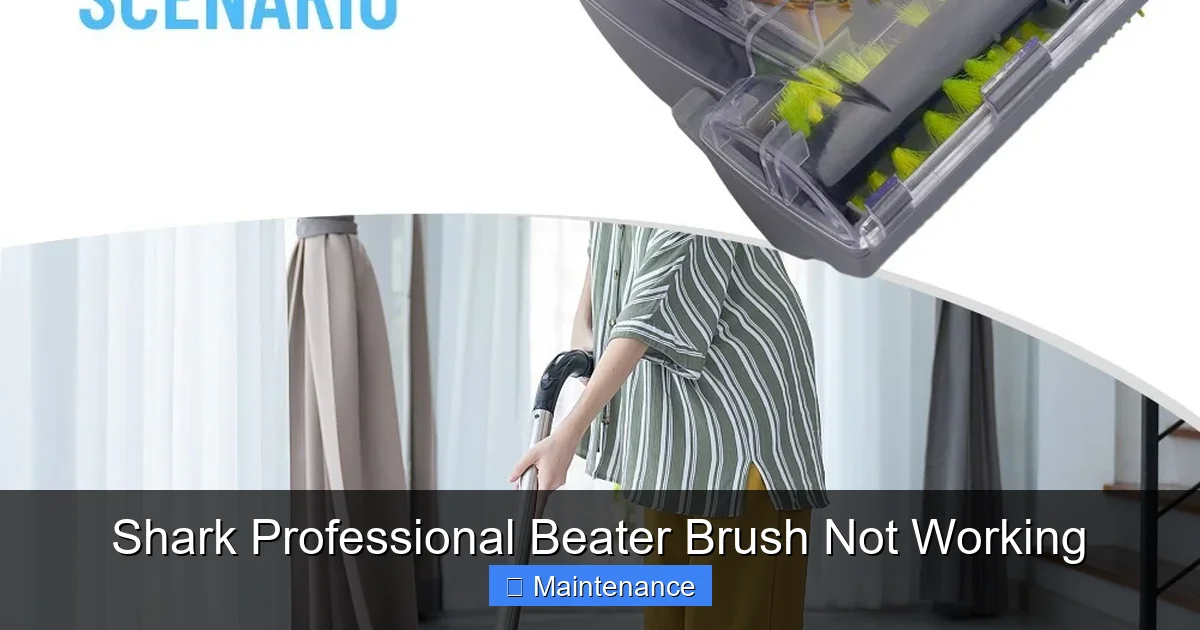
You plug in your trusty Shark Professional vacuum, flip the switch, and that familiar, powerful whirr of the beater brush—the heart of its deep-cleaning ability—is missing. The vacuum might still suck air, but without that rotating brush agitating carpet fibers, it’s just pushing dirt around. A non-functioning beater brush, or brush roll, is one of the most common yet frustrating issues Shark Professional owners face. But before you panic and search for a repair shop or a new vacuum, take a deep breath. The vast majority of “Shark Professional beater brush not working” problems are straightforward to diagnose and fix yourself with common household tools and a little patience.
This guide is your complete troubleshooting companion. We’ll walk through the system step-by-step, from the simplest clog to a potential motor replacement. You’ll learn how the brush roll system works, what each component does, and exactly where to look when things go wrong. By the end, you’ll have the knowledge and confidence to bring your Shark’s brush back to life, saving you money and extending the life of your machine.
Understanding the System: How the Shark Professional Beater Brush Works
Before we start taking things apart, it’s crucial to understand the basic mechanics. The beater brush doesn’t spin on its own; it’s part of a driven system. Knowing this flow helps you pinpoint the failure point.
Visual guide about Shark Professional Beater Brush Not Working
Image source: sharkcleanapac.zendesk.com
The Power Transfer Chain
Think of it like a bicycle chain. The motor (the pedaler) connects via a drive belt (the chain) to the brush roll (the rear wheel). If any link in this chain is broken or blocked, the brush stops. Here’s the sequence:
- Suction Power & Airflow: The main vacuum motor creates suction. This airflow must be uninterrupted from the brush roll housing, through the hose, and into the canister. A severe clog can create backpressure that sometimes affects brush engagement.
- The Drive Belt: This rubber belt loops from a pulley on the vacuum motor shaft to a pulley on the brush roll. When the motor runs, it spins this belt, which in turn spins the brush roll.
- The Brush Roll: This is the cylindrical component with bristles. It sits in a housing at the vacuum’s head. It must be free to rotate without obstruction.
- The Brush Motor (in some models): Some Shark Professional models have a separate, smaller motor dedicated solely to spinning the brush roll, especially in “self-propelled” or advanced lift-away designs. In others, the main vacuum motor powers it via the belt. Both can fail.
- Switches and Wiring: A switch on the handle or body controls power to the brush motor/belt system. Frayed wires or faulty switches can cut power.
A problem in any of these areas will result in a stationary brush. Our diagnostic process will check each one in order of likelihood and ease.
Diagnostic Step 1: The Quick & Easy Checks (5 Minutes)
Don’t grab a screwdriver yet. Start here to rule out the simplest, most frequent issues.

Visual guide about Shark Professional Beater Brush Not Working
Image source: sharkvacuum.blog
Check for the Obvious: Mode and Reset
First, ensure your Shark Professional isn’t in a mode that disables the brush. Many models have a “hard floor” or “bare floor” setting that turns the brush off to avoid scattering debris. Locate the brush on/off switch—often a separate button with a brush icon on the handle or near the power switch—and ensure it’s activated.
Next, look for a reset button. Shark vacuums often have a thermal reset button for the brush motor, usually a small red or black button on the brush roll housing or the motor itself (you’ll need to tilt the vacuum to see it). If the motor overheated from a clog, it may have tripped. Press it firmly to reset.
The Suction Test: Is Airflow the Problem?
Place the vacuum’s floor head against your hand and turn it on. Do you feel strong suction? If suction is weak or absent, the problem is likely a main clog or a failed main motor, which will also affect the brush if it’s belt-driven (due to lack of overall power). Strong suction with a dead brush points directly to the brush drive system.
If suction is poor, check the canister for fullness, the pre-motor filters (they get dirty fast), and the exhaust port. Clean or replace filters. A completely clogged hose or wand will also kill suction. Detach the hose from the vacuum and blow through it to check for blockages.
Diagnostic Step 2: The Physical Inspection – Hunting for Clogs and Hair Wrap
This is where you’ll solve most problems. Hair, string, carpet fibers, and small objects like carpet tacks are the arch-nemesis of the beater brush.
Visual guide about Shark Professional Beater Brush Not Working
Image source: i.ebayimg.com
Accessing the Brush Roll Housing
Lay the vacuum on its side. On most Shark Professional models, you’ll find screws or release latches on the underside of the floor head. There are typically 3-4 screws. Some newer models have a single lever release. Consult your manual if unsure. Remove the bottom plate to expose the brush roll and belt.
Visual Inspection and Cleaning
Once the plate is off, you’ll see the belt and brush roll. Here’s what to look for:
- Hair Wrap: This is the #1 issue. Hair and fibers wrap tightly around the brush roll bearings (the plastic end caps) and the axle itself. This creates immense friction, jamming the brush. Use scissors or a seam ripper to carefully cut and remove all wrapped material. Pull it away from the bristles. Do not just pull; you’ll likely break the bristles. Cut it longitudinally.
- Debris Jamming: Look for small objects—toy pieces, coins, paperclips, large carpet tacks—jammed between the brush bristles or in the housing. These can physically block rotation. Remove them with needle-nose pliers.
- Brush Roll Condition: Spin the brush roll by hand. It should rotate freely and smoothly. If it’s gritty, stiff, or has flat spots on the bristles, it’s worn out and needs replacement. Check that the rubber belts on the brush roll (if it has them) aren’t shredded.
- Belt Condition: Examine the drive belt. Is it broken, stretched, melted, or missing entirely? A stretched belt will slip and not turn the brush. A broken belt is obvious—it’s in two pieces. Sometimes a belt can jump off its pulleys. If the belt is intact but the brush doesn’t spin, the belt may be too loose.
Pro Tip: While you’re here, use a vacuum crevice tool or a compressed air canister to blow out any dust, hair, and debris from inside the brush roll housing channel. This prevents future clogs that could block the brush or affect suction.
Diagnostic Step 3: The Belt System – Diagnosis and Replacement
If the brush roll spins freely by hand but doesn’t spin when the vacuum is on, the belt is the prime suspect. If the brush roll is jammed, fix that first, then re-check the belt.
Identifying Your Belt Type
Shark Professional vacuums use either a standard round ribbed belt or a flat serpentine belt. The round belt is most common. Your model’s manual will specify the exact part number (e.g., Shark part # 112F). You can also find it by searching your model number online. Always use the correct replacement belt.
How to Check and Replace the Belt
- Remove the brush roll. With the bottom plate off, slide the brush roll out of its housing. Note its orientation—one side may have a gear or pulley that faces a specific direction.
- Locate the belt. It will be looped around the motor pulley (usually near the back of the housing) and the brush roll pulley (on one end of the brush roll).
- Remove the old belt. Stretch it off the pulleys. If it’s broken, pieces may be stuck—remove all fragments.
- Install the new belt. Loop one end onto the motor pulley. Then, stretch the other end onto the brush roll pulley. This requires some force. Ensure the belt is seated properly in the groove of both pulleys and isn’t twisted.
- Reinstall the brush roll. Slide it back into its housing, ensuring the belt is still on its pulley. The brush roll should fit snugly.
- Test before reassembling. Plug in the vacuum (with the bottom plate still off) and turn it on for a few seconds. The brush roll should spin vigorously. If it doesn’t, double-check the belt’s seating and tension.
- Reattach the bottom plate. Once confirmed working, screw the plate back on securely.
Note: A belt that’s been sitting under tension for years can lose elasticity. Even if it’s not broken, replacing it every 1-2 years as preventive maintenance is wise for Shark Professionals, which are workhorses.
Diagnostic Step 4: The Motor and Electrical System
If you have strong suction, a clean brush roll that spins freely by hand, and a new, properly installed belt, but the brush still doesn’t engage when powered, the fault lies in the motor or its circuit.
Listening for the Hum
When you turn the vacuum on with the brush engaged, listen closely. Do you hear a faint humming or buzzing sound from the brush area? This is a classic sign that power is reaching the motor, but the motor shaft is locked (often due to a failed bearing inside the motor) or the motor windings are burnt out. The motor is trying to turn but can’t.
If you hear nothing at all—no hum, no spin—the issue is likely a lack of power to the motor. This could be a faulty switch, a broken wire (especially in the flexible hose neck where it bends), a tripped thermal fuse, or a completely dead motor.
Testing and Replacing the Brush Motor
Testing a motor requires a multimeter and some comfort with electronics. If you’re not experienced, this is the step where you might consider a professional or simply replace the motor based on symptoms.
- Access: The brush motor is usually located at the rear of the brush roll housing or integrated into the main body near the belt path. You’ll likely need to remove the brush roll housing completely from the vacuum body.
- Visual Check: Look for burnt marks, melted plastic, or a foul smell from the motor. These are dead giveaways.
- Continuity Test: With the vacuum unplugged, disconnect the motor’s wire harness. Set your multimeter to the continuity setting (or the lowest ohms setting). Touch the probes to the two motor terminals. You should get a low resistance reading (typically under 5 ohms). If it reads “OL” (open loop) or infinite resistance, the motor is dead and needs replacement.
Replacement: Source the exact motor for your Shark Professional model. Remove the old motor (usually 2-4 screws and the wire connector), install the new one, and reassemble. Ensure all wiring is routed correctly and away from moving parts.
When to Replace the Brush Roll Itself
Even with a perfect drive system, a worn brush roll won’t clean effectively. Here’s when to replace it:
- Bristles are worn, splayed, or missing: If half the bristles are gone or they’re flattened, the brush can’t agitate carpet.
- End caps/bearings are seized: If you remove the brush roll and one end doesn’t spin freely when you flick it, its internal bearing is shot. You can sometimes replace just the end caps, but a new brush roll is often more economical.
- The brush roll is cracked or broken: Plastic can become brittle over time.
- Persistent hair wrap problems: Some newer Shark brush rolls have “anti-hair wrap” designs. If yours is an older model and you’re constantly battling hair, an upgrade to a newer brush roll style (if compatible) can be a great long-term fix.
Replacement is simple: Note how the old one comes out (usually a clip or a slide-out mechanism), and install the new one in the same orientation. Ensure the belt is properly aligned on its pulley.
Preventive Maintenance: Keeping Your Brush Spinning for Years
An ounce of prevention is worth a pound of cure. Integrate these habits into your routine:
The Post-Vacuuming Ritual (2 Minutes)
Every time you finish vacuuming, do this:
- Unplug the vacuum.
- Check the brush roll. Use your fingers or a cleaning tool to feel for and remove any hair or fibers wrapped around the bristles near the ends. This is much easier than dealing with a solid, compacted wrap later.
- Wipe the housing. Use a dry cloth to wipe out the brush roll housing channel. This removes fine dust that can accumulate and cause friction.
- Inspect the belt (if visible). Ensure it’s still seated and not looking frayed.
Monthly Deep Clean
Once a month, or if performance drops:
- Fully remove the brush roll and clean it thoroughly with a mild soap and water. Let it dry completely (24 hours) before reinstalling.
- Completely remove the bottom plate and clean out the entire housing channel with a vacuum crevice tool or compressed air.
- Check the condition of the drive belt. Replace if it shows any signs of wear, glazing, or cracks.
- Clean all filters according to the manual (most Shark foam filters are washable; the HEPA filter is usually replaceable).
Mind What You Vacuum
Shark Professionals are powerful, but they’re not indestructible. Avoid vacuuming: large, hard objects (legos, coins), wet spills (unless it’s a wet/dry model), very long hair without pre-treating (like picking up large wads), and anything that could jam or melt the belt (like hot ashes or plastic wrap).
Conclusion: Reviving Your Cleaning Powerhouse
A Shark Professional vacuum with a dead beater brush feels like a lion with a toothache—it’s lost its edge. But as we’ve seen, the solution is almost always within your grasp. The journey to a fix follows a clear path: rule out simple mode issues, confirm strong suction, perform a meticulous physical inspection for clogs and hair, examine and replace the drive belt, and finally, address the motor or electrical system if all else fails. Over 80% of these issues are resolved in the first two steps: cleaning and belt replacement.
By embracing regular, quick maintenance, you transform this occasional troubleshooting into a non-issue. Your Shark Professional is built to last, and with a little care, its beater brush will continue to agitate, lift, and deep-clean your carpets for years to come. You’ve now got the knowledge. Turn that vacuum on its side, start inspecting, and listen for the return of that powerful, satisfying whirr. Your clean carpets are waiting.
Frequently Asked Questions
Why does my Shark Professional vacuum have suction but the brush roll doesn’t spin?
This almost always indicates a problem isolated to the brush drive system. The most common causes are: a broken or slipped drive belt, a brush roll jammed with hair/debris, a tripped brush motor thermal reset, or a failed brush motor itself. Start by checking the belt and cleaning the brush roll.
How do I clean hair out of my Shark beater brush without damaging it?
Always unplug the vacuum first. Remove the bottom plate to access the brush roll. Use a pair of scissors to carefully cut hair and fibers lengthwise along the brush roll, then pull the cut sections away. Do not pull hair tangles forcefully, as this will uproot bristles. A seam riper is an excellent tool for this job.
How often should I replace the drive belt on my Shark Professional?
As a preventive measure, inspect the belt every 3 months and plan to replace it every 12-24 months, depending on use. If you notice the brush roll spinning slower, the belt is slipping, or you see visible cracks, glazing, or stretching, replace it immediately. Always use the OEM or exact replacement belt for your model.
My brush motor hums but doesn’t spin. What does that mean?
A humming sound with no rotation is a classic symptom of a seized brush motor. The motor is receiving power and attempting to turn, but an internal failure (usually a worn bearing or burnt windings) has locked the shaft. The motor will need to be replaced.
The brush roll spins but makes a loud grinding or squealing noise. Why?
This usually points to a lack of lubrication in the brush roll’s end caps/bearings or a worn bearing. Remove the brush roll and spin each end by hand. If one end is gritty, stiff, or makes noise, the brush roll needs to be replaced. It can also indicate a misaligned or warped brush roll rubbing against the housing.
After fixing everything, the brush still doesn’t spin. What could be wrong?
If you’ve confirmed a clean, free-spinning brush roll, a new correctly installed belt, and strong suction, the fault is likely electrical. Check for a faulty brush on/off switch on the handle, a broken wire (common in the hose neck where it flexes), a blown thermal fuse, or a completely failed brush motor. A multimeter is needed to test for continuity in the motor and wiring circuit.