A Shark vacuum’s green light not illuminating is a common issue usually tied to power, battery, or internal component problems, not necessarily a complete failure. This guide walks you through the most likely culprits, from simple fixes like charging the battery or cleaning filters to more involved checks like the brush roll and internal sensors. Most solutions are DIY-friendly and can get your Shark back up and running without a service call.
You’re all set to tackle your cleaning chores. You press the power button on your trusty Shark vacuum, you hear… nothing. Or maybe a faint whir, but the familiar, reassuring green light that usually signifies “ready to clean” remains stubbornly dark. Panic sets in for a second. Is it broken? Is it expensive to fix? Before you resign yourself to a costly service call or the sad search for a new vacuum, take a deep breath. A Shark vacuum green light not on is one of the most common troubleshooting queries, and the vast majority of the time, the solution is something you can handle yourself in under ten minutes. This guide will be your friendly, step-by-step companion to diagnose and fix this issue, getting your Shark back to its powerful, green-lit self.
We’ll approach this systematically, like a detective. We’ll start with the absolute basics—things so simple we often overlook them—and gradually move to more specific components. The green light isn’t just a random bulb; it’s a communication tool from your vacuum’s brain. It tells you the machine has power, the battery is acceptable (in cordless models), and critical systems like the brush roll are clear and operational. When it stays off, it’s the vacuum’s way of saying, “I’m not safe or ready to run.” Our job is to find out why. So, grab your user manual if you have it, and let’s begin.
Key Takeaways
- The green light is a status indicator: It typically signals the vacuum is powered on, charged (for cordless models), and that key systems like the brush roll are functioning correctly.
- Start with the simplest checks first: Always confirm the vacuum is plugged in (corded) or fully charged (cordless) and that the power switch is on before diving into complex diagnostics.
- Clogs and blockages are prime suspects: A severely obstructed air pathway, dirty filters, or a jammed brush roll can trigger safety cut-offs that prevent the green light from activating.
- Battery health is critical for cordless models: An old, depleted, or improperly seated battery is a frequent cause of a non-functional green light on battery-powered Sharks.
- Reset procedures can resolve electronic glitches: Many Shark models have a simple reset process involving removing the battery or unplugging the unit for a period, which can clear error states.
- Physical damage or sensor failure is less common: If all else checks out, a faulty power switch, damaged cord, or failed internal sensor may require professional repair or part replacement.
📑 Table of Contents
- Understanding What the Green Light Means on Your Shark
- Most Common Causes: Why Is My Shark Vacuum’s Green Light Off?
- Step-by-Step Troubleshooting Guide: From Simple to Advanced
- Preventive Maintenance: Keeping the Green Light On
- When to Contact Shark Support or a Professional
- Conclusion: Empowering You to Fix Your Shark
Understanding What the Green Light Means on Your Shark
Before we start poking and prodding, it’s crucial to understand the role of that little green light. It’s more than just a power indicator; it’s a multi-functional status beacon. Its exact meaning can vary slightly between Shark’s extensive model lineup—from the classic Navigator Lift-Away to the sleek Vertex and the powerful IZ682 cordless—but the core principles are universal.
The Green Light as a Power & Charge Indicator
For corded Shark vacuums, a solid green light almost always means the unit is receiving adequate power from the wall outlet and the internal circuit is closed. If it’s off, the first thought is “no power.” For cordless Sharks, the green light has a dual job. It confirms the vacuum is switched on and that the battery has a sufficient charge to operate the motor and brush roll. A red or amber light typically means the battery is low and needs charging. A completely absent green light on a cordless model, even when the switch is on, strongly points to a battery issue—either it’s completely dead, not connected properly, or has degraded to the point it can’t hold a charge.
The Green Light as a “Clear Path” Signal
Here’s the key nuance many users miss. On many modern Shark models, especially those with a motorized brush roll, the green light is also controlled by a sensor or switch that detects if the brush roll is spinning freely. If the brush roll is jammed with hair, carpet fibers, or a small object, a safety mechanism kicks in. This mechanism cuts power to the brush roll motor and often prevents the main green status light from illuminating to protect the vacuum from burning out. This is why a green light not on is frequently a symptom of a clog or jam, not just a dead battery.
Most Common Causes: Why Is My Shark Vacuum’s Green Light Off?
Now that we know what the light represents, let’s list the usual suspects. We’ll order them from the most frequent and easiest to check to the more complex.
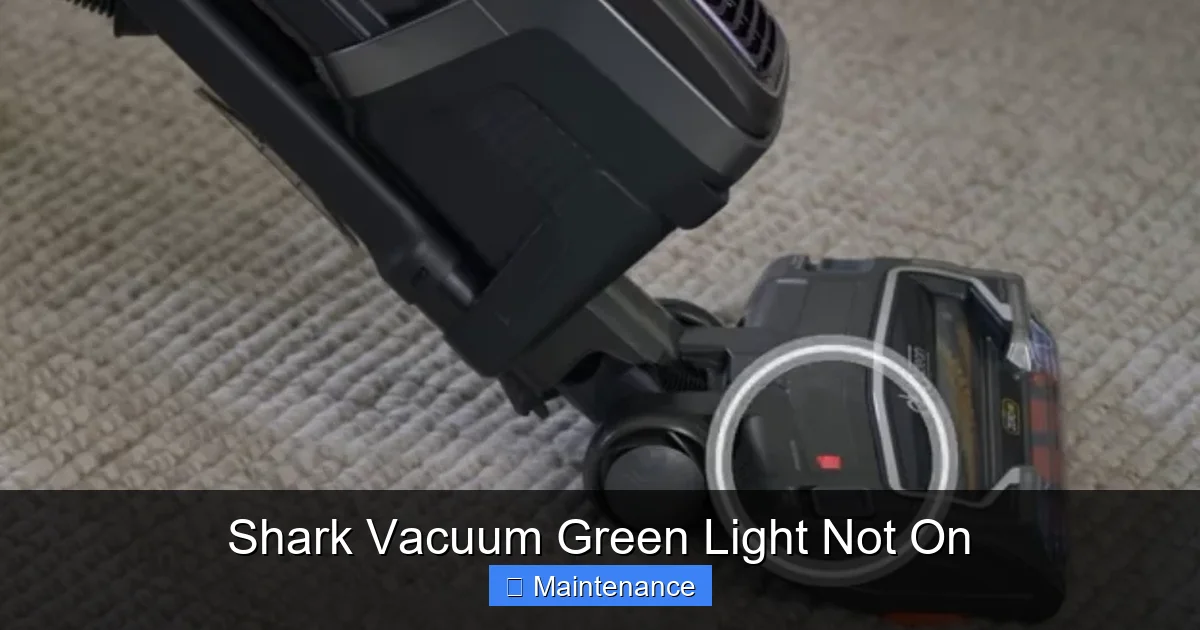
Visual guide about Shark Vacuum Green Light Not On
Image source: static.wixstatic.com
1. Power Source Problems (The Obvious Ones)
- Corded Models: Is the vacuum plugged in securely? Check both ends—the wall outlet and the plug on the vacuum. Try a different outlet you know is working (lamp test). Inspect the power cord for any visible cuts, frays, or damage, especially near the plug or where it enters the vacuum body.
- Cordless Models: Is the battery fully seated in its compartment? Remove it and reinsert it firmly, listening for a click. Is the battery actually charged? Connect it to the charger. The charger’s light (if it has one) should come on. If the charger light doesn’t come on, the problem could be the charger, the battery, or the vacuum’s charging port.
2. The Switch Is Off (Or Faulty)
It sounds silly, but double-check the main power switch. On some models, it’s a large red button. On others, it’s a sliding switch. Ensure it’s fully in the “I” or “On” position. If the switch feels loose, sticky, or doesn’t click into place, it may be faulty and need replacement.
3. Clogged Filters (A Major Culprit)
Shark vacuums have multiple filters: a pre-motor foam filter, a felt filter, and a post-motor HEPA filter. If any of these are severely clogged with dust and debris, it creates immense resistance in the airflow. The vacuum’s motor struggles, sensors detect the strain, and a safety cutoff can disable the green light to prevent overheating and damage. This is one of the most common reasons for a green light not coming on, especially if the vacuum was working fine until suddenly stopping.
4. Brush Roll Jam or Obstruction
As mentioned, a jammed brush roll is a direct trigger for the safety sensor. Turn the vacuum over. Look at the brush roll (the cylindrical brush at the front). Can you see it? Is it encased in a thick blanket of hair, carpet fibers, or string? Can you spin it freely by hand? If it’s stiff or won’t turn, you’ve found your problem. The jam could also be further down the airway, like a sock or large debris piece stuck in the suction intake behind the brush roll.
5. Battery Failure (For Cordless)
Lithium-ion batteries degrade over time. After 2-3 years of regular use, their capacity drops significantly. A battery that won’t hold a charge or shows a full charge but immediately drops to zero when the vacuum is turned on can cause the green light to stay off. If your cordless Shark is a few years old and suddenly won’t turn on, the battery is the prime suspect.
6. Faulty or Disconnected Internal Components
This is less common but possible. A loose wire connection inside the vacuum (from a bump or drop), a failed motor, a broken circuit board, or a malfunctioning sensor can all interrupt the power path to the green light. These issues usually require professional diagnosis.
Step-by-Step Troubleshooting Guide: From Simple to Advanced
Grab a screwdriver, your vacuum’s manual, and maybe a flashlight. Let’s work through this logically.
Visual guide about Shark Vacuum Green Light Not On
Image source: sharkvacuum.blog
Step 1: The Absolute Basics (2 Minutes)
First, eliminate the “oops” factors.
- Corded: Plug the vacuum into a different, known-good wall outlet. Ensure the outlet isn’t controlled by a switch (like a light switch on the wall).
- Cordless: Remove the battery. Examine the gold contact pins on both the battery and inside the vacuum’s battery compartment. Clean them gently with a dry cotton swab if they look dirty. Reinsert the battery firmly until it clicks. Place the entire vacuum on its charger. Does the charging indicator light come on? If not, the issue is with the battery, charger, or vacuum’s charging port.
- For both types: Locate and firmly press the main power switch several times. Listen for any clicking sounds from inside the motor housing.
Step 2: Inspect and Clean All Filters
This is a critical maintenance step that solves many problems. Always unplug the vacuum or remove the battery before doing any internal inspection.
- Locate your filter access panels. On most Sharks, the pre-motor foam filter is behind a door on the back or side. The post-motor HEPA filter is often near the exhaust port on the back.
- Remove the filters. The foam filter can usually be rinsed under cool water. Let it air-dry completely for at least 24 hours—never use it wet.
- The felt and HEPA filters are not washable. Tap them firmly over a trash can to dislodge dust. If they are saturated with dirt, they need to be replaced. A clogged HEPA filter is a very common cause of blocked airflow and safety cut-offs.
- Reinstall only completely dry filters.
Step 3: The Brush Roll Deep Dive
This is the most likely physical jam culprit.
- Lay the vacuum on its side or flip it over so you can see the brush roll housing.
- Most Shark brush rolls are easily removable. Look for a release lever or screw. Consult your manual for the exact method for your model.
- Once removed, cut away any hair, string, or carpet fibers wrapped around the brush roll bristles and end caps. Use scissors carefully.
- Check the brush roll bearings (the plastic caps on each end). Spin the brush roll by hand. It should rotate smoothly. If it’s gritty or stiff, the bearings are likely clogged with debris or worn out. Clean them or consider replacing the entire brush roll assembly.
- Look into the suction intake opening behind where the brush roll sits. Use a flashlight. Is there a large obstruction? Use a long, thin tool (like a screwdriver handle or a straightened coat hanger) to gently dislodge it.
- Reinstall the brush roll correctly, ensuring it’s seated properly and the belt (if your model has one) is intact and properly aligned.
Step 4: Check for Suction Path Clogs
If filters and brush roll are clear, the clog could be higher up.
- Detach the wand or hose from the vacuum body.
- Look through the opening. Can you see light? Can you feel strong suction with your hand? If suction is weak or absent here, the clog is between this point and the motor.
- Check the hose itself. Detach it from the wand and the vacuum. Look through it. A long object like a broom handle can be used to gently push a clog through, but be careful not to pack it tighter.
- Inspect the wand and any extension tubes for obstructions.
Step 5: The Reset Procedure
After clearing all jams and cleaning filters, a reset is often necessary to clear the vacuum’s memory of the error.
- Corded Models: Unplug the vacuum from the wall. Press and hold the power button for 10-15 seconds. Release, plug it back in, and try again.
- Cordless Models: Remove the battery. Press and hold the power button on the vacuum body for 15-30 seconds (this drains residual power). Reinsert the battery firmly. Place it on the charger for a full cycle before trying to use it.
Preventive Maintenance: Keeping the Green Light On
An ounce of prevention is worth a pound of cure. Regular maintenance is the single best way to avoid the green light issue and extend your Shark’s life.

Visual guide about Shark Vacuum Green Light Not On
Image source: wikihow.com
Establish a Cleaning Schedule
Don’t wait for a problem. After every 3-4 uses:
- Empty the dust cup. Tap it out over a trash can. Wipe the interior with a dry cloth.
- Check the brush roll for hair wrap. A quick 30-second snip with scissors saves hours of hassle later.
- Inspect the pre-motor foam filter. If it’s visibly gray, rinse it. This is the fastest filter to clean and makes a huge difference.
Monthly Deep Maintenance
Once a month, perform a more thorough check:
- Wash the foam filter (if your model has one) and let it dry completely.
- Tap out the felt and HEPA filters. Consider washing the HEPA filter if your manual says it’s washable (most are not).
- Remove the brush roll and clean it thoroughly. Check the belt for wear and proper tension if applicable.
- Check the hose and wand for any hidden clogs by shining a light through them.
Seasonal or Biannual Overhaul
Every 6 months to a year:
- Replace all filters according to the manufacturer’s schedule (usually every 6-12 months for HEPA/felt filters). This is the #1 performance booster.
- Inspect the power cord for damage on corded models.
- On cordless models, assess battery health. If runtime has dropped dramatically (e.g., from 60 minutes to 15), it’s time for a new battery.
- Check all internal connections if you’re comfortable opening the vacuum’s housing (always unplug first).
When to Contact Shark Support or a Professional
You’ve followed every step. The battery is new, filters are spotless, brush roll spins freely, there are no clogs, and you’ve performed the reset. The green light is still dead. Now what?
Diagnosing Internal Failures
At this stage, the problem is likely an internal component. This could be:
- A Failed Power Switch: The physical button you press has worn out internally.
- A Tripped Thermal Fuse: This safety device blows if the motor overheats. It’s a one-time part that needs replacement.
- A Faulty Motor: The main suction motor has burned out. This is a major repair.
- A Damaged Circuit Board: The vacuum’s “brain” has failed. This can happen from power surges, moisture, or age.
- A Broken Sensor/Wiring: The wire that tells the computer the brush roll is clear may be broken or the sensor itself is faulty.
Warranty and Repair Options
Before you panic:
- Check Your Warranty: Shark vacuums typically come with a 5-year limited warranty (varies by model and region). If your vacuum is within the warranty period, contact Shark Customer Support first. They may troubleshoot further or authorize a warranty repair.
- Official Repair Centers: Shark has a network of authorized service centers. They have the proper parts and diagnostics. This is often the best path for a complex fix if out of warranty.
- Consider the Cost-Benefit: Get an estimate for repair. If the cost is more than 50% of a new comparable Shark model, purchasing a new one might be more economical, especially for older units.
Conclusion: Empowering You to Fix Your Shark
A Shark vacuum with a green light that won’t turn on is a frustrating but almost always fixable problem. It’s your vacuum’s polite way of asking for a check-up, not its final goodbye. By methodically working through the power source, filters, brush roll, and reset procedures, you will solve the issue 90% of the time. Remember, the green light is a symptom. The root cause is almost always a preventable maintenance issue—a clogged filter, a hair-wrapped brush roll, or a depleted battery.
Embrace the role of your vacuum’s caretaker. Regular, simple maintenance isn’t a chore; it’s an investment in your cleaning tool’s longevity and performance. That green light is your reward for good care. So next time it goes dark, don’t fret. Put on your detective hat, follow this guide, and enjoy the satisfaction of bringing your Shark back to life with your own two hands. A clean home and a fully functional vacuum are just a few minutes of troubleshooting away.
Frequently Asked Questions
Why is my Shark cordless vacuum’s green light not on even though it’s on the charger?
This usually means the battery is completely dead and not accepting a charge, or the charging contacts are dirty. First, remove the battery and clean the metal contacts on both the battery and the vacuum with a dry cloth. Re-seat it firmly. If the charger’s light doesn’t come on, the charger may be faulty. If the vacuum’s light still won’t turn on after a full charge cycle, the battery likely needs replacement.
Can a clogged HEPA filter really prevent the green light from coming on?
Absolutely. The HEPA filter is the final barrier before air exits the vacuum. If it’s saturated with dust, airflow is severely restricted. The vacuum’s motor labors, sensors detect the strain, and a safety cutoff engages, which often prevents the green status light from illuminating to avoid motor burnout. Replacing a clogged HEPA filter is a very common fix.
I cleared the brush roll jam, cleaned the filters, and reset it. The green light is still off. Now what?
If you’ve completed all the basic troubleshooting steps, the issue is likely internal. Possible culprits include a faulty power switch, a tripped thermal fuse (which can happen after a jam causes overheating), a broken wire connection, or a failed circuit board. At this point, consulting your user manual’s error code section (if applicable) or contacting Shark Customer Support for warranty service or a referral to an authorized repair center is the next step.
Is there a way to manually override the safety sensor that controls the green light?
No, and you should never try to bypass safety sensors. They are critical protection mechanisms for the vacuum’s motor and internal electronics. Overriding them to force a vacuum with a jammed brush roll or blocked airflow to run will almost certainly cause permanent damage, like burning out the motor or melting the belt. Always address the root cause of the sensor activation.
How do I know if my Shark vacuum’s battery is dead or just needs a long charge?
First, ensure you’re using the correct, official Shark charger. Leave the vacuum on the charger for a full 3-4 hours without interruption. If the charging indicator light (if present) never comes on, or if the vacuum still won’t turn on after this full charge, the battery is likely at the end of its life. A significant drop in runtime (e.g., from 60 minutes to 10) is another clear sign of battery degradation.
My Shark vacuum is plugged in, the outlet works, but there’s no green light and no sound at all. Is it toast?
Not necessarily. The complete lack of any sound or light points strongly to a complete power failure. First, try a different, heavy-duty extension cord to rule out a weak outlet. If that fails, the problem is likely the power switch itself, a severed internal wire (often where the cord enters the machine), or a blown fuse inside the vacuum. These are repairable issues, but they require opening the vacuum to diagnose, so professional help is recommended unless you’re experienced with appliance repair.