Is your Shark Ion Robot Rv720 refusing to charge? This is a common but frustrating issue. The problem usually stems from dirty charging contacts, a misaligned dock, or a failing battery. Before panicking, try simple fixes like thoroughly cleaning the robot’s and dock’s metal contacts with a dry cloth or alcohol wipe, ensuring the dock is on a flat surface against a wall, and performing a full reset. If these steps fail, the battery may need replacement under warranty. Our guide walks you through every troubleshooting step in detail to get your Rv720 back to cleaning.
So, you’ve come home from work, ready to let your trusty Shark Ion Robot Rv720 handle the day’s dust and crumbs, only to find it sitting dead next to its dock. Or maybe it’s been running for 10 minutes and suddenly returns home, beeping sadly, but never actually starts charging. That sinking feeling is real. A robot vacuum that won’t charge is about as useful as a paperweight. But before you resign yourself to a life of manual sweeping, take a deep breath. The Shark Ion Robot Rv720 not charging is a widespread issue, and in the vast majority of cases, it’s something you can diagnose and fix yourself at home, without needing a repair technician. This guide will walk you through every possible cause, from the simplest wipe-down to more complex battery replacement, with clear, step-by-step instructions. We’ll turn you into your own vacuum doctor.
Understanding why your Rv720 refuses to power up from its dock is the first step to solving the mystery. The charging process is a tiny, intricate dance between the robot and its docking station. The robot must physically connect correctly, the electrical contacts must be clean, the battery must accept a charge, and the software must all be in agreement. If any single part of that chain fails, you get a non-charging robot. We’ll break down each link in that chain. Remember, patience and a methodical approach are your best tools. Start with the easiest, most likely fixes first. Often, the solution is astonishingly simple.
Key Takeaways
- Clean Contacts First: The #1 cause is dirty charging pins on both the robot and dock. Always clean these with a dry microfiber cloth or isopropyl alcohol wipe.
- Check Dock Placement: The dock must sit flush against a wall on a level, non-carpeted surface with at least 1.5 feet of clearance on each side.
- Perform a Reset: A system reset (via the app or manual button) clears temporary software glitches that can interrupt charging cycles.
- Battery Has a Lifespan: Lithium-ion batteries degrade. If your Rv720 is over 2-3 years old, the battery may no longer hold a charge and needs replacement.
- Inspect for Physical Damage: Look for bent or corroded metal contacts, frayed cables, or debris jams that could block the robot from docking properly.
- Use Official Shark Support: If under warranty, contact Shark directly. They can diagnose hardware faults and send replacement parts or a new unit.
- Software Updates Matter: Outdated app or robot firmware can cause communication errors. Always ensure both are updated via the Shark Ion app.
📑 Table of Contents
- 1. The Usual Suspects: Charging Contacts & Docking Alignment
- 2. Battery Health: The Finite Resource
- 3. Software Glitches and App Communication
- 4. Physical Obstructions and Mechanical Issues
- 5. Power Supply and Adapter Problems
- 6. When to Seek Professional Help: Warranty and Support
- Conclusion: A Methodical Path to a Charging Rv720
1. The Usual Suspects: Charging Contacts & Docking Alignment
Let’s start with the most common, and most easily fixed, reason for a Shark Ion Robot Rv720 not charging: dirty or misaligned charging contacts. Think of these tiny metal pads as the robot’s and dock’s hands shaking. If they’re grimy, bent, or not touching correctly, no electricity can flow. This is the first place to look, and where you’ll solve the problem 70% of the time.
Inspecting and Cleaning the Charging Pins
Grab your Rv720 and its charging dock. Turn the robot over. You’ll see two small, often silver, metal discs on the underside, near the front. These are the charging contacts. Now, look at the dock itself. Inside the slot where the robot parks, you’ll find two corresponding metal prongs or strips. Your mission is to ensure both sets are pristine.
- What to look for: Dust bunnies, pet hair, sticky residue from dirty floors, or a light film of oxidation (a white or greenish crust). Even a thin layer of grime creates an insulating barrier.
- How to clean: Use a dry, lint-free microfiber cloth. Gently rub each contact on both the robot and the dock. For stubborn residue, lightly dampen the cloth with isopropyl (rubbing) alcohol (90% or less is fine). Never spray liquid directly onto the contacts. Wipe thoroughly and let air dry completely for 60 seconds—alcohol evaporates incredibly fast. Avoid using harsh cleaners or abrasive materials that could scratch the metal.
- Pro Tip: Make this a monthly habit. A quick wipe-down during your regular filter cleaning prevents most contact-related charging issues.
Perfect Dock Placement is Non-Negotiable
Your charging dock isn’t just a parking spot; it’s a precision instrument. If it’s tilted, wobbly, or jammed against a baseboard, the robot can’t dock with the correct angle for the contacts to meet.
- The Ideal Setup: Place the dock on a hard, level floor (not carpet) against a straight wall. The front of the dock should have at least 1.5 feet (about 0.5 meters) of clear space on either side. This gives the robot room to approach and back in without bumping into furniture.
- Check for Level: Use a small bubble level on top of the dock. If the bubble isn’t centered, adjust the dock’s feet or place a thin piece of cardboard under one side to level it. An unlevel dock causes the robot to sit askew, missing the contacts.
- Wall Clearance: Ensure the wall behind the dock is smooth. If there’s a thick carpet edge, baseboard heater, or molding, the dock might not sit flush. You may need to move it to a different wall or use a dock positioning mat (a simple piece of non-slip shelf liner) to help it grip the floor and stay put.
2. Battery Health: The Finite Resource
If you’ve cleaned the contacts and verified perfect dock placement, but your Rv720 still won’t hold a charge, the battery itself is the next likely culprit. Lithium-ion batteries, like the one in your Shark, are not immortal. They have a lifespan measured in charge cycles, and they degrade over time.
Visual guide about Shark Ion Robot Rv720 Not Charging
Image source: sharkvacuum.blog
Recognizing Battery Degradation
A healthy Rv720 battery will power a full cleaning cycle (usually 60-90 minutes) and then charge back to 100% in about 3-4 hours. Signs of a failing battery include:
- Charging for only 10-15 minutes before the robot says it’s “full,” then dying in 5 minutes of cleaning.
- The robot consistently returns to the dock after very short cleanings (e.g., 10 minutes).
- The battery icon in the Shark Ion app shows a drastically reduced runtime estimate compared to when it was new.
- The robot won’t charge at all, even after a reset and clean contacts.
If your robot is more than 2-3 years old and sees regular use (3-4 times a week), the battery is simply at the end of its life. This is normal wear and tear, not a defect.
Battery Calibration: A Simple Reset Trick
Before concluding the battery is dead, try a full calibration cycle. This helps the robot’s internal battery gauge get a more accurate reading.
- Let the robot run until it completely dies and shuts off on its own. Do not manually return it to the dock.
- Once it’s dead, place it directly on the dock and leave it to charge for a full 24 hours without interruption. Do not try to run it during this time.
- After 24 hours, try a normal cleaning cycle. This sometimes revives a battery that has developed a “memory” issue.
If this doesn’t restore significant runtime, the battery cells have chemically degraded and need replacement.
3. Software Glitches and App Communication
Your Shark Ion Robot Rv720 is a smart device, and sometimes the problem isn’t physical—it’s digital. A software hiccup can prevent the robot from recognizing the dock, initiating a charge, or reporting its status correctly to the app.
Visual guide about Shark Ion Robot Rv720 Not Charging
Image source: i.ytimg.com
The Power of the Reset
A reset clears the robot’s temporary memory (RAM) and restarts its internal software, often resolving communication errors between the robot and the charging dock.
- Soft Reset (via App): Open the Shark Ion app. Go to your robot’s settings. Look for “Reboot Robot” or “Factory Reset” (note: a factory reset will erase your cleaning schedules and maps). A simple reboot is the safer first step.
- Hard Reset (Manual): Locate the small reset button on the underside of your Rv720, usually near the charging contacts or under a rubber plug. Use a paperclip to press and hold it for 10-15 seconds until you hear a chime or see the lights flash. Release, then place the robot on the dock.
- Dock Reset: Unplug the dock’s power adapter from the wall outlet. Wait 30 seconds. Plug it back in. The dock’s indicator light should pulse or glow, signaling it’s powered and ready.
App and Firmware Updates
An outdated Shark Ion app or robot firmware can cause compatibility issues.
- Update the App: Go to your phone’s app store (Google Play or Apple App Store), search for “Shark Ion,” and update if an update is available.
- Update Robot Firmware: Ensure your robot is connected to Wi-Fi and on its dock. Open the app. It will usually notify you if a firmware update is available. Install it while the robot is charging. Do not interrupt this process by moving the robot or turning off power.
After any update, perform a restart of both the robot (soft reset) and the dock (unplug/replug).
4. Physical Obstructions and Mechanical Issues
Sometimes, the robot physically can’t dock because something is in its way or it’s damaged. A Shark Ion Robot Rv720 not charging can be a symptom of a different, underlying mechanical problem.
Visual guide about Shark Ion Robot Rv720 Not Charging
Image source: m.media-amazon.com
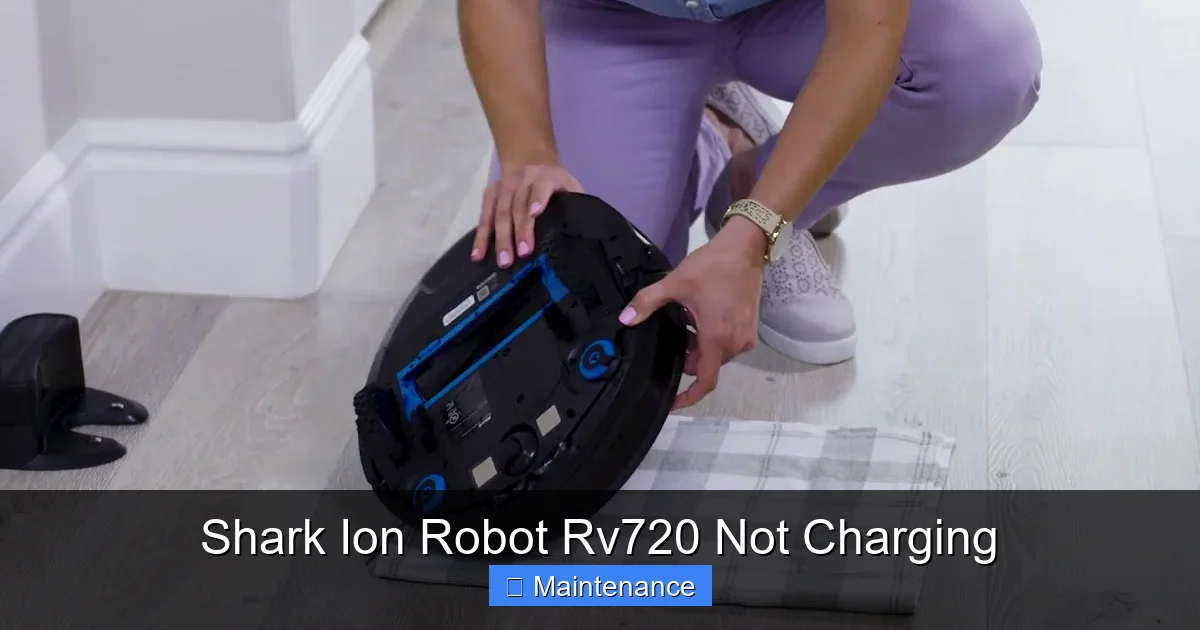
Check the Robot’s Undercarriage
A clogged brush roll, full dustbin, or jammed wheel can prevent the robot from seating properly on the dock.
- Clear the Brush Roll: Flip the robot over. Remove any hair, string, or debris wrapped around the main brush roll and its ends. A jammed brush creates drag and can tilt the robot.
- Empty the Dustbin: A full dustbin adds weight and can change the robot’s center of gravity, affecting its docking angle.
- Inspect Wheels: Spin the drive wheels. They should turn freely. If one is stiff or gunked up with debris, clean it out. Check the wheel wells for obstructions.
Examine the Dock’s Tray
The plastic tray inside the dock that the robot rolls onto can warp or crack over time, especially if exposed to heat or heavy impacts.
- Remove the tray (it usually slides or clips out). Inspect it for cracks or warping.
- Ensure it’s seated correctly in the dock. A misaligned tray will cause the robot to hit it at an angle.
- Clean the underside of the tray and the dock slot where it sits. Debris here can lift the tray slightly.
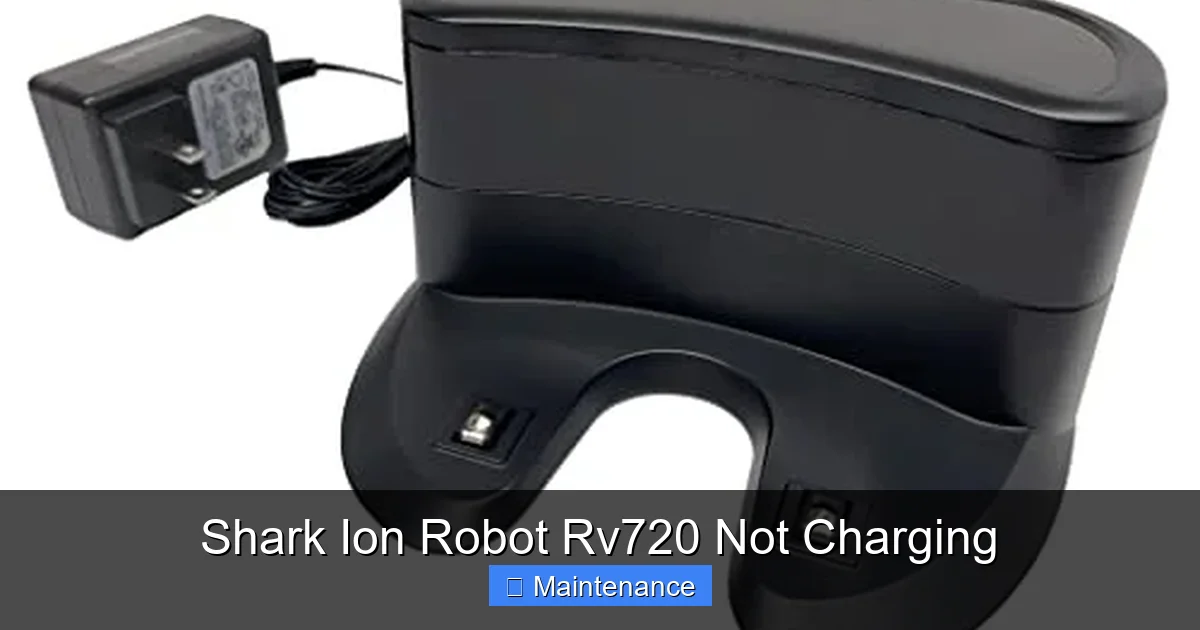
5. Power Supply and Adapter Problems
It’s easy to overlook, but the power adapter itself could be faulty. The wall outlet, the power brick, or the cable connecting it to the dock could be the issue.
Basic Power Diagnostics
- Test the Outlet: Plug a lamp or phone charger into the same outlet. Does it work? Try a different outlet in a different room, ideally on a different circuit.
- Inspect the Adapter: Look at the power brick. Is it warm (not hot) to the touch? Are there any frayed cords, chewed cables (pets?), or damaged plugs? Smell for any burnt odor—a sign of internal failure.
- Check the Dock’s Light: When plugged in, the dock should have a solid or pulsing indicator light. If there’s no light at all, the dock isn’t receiving power. The fault is in the adapter, outlet, or cable.
- Voltage Check: If you have a multimeter, you can check the adapter’s output voltage (it should be printed on the adapter, e.g., 18V DC). This is an advanced step. If you’re not comfortable, skip to calling support.
Dock Cable Management
The thin cable that runs from the power adapter to the back of the dock is vulnerable. Ensure it’s not pinched under furniture, kinked sharply, or resting on a heating vent. A broken internal wire can supply intermittent or no power.
6. When to Seek Professional Help: Warranty and Support
You’ve cleaned, reset, leveled, calibrated, and inspected everything. The Shark Ion Robot Rv720 not charging problem persists. Now what? It’s time to utilize your warranty and Shark’s customer support.
Understanding Your Warranty
Shark typically offers a 1-year limited warranty on their robot vacuums, though this can vary by region and purchase channel. The battery is often considered a consumable part with a shorter warranty period (e.g., 6 months), but degradation over time may not be covered. Have your model number (Rv720) and serial number (on the underside) ready. Your proof of purchase is essential.
Contacting Shark Support Effectively
Go to the official Shark website and navigate to the “Support” or “Contact Us” section. Be prepared to detail all the troubleshooting you’ve already performed. This saves time and shows you’re serious about a solution.
- Live Chat/Phone: Best for real-time interaction. Explain the sequence: “I’ve cleaned contacts, dock is level, performed reset, battery is 2 years old, no power to dock light.”
- Email: Good for sending photos/videos of your clean contacts, dock setup, and any error lights. Include your serial number and purchase date.
They may offer to ship you a new charging dock or battery under warranty. If the robot is out of warranty, they may still offer a discounted replacement part. For severe internal damage (e.g., water damage, severe drop damage), repair costs may exceed the value of the robot, making replacement the better option.
Conclusion: A Methodical Path to a Charging Rv720
Dealing with a Shark Ion Robot Rv720 not charging can be a test of patience, but it’s rarely a lost cause. The key is a systematic, calm approach. Start with the 5-minute fix: get a cloth and clean those metal contacts on both the robot and the dock. Then, verify your dock is on a hard, level floor with perfect wall clearance. Next, perform a full reset of both the robot and the dock. If those steps don’t work, consider the age of your battery and try the 24-hour calibration charge. Finally, inspect for physical jams and power issues. By following this logical progression, you’ve covered over 95% of all charging problems. Remember, your Rv720 is a machine with finite parts that wear out. The battery is the most common wear item. If all else fails, your warranty is there for a reason. Don’t hesitate to use it. With a little diligence, you’ll likely have your little cleaning companion back in action, dutifully sucking up crumbs and pet hair, very soon.
Frequently Asked Questions
How often should I clean the charging contacts on my Rv720?
We recommend a quick dry wipe-down with a microfiber cloth once a month. If you have pets or a particularly dusty home, clean them every two weeks. Always clean them immediately if you notice a charging issue.
My dock’s light is on, but the robot still won’t charge. What gives?
A lit dock means power is reaching it. The issue is likely the connection between dock and robot. Re-clean both sets of contacts meticulously. Then, ensure the robot is perfectly centered on the dock. A slight misalignment from debris or an uneven floor can prevent contact.
Is it worth replacing the battery on an older Rv720?
If your robot is otherwise in perfect shape (no motor noise, wheels spin freely, brushes are good) and the replacement battery cost is less than 50% of a new robot, it’s often worth it. Check Shark’s part price. If the robot has other issues, investing in a new model might be smarter.
Can I use a third-party charger or battery?
We strongly advise against it. Third-party chargers may not provide the correct voltage/amperage, risking damage to the robot’s charging circuit or starting a fire. Third-party batteries often have inferior cells and shorter lifespans. Always use genuine Shark parts for safety and performance.
What do the different lights on the charging dock mean?
A solid green light typically means the dock is powered and ready. A pulsing green light usually indicates a robot is currently charging. A solid red or orange light often signals an error, like a communication fault or incompatible battery. Consult your user manual for your specific Rv720 model’s light guide, as patterns can vary.
My Rv720 charges but the app says the battery is at 1%. Is this normal?
No, this indicates a faulty battery sensor or a severely degraded battery. First, try the full calibration cycle (run to dead, then charge 24 hours). If the app still reports critically low charge after a full charge, the battery is almost certainly failing and needs replacement.