Is your Shark RV700 robot vacuum stubbornly refusing to connect to your home WiFi network? This is a common but frustrating issue, usually stemming from simple network incompatibilities, signal interference, or app glitches. The solution almost always lies in a methodical, step-by-step troubleshooting process that checks your router settings, robot placement, and the Shark app itself. Follow our comprehensive guide to diagnose and resolve the connection problem and restore your vacuum’s smart cleaning capabilities.
So, you’ve unboxed your shiny new Shark RV700, charged it up, and are ready to embrace the future of automated cleaning. You open the Shark app, follow the on-screen prompts, and… nothing. The robot refuses to join your WiFi network. Or maybe it was working fine for weeks, and now it’s suddenly gone dark in the app, showing as “Offline.” The “Shark RV700 not connecting to WiFi” problem is one of the most frequent hurdles owners face, and it can feel incredibly frustrating. But before you consider returning the vacuum or calling tech support in a panic, take a deep breath. In the vast majority of cases, this is not a hardware defect—it’s a communication hiccup that you can fix yourself with a calm, systematic approach. This guide will walk you through every possible cause and solution, from the simplest reboot to more advanced network adjustments.
Understanding why it’s happening is the first step to fixing it. Your Shark RV700 is a smart device that relies on a constant, clear two-way conversation with your home’s WiFi router and the Shark cloud servers via your smartphone app. This conversation can break down at several points: your robot might not be “speaking the right language” your router understands, the signal might be too weak for a clear conversation, your phone’s app might be using an outdated “phrasebook,” or a temporary network glitch might have hung up the call. We will explore each of these failure points in detail.
Key Takeaways
- Network Band is Critical: The Shark RV700 only connects to 2.4GHz WiFi networks. It is incompatible with 5GHz-only networks or networks that combine both bands into a single SSID.
- Signal Strength is King: Weak WiFi signals due of distance, walls, or interference are a top cause of failure. The robot must be placed near the router during initial setup.
- App & Account Basics: Ensure you’re using the latest Shark app, are logged into the correct Shark account, and have granted all necessary location and Bluetooth permissions.
- Firmware Updates Matter: Outdated robot or app firmware can cause communication breakdowns. Regular updates are essential for stable connectivity.
- Power Cycle Everything: A simple restart of your router, modem, robot vacuum, and smartphone resolves many temporary software glitches and IP address conflicts.
- Factory Reset as a Last Resort: Performing a factory reset on the RV700 clears all network data and can force a fresh connection attempt, but you must re-setup the robot from scratch.
📑 Table of Contents
- 1. The Foundation: Your Home Network & Shark RV700 Compatibility
- 2. The Signal Journey: Overcoming Interference and Range Issues
- 3. The Control Center: Shark App and Account Glitches
- 4. The Brains: Firmware and Software Updates
- 5. The Nuclear Option: Resetting and Re-Setup
- 6. When to Seek Help: Advanced Troubleshooting and Support
- Conclusion: Patience and Precision Win the Day
1. The Foundation: Your Home Network & Shark RV700 Compatibility
Before we even touch the robot, we must look at the source of the signal: your router. The most common and absolute barrier to connection is a fundamental incompatibility between what your router broadcasts and what the Shark RV700 can receive. This isn’t about brand names—it’s about technical specifications.
The 2.4GHz vs. 5GHz Showdown
The Shark RV700 was designed to connect exclusively to 2.4GHz WiFi networks. This is non-negotiable. The 2.4GHz band has a longer range and better wall-penetration than the faster 5GHz band, which is crucial for a roaming robot vacuum that moves throughout your home. Many modern routers are “dual-band,” meaning they broadcast both a 2.4GHz and a 5GHz network. Often, these are set up with identical names (SSIDs), creating a “band-steering” network that automatically connects devices to the best band. This is the problem. The RV700’s simple WiFi chip does not understand this steering technology and will fail to connect, often timing out with a vague “connection failed” message.
Practical Example: Your router’s networks might be named “MyHomeWiFi” for both bands. Your laptop and phone seamlessly switch between them. But your Shark RV700 sees “MyHomeWiFi,” tries to connect, gets confused by the mixed signals, and gives up. The fix is to log into your router’s admin panel (usually via a web browser at 192.168.1.1 or 192.168.0.1) and split the two bands into two distinctly named networks. Rename them to something clear like “MyHomeWiFi-2.4” and “MyHomeWiFi-5.” Then, during the Shark app setup, explicitly select and connect only to the “MyHome-2.4” network.
Checking Your Network Settings
If you already have separate SSIDs, double-check that the 2.4GHz network is actually turned on. Some users accidentally disable the 2.4GHz band in favor of 5GHz, not realizing their smart home devices require it. Also, verify your WiFi security protocol. The RV700 supports WPA2-Personal (AES) and WPA/WPA2-Personal. It does not support the newer WPA3 protocol or the outdated WEP. If your router is set to “WPA3 only” or “WPA2/WPA3 mixed,” the Shark will fail. You must set the 2.4GHz network security to “WPA2-Personal (AES)” only for guaranteed compatibility.
2. The Signal Journey: Overcoming Interference and Range Issues
Assuming your network language is correct, we now examine the strength and clarity of the signal reaching your robot. A weak or corrupted signal is the next most common culprit.
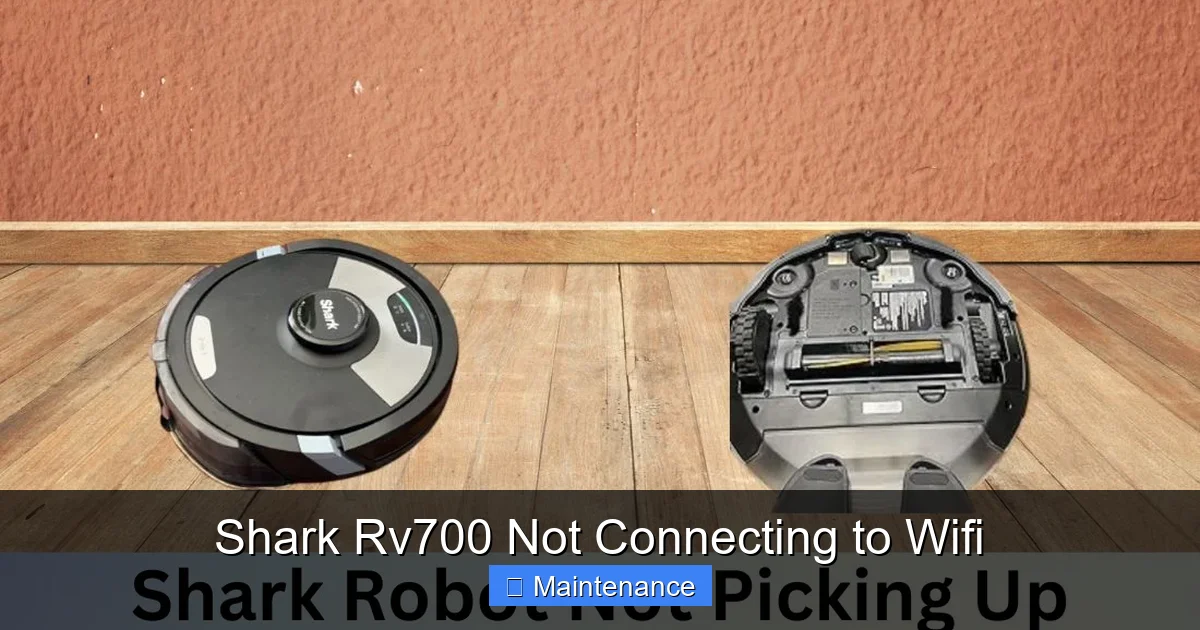
Visual guide about Shark Rv700 Not Connecting to Wifi
Image source: sharkvacuum.blog
Placement During Setup is Everything
The Shark RV700 must be in a strong-signal area during the initial WiFi setup process. This is a critical step many miss. The robot’s initial “handshake” with your router requires a robust, stable connection to transfer all the network credentials. If you place the robot in its usual cleaning spot—perhaps a bedroom far from the router—the signal will likely be too weak to complete the setup. The rule is: always start the WiFi setup with the robot sitting on its charging base, and place that charging base within 10-15 feet of your router, with a clear line of sight if possible. Once successfully connected, you can move the base to its permanent location.
Identifying and Eliminating Signal Killers
WiFi signals are radio waves, and many household objects can block or weaken them. Thick concrete walls, metal appliances (refrigerators, filing cabinets), large mirrors, and even certain types of insulation can create dead zones. Additionally, other wireless devices cause interference on the crowded 2.4GHz band. These include:
- Microwave ovens: When running, they emit powerful noise on the 2.4GHz frequency.
- Cordless phones (DECT 6.0 is usually safe, but older models are not).
- Bluetooth devices: Headsets, speakers, and game controllers.
- Wireless security cameras and baby monitors.
- Neighboring WiFi networks: If you live in an apartment, your router may be set to a channel (1, 6, or 11) that is overcrowded. Logging into your router and manually selecting a less congested channel can help.
Tip: Use a smartphone WiFi analyzer app (like “WiFi Analyzer”) to see a graph of all nearby networks and their channel usage. Switch your 2.4GHz network to the least crowded channel for a cleaner signal.
3. The Control Center: Shark App and Account Glitches
Your smartphone app is the remote control and communication hub. If the app is misconfigured or outdated, it can’t properly instruct the robot or receive its status updates, making it appear as if the robot isn’t connected.
Visual guide about Shark Rv700 Not Connecting to Wifi
Image source: sharkvacuum.blog
Permissions and Location Services
Modern smartphone operating systems (iOS and Android) are strict about app permissions for privacy and battery life. The Shark app requires specific permissions to function correctly:
- Location Permission: Needed to discover the robot on your local network during setup and sometimes to maintain the connection.
- Bluetooth Permission: Used for the initial pairing process between your phone and the robot, even over WiFi.
- Local Network Access (iOS): A critical permission that allows the app to communicate with devices on your home network.
Go to your phone’s Settings > Apps > Shark ION Robot and ensure all these permissions are granted. If you denied them during installation, the connection process will fail silently.
App Version and Account State
Using an outdated version of the Shark app is a frequent cause of connectivity failures, especially after a major router firmware update or a change in Shark’s cloud services. Visit the App Store or Google Play Store and check for any available updates. Install the latest version. Also, ensure you are logged into the correct Shark account. If you have multiple accounts or recently created a new one, the robot may be registered to a different account, causing confusion. You can check the robot’s registration in the app under “Settings” > “Robot Settings” > “About.”
4. The Brains: Firmware and Software Updates
Both your Shark RV700 robot and the Shark app run on software (firmware and app code). Bugs in this software can create connectivity bugs. Keeping everything updated is paramount.
Visual guide about Shark Rv700 Not Connecting to Wifi
Image source: sharkvacuum.blog
Updating the Robot (When Connected)
When connected, the robot will automatically download and install firmware updates in the background, usually during charging cycles. This is ideal. However, if your robot is stuck in a “not connected” state, it cannot receive these updates. This creates a chicken-and-egg problem. The fix often comes from the other direction: updating the app first. A newer app version may contain a fix that allows it to communicate with an older robot firmware, successfully establishing a connection. Once connected, the robot will then update itself.
Manual Update via USB (Advanced)
In rare, stubborn cases where the robot is completely unresponsive to app commands, Shark support may provide a firmware file and instructions to update the robot manually via a USB drive connected to the robot’s port. This is a last-resort procedure and should only be done with explicit instructions from Shark customer care to avoid bricking the device.
5. The Nuclear Option: Resetting and Re-Setup
When all else fails, you need to wipe the slate clean. This involves resetting the robot’s internal network memory and starting the setup process from the very beginning.
Performing a Factory Reset on the RV700
Locate the small reset button on your Shark RV700. It is typically a pinhole button on the underside or back of the robot, near the charging contacts. You will need a paperclip or similar tool. With the robot powered on (not on the base), press and hold the reset button for approximately 10-15 seconds. You will hear a series of beeps, and all the lights will turn off and then back on. This indicates the robot’s memory has been cleared of all network settings, map data, and scheduling information. It is now in a factory-fresh state, like the day you bought it.
The Full Re-Setup Protocol
After a reset, you must follow the setup process meticulously:
- Unplug and replug your router and modem. Power cycle them to clear any DHCP lease glitches.
- Delete the robot from your Shark app. In the app’s device list, remove the existing RV700 entry.
- Reinstall the Shark app (optional but recommended). Delete the app from your phone and reinstall it from the store to ensure a clean configuration.
- Place the robot on its charging base, and move the base right next to your router.
- Start the “Add Robot” process in the app. Ensure your phone is connected to the correct 2.4GHz network before starting.
- Follow every on-screen instruction precisely. This will involve putting the robot into WiFi pairing mode (usually by pressing the WiFi button on the robot until you hear a tone) and selecting your network, then entering the password.
Patience is key here. The connection process can take 1-3 minutes. Do not exit the app or move the robot during this time.
6. When to Seek Help: Advanced Troubleshooting and Support
If you have meticulously followed every step above—verified 2.4GHz band, optimized signal, checked app permissions, updated software, and performed a factory reset with precise setup—and the RV700 still refuses to connect, the issue may lie deeper.
Router-Specific Quirks
Some routers have aggressive security features, firewalls, or “AP isolation” settings that can block communication between your phone and the robot on the local network. Temporarily disabling the router’s firewall or “client isolation” feature (often found under “Wireless Settings” or “Security”) for the setup process can test this. Be sure to re-enable it afterward. Additionally, if your router is very old (more than 5-7 years), its WiFi chipset or DHCP server may have compatibility issues with newer IoT devices. Borrowing a friend’s newer router for a test setup can diagnose this.
Contacting Shark Customer Support
At this stage, it’s time to engage the manufacturer. Have the following information ready to expedite your support case:
- Your robot’s serial number (found on the underside label).
- The exact model number (RV700).
- A detailed list of all troubleshooting steps you have already performed.
- Your router’s make and model.
- Screenshots or videos of the exact error messages in the app.
Shark support may offer a replacement if the unit is under warranty and deemed defective, but they will first guide you through their own diagnostic procedures, which will closely mirror the steps in this guide. Your thorough preparation will show them you’ve done the legwork and help them assist you more effectively.
Conclusion: Patience and Precision Win the Day
The “Shark RV700 not connecting to WiFi” issue is a solvable puzzle. It demands a shift from frustration to methodical diagnosis. Start with the non-negotiable foundation: the 2.4GHz network. Then, build up by ensuring a strong signal, a properly configured app, and up-to-date software. The power cycle and factory reset are your most powerful tools, clearing temporary glitches and corrupted data. Remember, the robot is a simple device trying to communicate with a complex network. Your job is to simplify that communication path. By following this structured approach, you will almost certainly restore that vital connection, bringing your RV700 back into the smart home ecosystem and returning your weekends to relaxation instead of manual vacuuming. The satisfaction of fixing it yourself is the final, clean sweep.
Frequently Asked Questions
Why is my Shark RV700 not finding my WiFi network at all?
This almost always means you are trying to connect to a 5GHz network or a combined SSID. The RV700 only “sees” and connects to 2.4GHz networks. Log into your router and create a separate, uniquely named 2.4GHz network, then connect the robot to that specific name during setup.
My Shark RV700 says “Wrong Password” even though I’m sure it’s correct.
First, double-check for typos and case sensitivity. If the password is correct, the issue is likely network band incompatibility (see above) or a temporary glitch. Power cycle your router and robot, then try again. Also, ensure your router’s security is set to WPA2-Personal (AES), not WPA3.
How do I reset the WiFi on my Shark RV700?
Locate the small reset pinhole on the underside of the robot. With the robot powered on, use a paperclip to press and hold the button for 10-15 seconds until you hear beeps and the lights reset. This clears all network settings. You must then immediately go through the full setup process again in the Shark app.
Do I need to update my Shark RV700 firmware manually?
No, the robot updates itself automatically when it is connected to WiFi and charging. The key is getting it connected first. Once connected, ensure the Shark app has permission to send notifications, as you may need to approve a firmware update on your phone.
Can I use the Shark RV700 without WiFi?
Yes, you can. You can operate the RV700 manually using the physical buttons on the robot itself (Clean, Home, Spot Clean). However, you will lose all smart features like scheduling, app control, map viewing, and voice assistant integration. The robot will function as a basic, random-navigating vacuum.
What router settings should I check for my Shark RV700?
Ensure the 2.4GHz band is enabled, has a unique SSID (name), uses WPA2-Personal (AES) security, and is on a clear channel (1, 6, or 11). Disable any “AP Isolation” or “Client Isolation” feature temporarily during setup. If your router has a “Smart Connect” or “Band Steering” feature, disable it so the 2.4GHz and 5GHz networks remain separate.