Maintaining a clean filter is essential for your Shark robot vacuum’s performance and longevity. Our guide provides detailed, model-specific instructions to make filter maintenance simple and effective. A neglected filter reduces suction power, strains the motor, and can lead to costly repairs, but regular cleaning takes just minutes.
You invested in a Shark robot vacuum to make life easier—a smart, automated helper that scoots around your floors, eating up dust, hair, and debris. It’s a marvel of modern convenience. But there’s one tiny component that holds the key to its long-term power and efficiency, and it’s often overlooked: the filter. Think of it as the vacuum’s lungs. Just as you need clear airways to breathe deeply, your Shark robot needs a clean filter to suck strongly and run healthily. Learning how to properly clean filter on Shark robot vacuum isn’t just a chore; it’s the single most important maintenance task you can perform to protect your investment and ensure your home stays truly clean.
Many users are surprised to learn that a seemingly small piece of foam or paper can have such a massive impact. A clogged filter doesn’t just reduce suction—it forces the vacuum’s motor to work overtime, draining the battery faster, generating more heat, and ultimately shortening the device’s lifespan. The good news? This critical maintenance task is remarkably simple, quick, and inexpensive. It requires no special tools, just a few minutes of your time every couple of weeks. This complete guide will walk you through everything you need to know about filter care for your Shark robot vacuum, from identification and cleaning to drying, reinstalling, and knowing when it’s time for a fresh one. We’ll cover all major Shark robot series, so you can confidently tackle this task no matter which model is humming around your baseboards.
Key Takeaways
- Critical for Performance: A clean filter is non-negotiable for maintaining strong suction, efficient cleaning, and protecting your vacuum’s motor from dust overload.
- Clean Frequently: Clean the filter every 1-2 weeks for average use, or after 3-5 cleaning cycles if you have pets, allergies, or high-traffic homes.
- Simple Process: Cleaning typically involves removing the filter, tapping out debris, and gently washing (if washable) before drying completely for 24 hours.
- Know Your Model: Not all Shark robot filters are washable. Check your manual to identify if you have a foam filter (washable) or a pleated paper filter (non-washable, tap-only).
- Dry Thoroughly: Reinstalling a damp filter is a common mistake that causes clogs and mold. Always air-dry the filter for a full 24 hours away from direct sunlight or heat.
- Watch for Replacement: Replace the filter every 3-6 months if you notice tears, permanent odors, or if suction doesn’t improve after a thorough clean.
- Neglect Has Consequences: Ignoring filter maintenance leads to poor cleaning results, shorter battery life, excessive motor strain, and can void your warranty.
📑 Table of Contents
- Understanding Your Shark Robot Vacuum’s Filter: The First Line of Defense
- When and How Often Should You Clean the Filter?
- Step-by-Step Guide: How to Clean Your Shark Robot Vacuum Filter
- Model-Specific Considerations: Not All Sharks Are Identical
- Drying, Reinstalling, and Post-Cleaning Checks
- When Cleaning Isn’t Enough: Signs It’s Time for a New Filter
- The High Cost of Neglect: Why This Simple Task Matters So Much
- Conclusion: A 5-Minute Habit for Years of Service
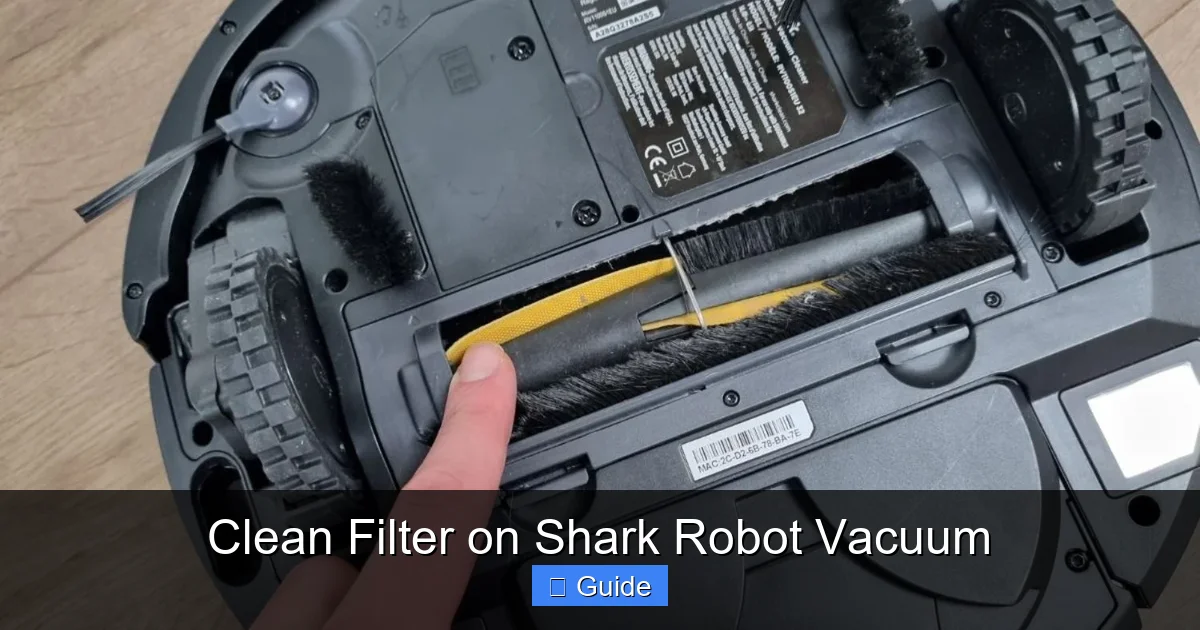
Understanding Your Shark Robot Vacuum’s Filter: The First Line of Defense
Before you can clean something, you need to know what you’re looking at. Shark robot vacuums use different filter technologies across their various models, and understanding yours is the first step to proper care. The filter’s job is to capture fine dust, allergens, and microscopic particles that the vacuum’s brushes and suction inlet pull from your floors. Without it, all that debris would be blown back into your room’s air, and the vacuum’s internal components would quickly become clogged with abrasive grime.
How Filters Work and Why They Clog
As air and debris are sucked into the vacuum, they pass through the filter. The filter media—whether foam or pleated paper—acts as a physical barrier. Larger particles like pet hair and crumbs are trapped in the bin, but the tiniest particles of dust, pollen, and dander are caught by the filter. Over time, this fine dust accumulates in the filter’s pores. This buildup is what causes clogs. A clogged filter has restricted airflow, which directly translates to weaker suction at the floor nozzle. It’s a direct, linear relationship: more clog = less suck. Furthermore, the vacuum’s motor has to work harder to pull air through the dense blockage, leading to increased wear and tear and reduced battery runtime on cordless models.
The Two Main Types of Shark Robot Filters
Shark primarily uses two types of filters in its robot lineup, and the cleaning method differs drastically between them. Using the wrong method can destroy your filter.
- Foam Filters (Washable): Commonly found in older Shark ION Robot models (like the RV750, RV850) and some newer ones. These are typically blue or black rectangular pieces of soft, porous foam. They are designed to be rinsed with water. The open-cell structure allows for thorough washing to dislodge embedded dust.
- Pleated Paper Filters (Non-Washable): Found in most newer Shark AI Ultra and ION Robot models (like the AV753, AV761, RV2502). These look like small, accordion-folded paper cartridges, often white or light gray. They are made of a dense, fibrous material. These must never get wet. Water destroys the paper’s structure, causing it to disintegrate or become permanently clogged. They are cleaned by mechanical agitation only—tapping and brushing.
If you’re unsure, consult your user manual. The manual will explicitly state if the filter is “washable” or “non-washable.” You can also often tell by feel: foam is soft and flexible; paper is stiff and crinkly. When in doubt, assume it’s non-washable and only tap it out.
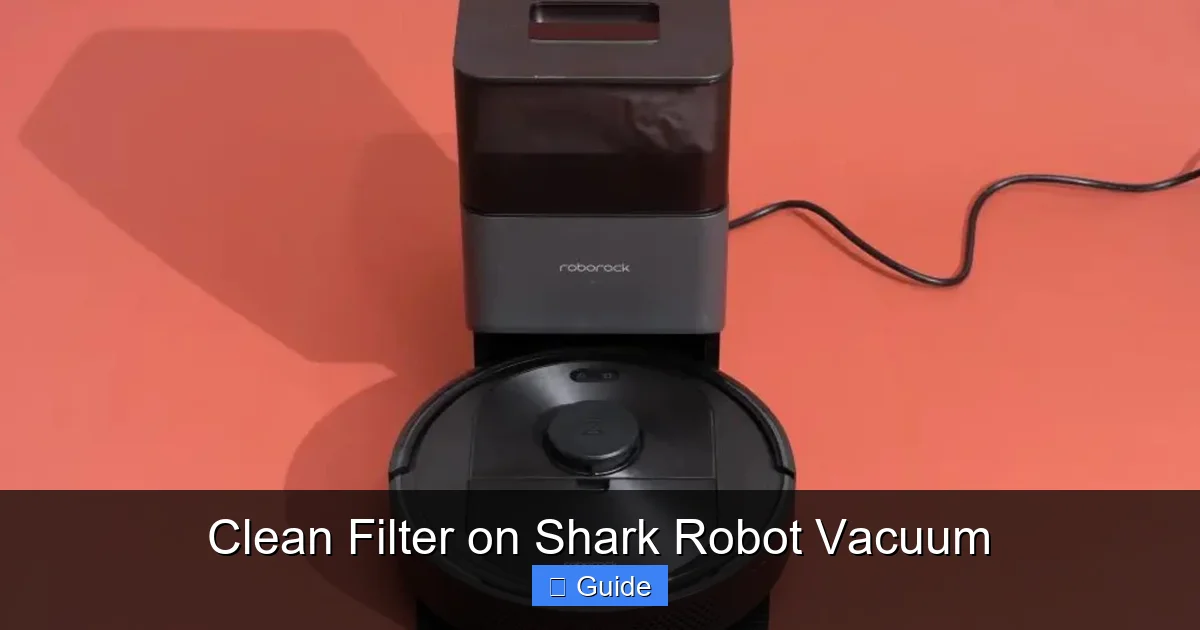
When and How Often Should You Clean the Filter?
This is the golden question, and the answer depends heavily on your home’s environment. There is no one-size-fits-all schedule, but there are clear guidelines and tell-tale signs that your filter needs attention now.
Visual guide about Clean Filter on Shark Robot Vacuum
Image source: robots.net
General Frequency Guidelines
As a baseline rule of thumb, plan to inspect and clean your Shark robot’s filter every 1 to 2 weeks. This is for an average home with hard floors and low-pile carpet, no pets, and one or two occupants. However, you must adjust this schedule based on your specific conditions:
- Pet Owners: If you have cats or dogs, especially those that shed, clean the filter after every 3-5 cleaning cycles. Pet hair and dander are prolific and will clog a filter remarkably fast.
- Allergy Sufferers: For those with dust mites, pollen, or other environmental allergies, frequent cleaning (weekly) is crucial to maintain the vacuum’s allergen-capturing efficiency.
- High-Traffic Homes: Large families, homes with young children, or houses with lots of entry/exit points track in more dirt and debris. Opt for a weekly cleaning schedule.
- Carpeted Homes: Carpets, especially high-pile, hold more dust and release it into the air as the vacuum agitates them. This dust load is higher than on hard floors, so clean more often.
Recognizing the Signs of a Clogged Filter
Don’t wait for the schedule—listen to your vacuum. Your Shark robot will give you clear signals that its filter is struggling:
- Noticeably Weaker Suction: The most obvious sign. If your vacuum seems to be pushing debris around instead of picking it up, a clogged filter is the prime suspect.
- Shorter Runtime: A clogged filter makes the motor work harder, draining the battery much faster. If your vacuum is dying in 45 minutes instead of its usual 90, check the filter first.
- Unusual Noises: A strained, higher-pitched whining sound from the motor indicates it’s fighting for airflow. A healthy vacuum has a consistent, lower hum.
- Visible Dust Puffing from the Exhaust: Check the exhaust vent on the side or back of the robot. If you see a visible cloud of fine dust escaping, the filter is not capturing particles—it’s overloaded and air is bypassing it.
- The “Clean Filter” Alert: Many newer Shark AI models have an intelligent filter maintenance sensor. If the indicator light on the robot or in the Shark app turns on, clean the filter immediately. Don’t ignore this automated reminder.
Step-by-Step Guide: How to Clean Your Shark Robot Vacuum Filter
Now for the hands-on part. The process is straightforward, but precision matters. We’ll break it down for both washable and non-washable filters. Always, always start by turning off and removing the robot from its charging dock.
Visual guide about Clean Filter on Shark Robot Vacuum
Image source: robots.net
Step 1: Access and Remove the Filter
The filter is located inside the dustbin assembly. To access it:
- Press the release button on the dustbin and pull it straight out from the back of the robot.
- Open the dustbin lid. On most models, this is a hinged flap on the top of the bin.
- You will see the filter seated inside a plastic frame or holder. Gently pull the filter straight out. It should come out easily. If it’s stuck, check for debris jamming it in place and remove that first.
Pro Tip: Do this over a trash can. Tapping the filter will dislodge dry dust and debris you don’t want to spread on your floor.
Step 2: Removing Loose Debris (For ALL Filter Types)
This is the first and most important step for both filter types.
- Hold the filter over a trash receptacle.
- Firmly tap the edge of the filter against the side of the trash can. Do not hit the filter media surface directly with a hard object, as this can tear or damage it. The goal is to use the rigid plastic frame to knock loose debris out of the filter media.
- You can also use a soft-bristled brush, like a clean paintbrush or makeup brush, to gently sweep across the surface of the filter, dislodging dust from the fibers. This is especially helpful for pleated paper filters.
- Continue tapping and brushing until no more dust clouds emerge. You’ll be amazed at how much comes out.
Step 3: Washing (ONLY for Washable Foam Filters)
This step is ONLY for filters confirmed to be washable (foam type). Skip to Step 4 if you have a paper filter.
- Take the foam filter to a sink.
- Use lukewarm water and gently squeeze and massage the foam. Do not wring or twist it aggressively, as this can tear the foam.
- You may use a tiny drop of mild dish soap if the filter is exceptionally greasy (e.g., from cooking fumes). Rinse extremely thoroughly to remove all soap residue, as any leftover soap will create suds when the vacuum runs and can damage the motor.
- Repeat the rinsing process until the water runs completely clear.
Step 4: Drying – The Most Critical Step
This step is non-negotiable and applies to both washed foam filters and tapped paper filters. Never reinstall a damp filter.
- Gently shake off excess water (for foam).
- Place the filter on a clean, dry towel in a well-ventilated area, away from direct sunlight, radiators, or hair dryers. Heat can warp or melt the filter media.
- Allow it to air dry for a minimum of 24 hours. For foam filters in humid climates, 48 hours is safer. The filter must be completely dry to the touch, inside and out.
- Do not use a hair dryer, oven, or microwave to speed up drying. This will destroy the filter.
Real-World Example: After cleaning your filter on a Saturday morning, don’t put it back in until Sunday morning at the earliest. Set a reminder on your phone. Patience prevents a ruined filter and a potentially damaged vacuum motor.
Step 5: Reinstallation and Testing
- Ensure the filter is 100% dry.
- Align it correctly with the holder. It should fit snugly but without force. There is usually only one correct orientation.
- Push it firmly into place until it seats properly.
- Close the dustbin lid and click the dustbin back into the robot until it locks.
- Place the robot on its dock to charge.
- Run a test cleaning cycle. Listen for normal motor sounds and check the exhaust for dust. You should immediately notice a return of strong suction.
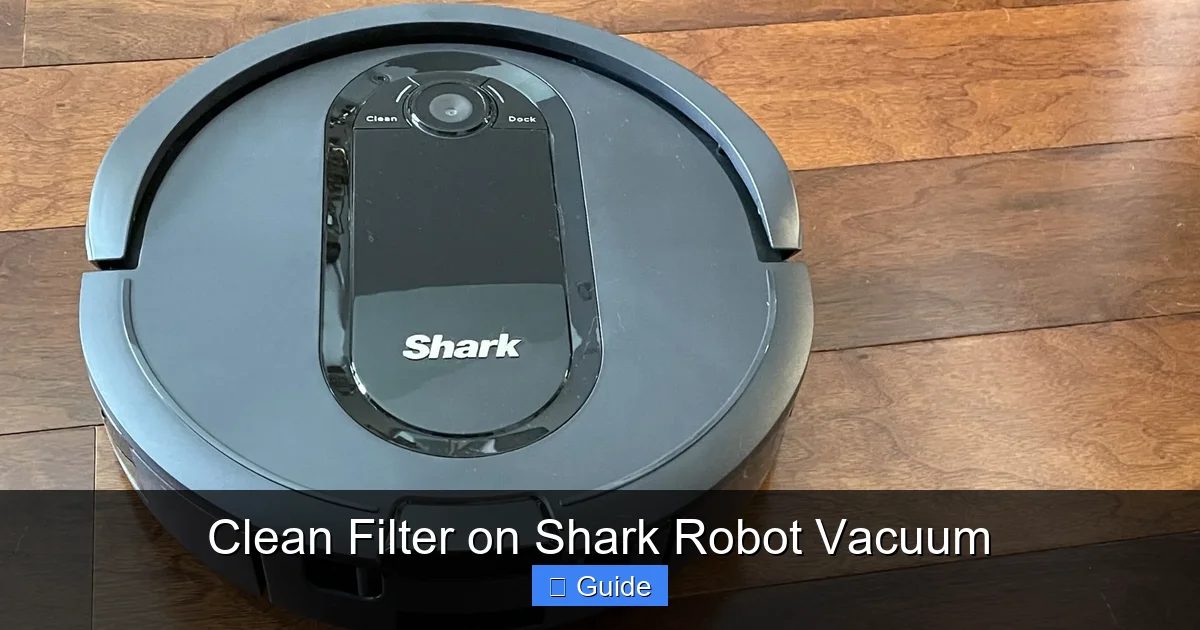
Model-Specific Considerations: Not All Sharks Are Identical
While the core process is universal, the location and design of the filter can vary slightly between Shark’s robot families. Here’s what to know for the most common lines.
Visual guide about Clean Filter on Shark Robot Vacuum
Image source: robots.net
Shark ION Robot Series (RV750, RV850, RV862, etc.)
These are some of the earliest models and almost universally use the blue rectangular foam filter. The dustbin opens from the top, and the filter is held in by a plastic frame that you pull straight out. These are very straightforward and fully washable. The main caution is ensuring the foam is completely dry, as its thickness can hold moisture deep inside.
Shark ION Robot with AI Series (RV2502, RV2501, etc.)
These mid-life models introduced a more cylindrical dustbin design. They typically use a white, pleated paper filter that is NOT washable. The filter is often housed in a round plastic cartridge that you twist or pull to remove. Cleaning is strictly tapping and brushing. Never attempt to rinse this filter.
Shark AI Ultra Series (AV752, AV761, AV2502AE, etc.)
The current flagship line. These feature the “Matrix Clean” navigation and a larger, square-ish dustbin. They use a white or light-gray pleated paper filter. Access is via the top lid of the dustbin. The filter is held in a square plastic cage. Again, tap only. Some newer variants in this series might have a hybrid filter, so always double-check your manual. The AI Ultra models also have the “Clean Filter” app notification, making maintenance reminders very clear.
Finding Your Model’s Exact Instructions
Your best resource is always the physical user manual that came with the vacuum. If it’s lost, go to the Shark Clean website, navigate to “Support” or “Customer Service,” enter your exact model number (found on a sticker on the underside of the robot), and download the PDF manual. Search the document for “filter” or “maintenance.” This will give you the definitive word on your filter’s type and care.
Drying, Reinstalling, and Post-Cleaning Checks
You’ve cleaned the filter. Now what? The aftermath is just as important as the cleaning itself. A mistake here can undo all your good work.
The 24-Hour Rule: Why Patience is a Virtue
We cannot stress this enough. A filter that feels dry to the touch on the surface can still harbor moisture deep within its fibers or pores. When you power on the vacuum, that residual moisture is sucked into the motor housing. This can cause several problems: it can create a musty odor that blows back into your home, it can promote mold and mildew growth inside the vacuum (a health hazard), and in severe cases, it can cause a short circuit or corrosion of electronic components. The 24-hour air-dry period is a minimum safety buffer. For foam filters, consider 48 hours to be safe.
Correct Reinstallation: Ensuring a Proper Seal
When you reinsert the filter, make sure it is seated correctly in its housing. There should be no gaps. The filter’s frame is designed to create a seal so all air is forced through the filter media. If it’s crooked or not pushed in all the way, unfiltered air will rush around the edges, bypassing the filter entirely. This means you’re running your vacuum with no dust protection, and your motor is still at risk. You should feel a slight click or resistance when it’s fully in place. Give it a gentle tug to ensure it doesn’t pull out easily.
Running Your First Cycle After Cleaning
After reinstalling and charging, run a short cleaning cycle in a single room. Stand near the exhaust vent and smell the air. It should smell clean, not musty or dusty. Watch the dustbin—it should be collecting debris as expected. If you see a dust cloud from the exhaust, the filter is either not installed correctly or was not cleaned thoroughly enough. Abort the cycle, re-check the installation, and if the problem persists, clean the filter again.
When Cleaning Isn’t Enough: Signs It’s Time for a New Filter
Filters are consumable parts. They have a finite lifespan, even with perfect care. Eventually, the filter media itself degrades and loses its ability to capture fine particles. Cleaning can only do so much.
Physical Damage and Wear
Inspect your filter closely during each cleaning. Look for:
- Tears or Holes: In foam filters, look for rips. In paper filters, look for splits or areas where the pleats have separated. Any breach in the media means unfiltered air is passing through.
- Permanent Staining or Discoloration: A filter that is permanently gray, black, or brown, even after a thorough wash, is saturated with embedded grime that can’t be removed.
- Rigidity or Brittleness: Paper filters can become stiff and brittle over time. Foam can become hard and crumbly. If it doesn’t flex slightly, it’s likely past its prime.
Performance That Doesn’t Recover
You’ve cleaned the filter meticulously, ensured it’s bone-dry, and reinstalled it correctly. Yet, the suction is still weak, the runtime is short, and the exhaust is dusty. This is a clear sign the filter media itself is exhausted and can no longer hold a charge of dust. It’s time for a replacement.
Persistent Odors
If your vacuum develops a lingering, musty smell that doesn’t go away after cleaning the filter and the dustbin, the odor may be trapped in the degraded filter fibers. At this point, replacing the filter is the only cure.
Replacement Schedule and Sourcing
As a preventative measure, plan to replace your Shark robot filter every 3 to 6 months with regular use. For homes with pets or allergies, lean toward the 3-month mark. You can purchase genuine Shark replacement filters (part numbers like “Shark ION Robot Filter” or “Shark AI Ultra Filter”) directly from Shark’s website, major retailers like Amazon, Best Buy, or Walmart. Always buy the filter specific to your exact robot model number. Using an incorrect filter can cause poor performance and damage.
The High Cost of Neglect: Why This Simple Task Matters So Much
Let’s connect the dots from a dirty filter to the bottom line: your wallet and your vacuum’s lifespan. Skipping filter maintenance isn’t just a minor oversight; it’s a direct path to premature failure and wasted money.
Straining the Motor: The Heart of the Machine
The vacuum’s motor is engineered to move a specific volume of air. A clogged filter restricts that airflow, creating back pressure. The motor has to spin faster and work harder to achieve the same suction. This generates excessive heat. Motors are designed to dissipate heat within normal operating parameters. Chronic overheating accelerates wear on the motor’s bearings and windings, leading to early failure. A motor replacement is often so costly that it’s not economically feasible, effectively turning your robot into a paperweight.
Draining the Battery
On cordless robots, the battery is a finite resource. A strained motor draws more current to compensate for the restricted airflow. This drains the battery in a fraction of the normal time. What was once a 90-minute runtime may shrink to 30 minutes, meaning your vacuum can’t clean your entire home in one go. You’re forced to run multiple partial cycles, which is inefficient and annoying. While batteries can be replaced, it’s an additional expense that could have been avoided.
Poor Cleaning Performance & Re-Debrising
The ultimate irony: a vacuum with a clogged filter doesn’t clean well. It might scatter dust, leave debris behind, and miss edges. You might run it more frequently to compensate, using more electricity and wearing the machine faster. You’re also potentially re-aerosolizing captured dust back into your living space because the filter is overloaded and some particles bypass it. You’re not just getting a poor clean; you might be making your air quality worse.
Voiding Your Warranty
Shark’s warranty, like most appliance warranties, requires proper maintenance. If a technician examines your failed robot and finds evidence of a chronically clogged filter—caked with dust, a damaged motor from overheating—they will almost certainly deny the warranty claim. The repair or replacement cost then falls entirely on you. Keeping a simple maintenance log with dates you cleaned the filter can be useful proof of proper care.
Conclusion: A 5-Minute Habit for Years of Service
Caring for your Shark robot vacuum’s filter is the definition of a high-impact, low-effort maintenance habit. In less time than it takes to make a cup of coffee, you can perform this task once every week or two and safeguard your vacuum’s performance, extend its useful life by years, protect your home’s air quality, and save yourself from expensive repairs. The process is universal: remove, tap/brush out debris, wash if applicable, dry for 24+ hours, and reinstall. The key is consistency and respecting the critical difference between washable foam and non-washable paper filters. Make it a part of your routine—tie it to another weekly chore, like taking out the trash. Set a reminder on your phone if you need to. Your Shark robot works hard for you; this is the one simple thing you can do to ensure it continues to work hard and work well for a long, long time. A clean filter means a powerful clean, a healthy home, and a happy investment.
Frequently Asked Questions
How often should I clean the filter on my Shark robot vacuum?
For average use, clean the filter every 1-2 weeks. If you have pets, allergies, or a large home, clean it after every 3-5 cleaning cycles. Always clean it immediately if you notice reduced suction or if your model has a “Clean Filter” indicator light.
Can I use water to clean all Shark robot vacuum filters?
No. Only washable foam filters (typically blue) can be rinsed with water. Pleated paper filters (typically white) are never washable and will be destroyed by moisture. Paper filters must only be cleaned by tapping and brushing. Always check your user manual to confirm your filter type.
What happens if I reinstall a damp filter?
Reinstalling a damp filter is very damaging. Moisture can be sucked into the motor, causing corrosion, short circuits, and mold growth inside the vacuum. It will also immediately clog again. Always ensure the filter is completely air-dry for at least 24 hours before reinstalling it.
How do I know when it’s time to replace the filter instead of just cleaning it?
Replace the filter if you see physical tears or holes in the media, if it remains permanently discolored and clogged after a thorough clean, if it feels brittle or hard, or if suction and performance do not improve after cleaning. As a preventative measure, replace it every 3-6 months depending on use.
Do all Shark robot vacuums use the same filter?
No. Filter design varies by model series and year. Foam washable filters are common in older ION Robots, while newer AI Ultra and ION Robot with AI models typically use non-washable pleated paper filters. Always purchase a replacement filter using the exact model number of your vacuum.
Can I use compressed air to clean the filter?
It’s not recommended. While it might seem effective, compressed air can force dust particles deeper into the filter media and potentially damage the delicate fibers. The safe and effective methods are gentle tapping and using a soft-bristled brush for all types, and lukewarm water only for confirmed washable foam filters.