Regularly changing your Shark Robot’s filter is non-negotiable for peak performance and clean air. A clogged filter reduces suction power, strains the motor, and can blow dust back into your home. This guide provides precise, model-specific instructions to make the filter change quick and easy, ensuring your robot vacuum works smarter, not harder, for years to come.
So, you’ve noticed your Shark Robot vacuum isn’t picking up quite as much dust as it used to. Maybe it sounds a bit strained, or you’re seeing more dust settling on surfaces after it runs. Before you start troubleshooting more complex issues, there’s one incredibly common—and incredibly simple—culprit: a clogged filter. Think of the filter as your robot’s lungs. If they’re full of gunk, it can’t breathe properly, and its performance plummets. Learning how to change a Shark Robot filter is one of the most fundamental, yet impactful, pieces of maintenance you can perform. It’s a two-minute task that saves you from reduced cleaning power, premature motor wear, and recirculated allergens. This guide will walk you through everything, from identifying your filter type to the exact steps for every major Shark Robot series.
We’re going to break it down clearly. No confusing jargon, no guesswork. Whether you own a sleek Shark ION Robot, an intelligent Shark AI Ultra, or the powerful Shark Detect Pro, you’ll find the precise instructions you need right here. We’ll cover the tools you need (spoiler: it’s almost always just your fingers), how to know when it’s time for a change, and the critical “do’s and don’ts” of filter maintenance. By the end, you’ll be a filter-changing pro, ready to keep your home cleaner and your robot running like new.
Key Takeaways
- Filters are the lungs of your robot: They trap fine dust and allergens; a clean filter is essential for strong suction and healthy indoor air quality.
- Frequency depends on usage: Change the filter every 2-3 months for average homes, monthly for pet owners or allergy sufferers.
- Know your specific model: Shark has multiple Robot series (ION, AI, Detect); each has a slightly different filter location and removal method.
- You need the right tools: Usually just your hands, but a soft brush or canned air helps clean the filter housing.
- Never wash non-washable filters: Only Shark’s “Washable” or “Anti-Allergen Complete Seal” filters can be rinsed. Others must be replaced.
- Installation is simple but specific: Filters must sit flush and correctly oriented in their housing; an improper fit causes air leaks.
- Buy genuine Shark filters: Off-brand filters often don’t seal properly, fit poorly, and can damage your vacuum’s motor over time.
📑 Table of Contents
- Why Changing Your Shark Robot Filter is Critical
- Identifying Your Shark Robot Model & Filter Type
- Essential Tools & Preparation Before You Start
- Step-by-Step Guide: How to Change Your Shark Robot Filter
- Maintenance Tips & Best Practices for Longevity
- Troubleshooting: What If My Robot Still Has Low Suction After a Filter Change?
- Conclusion: A Simple Habit for a Powerful Clean
Why Changing Your Shark Robot Filter is Critical
It’s easy to think of a vacuum filter as just a small, inconsequential part. In reality, it’s one of the most vital components for both your robot’s health and your family’s. Let’s dive into the why behind this essential maintenance task.
The Direct Link Between Filter Health & Suction Power
Your Shark Robot creates a powerful airflow to lift dirt from your floors. This air must pass through the filter before being expelled. Imagine trying to breathe through a thick, dirty mask—it’s labored and inefficient. That’s exactly what happens inside your vacuum. A filter clogged with dust, hair, and dander creates immense resistance. The motor has to work significantly harder to pull the same amount of air, leading to a dramatic drop in suction at the brush roll. You’ll notice it misses larger debris like cereal or pet kibble. Regularly changing the filter maintains that powerful, consistent airflow your Shark is engineered for.
Protecting the Motor and Extending Lifespan
The motor is the heart of your robot vacuum, and it’s expensive to replace. A blocked filter doesn’t just reduce suction; it causes the motor to overheat. Constantly straining against high airflow resistance leads to premature wear on motor brushes and bearings. By simply replacing a $15-$25 filter every few months, you are directly investing in protecting a much more costly component and potentially adding years to your robot’s life.
Allergen Containment and Air Quality
This is a huge point, especially for allergy and asthma sufferers. Shark Robot vacuums, particularly models with “Complete Seal” technology, are designed to trap 99.9% of particles as small as 0.3 microns. But this seal is only as good as the filter. A saturated filter can’t trap fine particles effectively, allowing them to bypass the system and be blown back into your room’s air during exhaust. A fresh, high-efficiency filter ensures that once dust and allergens are sucked up, they stay trapped inside the robot’s dustbin and filter system, not back onto your floors or in the air you breathe.
Preventing Costly Repairs and Error Codes
Many modern Shark Robots have sensors that monitor airway pressure. A severely clogged filter can trigger error codes related to “suction” or “clog” that are not actually caused by a blocked brush roll or intake. You might waste time cleaning the wrong parts. A filter change is the first and easiest diagnostic step. Furthermore, the strain from a clogged filter can lead to other components, like the fan or hoses, failing sooner.
Identifying Your Shark Robot Model & Filter Type
Before you can start, you need to know two things: 1) What exact Shark Robot model you own, and 2) What type of filter it uses. This isn’t a one-size-fits-all situation.
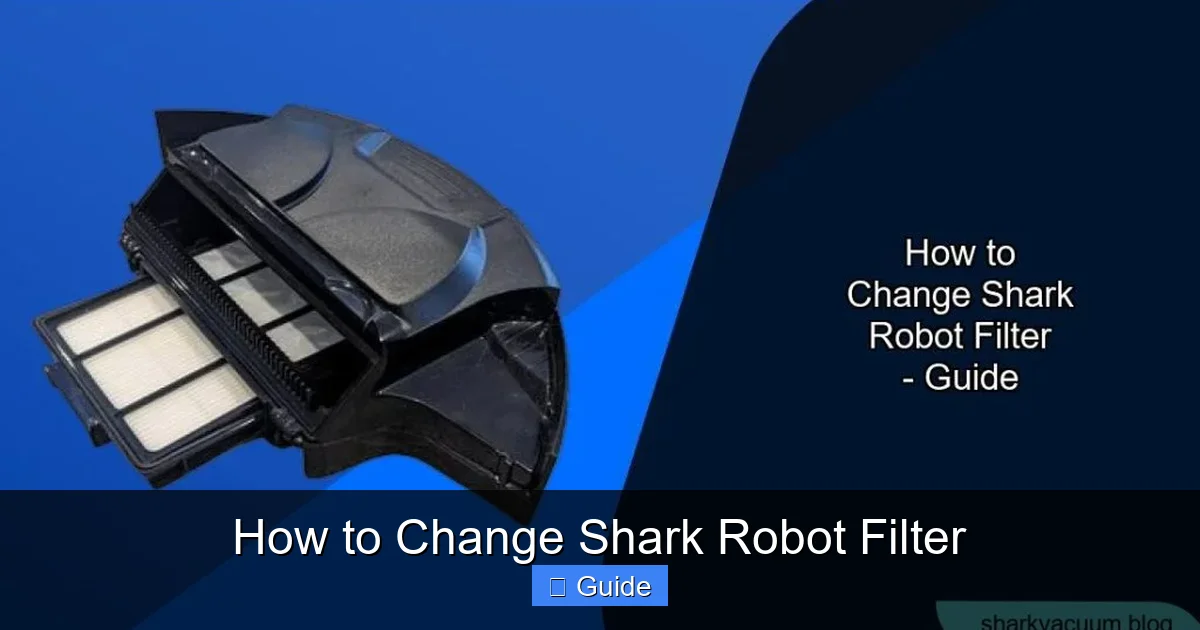
Visual guide about How to Change Shark Robot Filter
Image source: sharkvacuum.blog
How to Find Your Model Number
The model number is typically found on a sticker on the bottom of your robot vacuum. Lift the robot and look for a label near the wheels or brush roll housing. It will start with “RV” (for Robot Vacuum) followed by numbers and letters, like RV1001AE or RV912. You can also find it in the Shark Clean app under device settings or on the original packaging. Knowing this exact model is crucial for ordering the correct replacement filter.
Common Shark Robot Filter Types
Shark uses a few primary filter designs across its lineup. The most important distinction is between Washable Filters and Non-Washable (Replaceable) Filters.
- Washable Filters (often “Anti-Allergen Complete Seal”): These are typically made of a pleated, fabric-like material. They are dark gray or black. You can rinse them under cool water, let them dry completely for 24 hours, and reuse them. They have a longer lifespan but still need regular cleaning and eventual replacement (usually after 6-12 washes). Found on many ION and AI series models.
- Non-Washable/Replaceable Filters: These are often a finer, white or light gray pleated paper or fiber material. They cannot get wet. You simply remove and discard them, replacing with a new one. They are common on the Detect series and some older ION models.
- Pre-Motor Filters vs. Post-Motor Filters: Some advanced models have two filters. The pre-motor filter (the one you change most often) protects the motor from large debris. The post-motor filter cleans the air before it exits the robot. Your user manual will specify if your model has two and the replacement schedule for each. For most users, the single main filter is the pre-motor filter.
Essential Tools & Preparation Before You Start
Changing a Shark Robot filter is designed to be tool-free. However, a little preparation makes the process cleaner and faster.
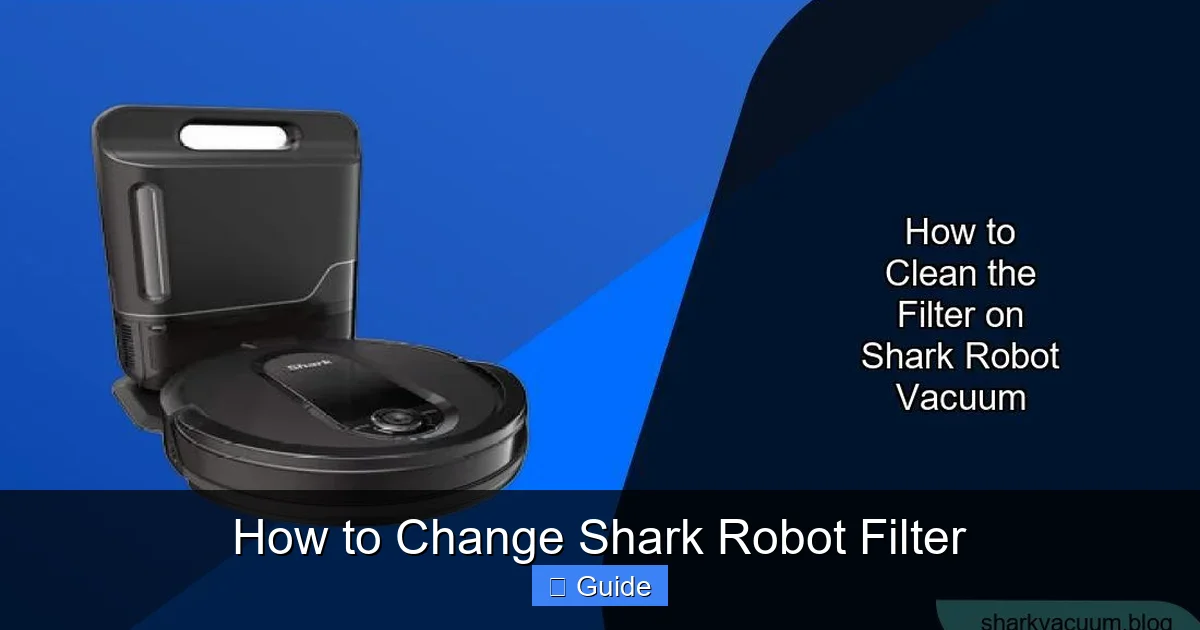
Visual guide about How to Change Shark Robot Filter
Image source: sharkvacuum.blog
What You’ll Need
- New Shark Robot Filter: Always use a genuine Shark replacement filter (part number like HF1, HF2, XF1, etc.) for your specific model. You can find this on the old filter’s frame or in your manual.
- A clean, flat surface: Your kitchen table or countertop.
- A soft-bristled brush (optional but helpful): A clean, dry paintbrush or makeup brush to gently dislodge dust from the filter housing.
- Canned air or a bulb syringe (optional): To blow out any loose debris from the filter cavity without creating a mess.
- Your robot vacuum: Fully charged is best, but not required for filter change.
Safety First & Best Practices
Always perform this task with the robot powered OFF and, for safety, with the battery removed if your model has a removable battery (most do not). This prevents any accidental startup. Work in a well-lit area. If you have allergies, consider wearing a simple dust mask while handling the dirty filter. Have a small trash bag ready to immediately dispose of the old filter to contain the dust.
Step-by-Step Guide: How to Change Your Shark Robot Filter
Now, the core of the guide. The process varies slightly by series. Find your series below and follow the exact steps. The general principle is always: Locate the filter cover on the side or top of the robot, open it, remove the old filter, clean the area, insert the new filter correctly, and close the cover securely.
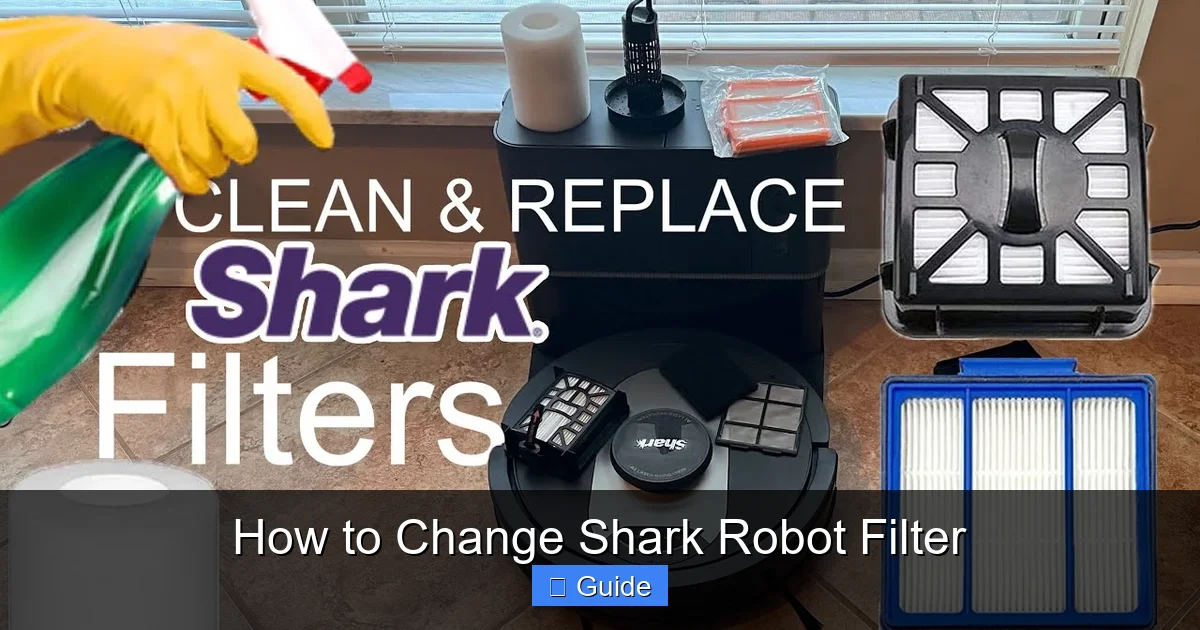
Visual guide about How to Change Shark Robot Filter
Image source: i.ytimg.com
For Shark ION Robot Series (RV10, RV20, RV30, RV40, RV50, RV60, RV70, RV80, etc.)
This is the most common series. The filter is housed in a small, rectangular compartment on the side or rear of the robot.
- Position the Robot: Place the robot upside-down on a soft towel to protect its finish.
- Locate the Filter Door: On the bottom side (not the brush roll side), you’ll see a small, rectangular plastic door secured by one or two plastic tabs or a single screw.
- Open the Filter Door: Gently pry open the plastic tabs with your fingernail or a flat tool, or unscrew the screw if present. The door will hinge down or pop off.
- Remove the Old Filter: The filter sits snugly in a slot. Grasp the tab on the filter frame and pull it straight out. It may require a slight wiggle.
- Inspect and Clean the Housing: Use your soft brush to sweep away any dust or hair that has accumulated inside the filter cavity. Do not use water or liquids here.
- Insert the New Filter: Take your new, genuine Shark filter. It will only fit one way. Note the orientation—there is often a tab or cut-out that aligns with a notch in the housing. Slide it in firmly until it sits flush and level.
- Close the Filter Door: Snap the plastic door back into place until you hear it click, ensuring it’s sealed. Re-insert the screw if your model has one, but do not overtighten.
- Recharge and Reset: Place the robot back on its dock. Some models may require you to press and hold the “Clean” button for 2-3 seconds to reset the filter reminder timer in the app.
For Shark AI Ultra Series (RV2500, RV2600, etc.)
The AI Ultra has a slightly different, more accessible top-loading design. The process is very similar to the ION series but the location is different.
- Position the Robot: Place it upside-down.
- Locate the Filter Compartment: On the top side (the side with the LIDAR dome), find the rectangular filter cover. It’s held by two clips.
- Open the Cover: Press the two release clips inward and lift the cover off.
- Remove and Replace the Filter: Pull the filter out by its tab. The new filter slides in the same orientation. Ensure it’s seated properly.
- Reattach the Cover: Align the cover and press down until the clips snap securely. You should feel a firm seal.
Pro Tip: The AI Ultra also has a small foam pre-filter inside the dustbin. While you’re doing maintenance, pull out the dustbin and rinse this foam filter under water (let dry 24 hrs) for even better performance.
For Shark Detect Pro Series (RV2800, RV2900, etc.)
The Detect series uses a non-washable, high-efficiency filter and has a very distinct, easy-to-use top cover.
- Position the Robot: Upside-down.
- Find the Filter Cover: On the top of the robot, there is a large, circular cover with a Shark logo or a clear plastic dome. This cover rotates.
- Rotate and Remove: Turn the cover counter-clockwise (about a quarter turn) until it releases. Lift it straight off.
- Remove the Filter: Underneath, you’ll see the white, pleated filter held by a plastic frame. Lift the entire filter assembly out.
- Dispose and Install: Discard the old filter. Place the new filter into the empty frame, ensuring the pleats are not crushed and it lies flat. The frame has tabs; the filter has corresponding slots—it only fits one way.
- Reassemble: Place the filter-in-frame back into the cavity. It should sit level. Then, align the cover’s tabs with the slots in the robot body and rotate it clockwise until it locks firmly in place.
For Shark ION Robot Vacuum with Self-Empty Base (RV1001AE, etc.)
The self-empty base has its own filter! This is a common point of confusion. The robot itself has a filter (change as per the standard ION guide above). The Self-Empty Base also contains a larger, rectangular charcoal filter that neutralizes odors.
- Disconnect Power: Unplug the base from the wall.
- Access the Base Filter: On the back or side of the base, there is a filter access door secured by a clip or screw.
- Open and Remove: Open the door and pull out the rectangular charcoal filter.
- Replace: Insert the new base filter in the same orientation. Close the door securely.
- Important: The base filter typically needs changing every 6-12 months, depending on use, and is a separate purchase from the robot filter.
Maintenance Tips & Best Practices for Longevity
Changing the filter is the main event, but surrounding habits can maximize its effectiveness and your robot’s overall health.
Establish a Regular Schedule
Don’t wait for performance to drop. Set a calendar reminder based on your household:
- Light Use (no pets, no allergies): Every 3 months.
- Average Use (1 pet, some allergies): Every 2 months.
- Heavy Use (multiple pets, severe allergies, high dust): Every 1 month.
The Shark Clean app often has a filter replacement reminder. Use it, but also use your own judgment based on your environment.
How to Properly Clean a Washable Filter
If you have a washable filter, follow these steps exactly:
- Remove the filter from the robot.
- Hold it under a gentle stream of cool water. Do not use soap, detergent, or hot water.
- Gently squeeze and agitate the filter to flush out dust. Do not wring or twist forcefully, as this can damage the pleats.
- Shake off excess water.
- Place the filter in a well-ventilated area, away from direct sunlight or heat sources. Prop it up if possible.
- Allow it to air dry for a FULL 24 hours. This is critical. Reinstalling a damp filter will ruin it and can damage the motor. Do not use a hair dryer or other heat source.
After about 6-12 wash cycles, the filter material will start to break down and lose its efficiency. At that point, replace it with a new one.
What NOT To Do
- Never wash a non-washable filter. It will disintegrate.
- Never use compressed air directly on the filter. It can tear the material. Use it only in the empty housing.
- Never reinstall a damp or wet filter.
- Never skip cleaning the filter housing. A clean home for the filter ensures a good seal.
- Never use third-party filters that aren’t engineered to Shark’s exact specifications.
Troubleshooting: What If My Robot Still Has Low Suction After a Filter Change?
You’ve changed the filter, but the problem persists. Don’t panic. The filter is just one part of the airflow path. Now, systematically check the following:
Check the Brush Roll and Intake
Turn the robot over. Is the brush roll clean and spinning freely? Is hair or carpet fiber wrapped around the ends? Clear it. Look at the main intake vents on the underside—are they blocked by debris or a large piece of carpet?
Inspect the Dustbin and Exhaust
Empty the dustbin completely. Check the fine mesh screen inside the bin (if your model has one) for clogs. Also, check the exhaust port on the side or back of the robot—make sure nothing is blocking the air coming out.
Clean the Wheels and Sensors
Wheels packed with hair can cause the robot to ride higher, reducing contact and suction effectiveness. Wipe the wheels and the cliff sensor windows (the black bars on the underside) clean.
Consider the Battery
An old, failing battery can’t provide enough power to the motor, mimicking low suction symptoms. If your robot’s runtime has significantly decreased, a battery replacement might be needed.
When to Contact Shark Support
If you have changed the filter, cleaned all airways, and the suction is still weak, there may be an internal issue like a worn fan or motor. At this point, it’s best to contact Shark Customer Care, especially if your robot is still under warranty. Have your model number and proof of purchase ready.
Conclusion: A Simple Habit for a Powerful Clean
Mastering how to change your Shark Robot filter transforms you from a passive user into an active maintainer of your home’s cleaning system. It’s the single most effective, low-cost action you can take to guarantee that your investment continues to deliver that powerful, thorough clean you bought it for. You’re not just swapping out a part; you’re protecting the motor, safeguarding your indoor air from recirculated allergens, and ensuring every cleaning cycle is as effective as the first. Make it a habit. Pair it with other simple tasks like emptying the dustbin after each run and cleaning the brush roll monthly. This small, consistent effort will reward you with a reliably high-performing robot vacuum and a visibly cleaner, healthier home for years to come. Your Shark Robot works hard for you—give its lungs a regular breath of fresh air.
Frequently Asked Questions
How often should I change the filter in my Shark Robot vacuum?
For most households, change the main filter every 2-3 months. If you have pets, allergies, or a particularly dusty home, increase the frequency to once a month. Always follow the specific guidance in your model’s manual, as washable filters have a different (longer) replacement cycle based on washes.
Can I wash my Shark Robot filter?
It depends entirely on the filter type. Only filters explicitly labeled as “Washable” or part of the “Anti-Allergen Complete Seal” system can be rinsed with cool water and air-dried for 24 hours. Most standard Shark Robot filters are not washable and must be replaced when dirty. Check the filter itself or your manual to be sure.
How do I know when my Shark Robot filter needs to be changed?
Key signs include: noticeably weaker suction, the robot sounding like it’s struggling, more dust left on floors after cleaning, and the filter itself looking dark gray or black and clogged with dust (you’ll see this when you remove it). Many Shark Robots also send an alert in the Shark Clean app when the filter life is low.
Can I use water or cleaning solutions on my Shark Robot filter?
No. For washable filters, use only cool, clean water. Never use soap, detergent, or any cleaning solution, as residues can damage the filter media and be blown into your home. For non-washable filters, never get them wet at all. For all filter types, never soak them.
Where can I buy genuine Shark Robot replacement filters?
Always purchase from authorized retailers like Shark’s official website, Amazon (sold by Shark), Best Buy, Target, or Walmart. Look for the exact part number (e.g., HF1, XF1) for your specific robot model. Avoid generic or third-party filters, as they often lack the precise sealing and filtration efficiency of genuine parts.
What happens if I don’t change my Shark Robot filter regularly?
Neglecting filter changes leads to severely reduced suction power, causing your robot to miss dirt. It forces the motor to overwork, shortening its lifespan and potentially leading to expensive repairs. Most critically, a saturated filter fails to trap fine allergens and dust, allowing them to be expelled back into your home’s air, defeating the purpose of vacuuming altogether.