Removing Shark vacuum attachments is a simple but crucial skill for maintenance and versatility. The process almost always involves locating and pressing a release button or twisting the connection. Always power off and unplug your vacuum first to prevent accidental startup. While the core method is consistent across models, specific attachment types like the self-cleaning brush roll or pet multitool have unique locking mechanisms you need to identify.
So, you’re staring at your Shark vacuum, a tangle of attachments at your feet, and you just need to get that pet hair tool off to clean it. Or maybe you’re switching from cleaning the carpets to the sofa and need to swap out the main nozzle for the dusting brush. It seems like it should be obvious, but sometimes those attachments feel stubbornly stuck. Knowing how to remove Shark vacuum attachments correctly isn’t just about convenience; it’s a fundamental part of owning and maintaining your machine. Doing it the right way prevents damage to the locking mechanisms, saves you from frustrating struggles, and keeps your vacuum performing at its peak for years to come.
The good news is that Shark has standardized much of its attachment system across its vast lineup of Navigator, Rotator, Vertex, and IZOO models. The core principle is almost always the same: locate the release, depress it, and pull. However, the location and style of that release can vary. Some are obvious red buttons, others are subtle tabs, and a few specialized tools like the famous Self-Cleaning Brush Roll have a completely unique, tool-free design. This guide will walk you through every common scenario, turning a moment of confusion into a 10-second task. We’ll cover the universal steps, then dive into specific attachment types, troubleshooting for stuck tools, and essential maintenance checks you should do every time an attachment is off.
Key Takeaways
- Power Down First: Always turn off and unplug your Shark vacuum before attempting to remove any attachment to ensure safety and prevent damage.
- Find the Release Mechanism: Most attachments use a push-button release on the wand or tool itself; others twist or have a secondary lock tab that must be depressed.
- Identify Your Attachment Type: The removal technique varies slightly between standard floor nozzles, crevice tools, dusting brushes, and specialized tools like the pet multitool or self-cleaning brush roll.
- Apply Steady, Even Pressure: When pressing a release button, hold it down firmly while pulling the attachment straight out. Never use excessive force or wiggling.
- Consult Your Manual: Your Shark model’s manual is the ultimate authority. Model-specific diagrams are invaluable if you’re unsure about a particular connection point.
- Regular Removal is Key Maintenance: Frequently removing and cleaning attachments, especially brush rolls and filters, is essential for maintaining suction power and vacuum performance.
- Inspect for Wear: While attachments are off, check the locking mechanisms, connection points, and brush bristles for damage, wear, or hair wraps that could cause future removal issues.
📑 Table of Contents
- Understanding the Universal Shark Attachment System
- Step-by-Step: Removing the Most Common Shark Attachments
- Model-Specific Considerations and Variations
- Troubleshooting: What to Do When an Attachment is Stuck
- Maintenance Checklist: What to Do Every Time You Remove an Attachment
- Conclusion: Mastery for a Longer-Lasting Vacuum
Understanding the Universal Shark Attachment System
Before we get into specifics, let’s establish the common language. Shark vacuums, whether upright or stick, typically use a two-part wand system. The main body of the vacuum connects to a lower wand (or extension tube). This lower wand then connects to an upper wand, which in turn connects to the various cleaning attachments (nozzles, brushes, tools). Each of these connection points—body to lower wand, lower to upper wand, wand to tool—uses a similar quick-release locking mechanism.
The Standard Push-Button Release
This is the workhorse of the Shark system. You’ll find a prominent, usually red or gray, button on the wand or the attachment’s connector. The button is spring-loaded. When you press it in, it retracts a small metal or plastic locking pin that protrudes from the side of the connector sleeve. That pin slides into a corresponding hole on the wand or tool it connects to, locking it in place. To remove, you simply press the button all the way in and then pull the attached piece straight out. It’s important to press the button *before* you pull. Trying to pull without pressing first can cause the pin to jam or wear down the hole.
The Twist-and-Lock Mechanism
While less common on modern Shark attachments, some older models or specific tools (like certain crevice tools) use a simple twist-lock. You’ll see ridges or a textured grip on the connector. To attach, you align the tabs and push on, then twist clockwise until it locks. To remove, you twist counter-clockwise to disengage the tabs and then pull straight off. There is no button. If you’re struggling with a tool that has no visible button, check if it twists.
The Secondary Lock Tab
Some tools, particularly the motorized pet tools or the dusting brush with a flexible neck, have a secondary security tab. This is a small, often gray or black, plastic flap or button located near the main push-button. Its purpose is to prevent accidental detachment if the main button is brushed during use. To remove these tools, you must depress this secondary tab *and* the main release button simultaneously before pulling. It feels like you need three hands, but with practice, you can use your thumb to hold the tab and your index finger to press the button. Always look for a second, smaller release point if the main button alone isn’t working.
Step-by-Step: Removing the Most Common Shark Attachments
Now let’s apply those principles to the tools you use every day. We’ll start with the basics and move to the more specialized.
Visual guide about How to Remove Shark Vacuum Attachments
Image source: m.media-amazon.com
Removing the Main Floor Nozzle (Shark Navigator/Rotator Head)
This is the large head you use for carpets and hard floors. It connects to the lower wand. Locate the large, red push-button release on the back of the nozzle, right where it meets the wand. This is the easiest attachment to remove.
- Power Off & Unplug: This is non-negotiable. Safety first.
- Position the Vacuum: Lay the vacuum on its side or tilt it so the nozzle is accessible. Standing it upright is fine too.
- Locate the Button: Find the red button on the rear of the nozzle connector.
- Press and Pull: Press the button in firmly. You should feel a distinct click as the locking pin releases. While holding the button, grip the nozzle handle and pull it straight back, away from the wand. Do not twist or angle it.
- Set Aside: Place the nozzle on a soft surface to avoid scratching the floor pads.
Pro Tip: If the nozzle is stuck, ensure you are pressing the button all the way in. Sometimes debris or hair can jam the button mechanism. Press it a few times while the nozzle is attached to clear any obstruction before attempting removal again.
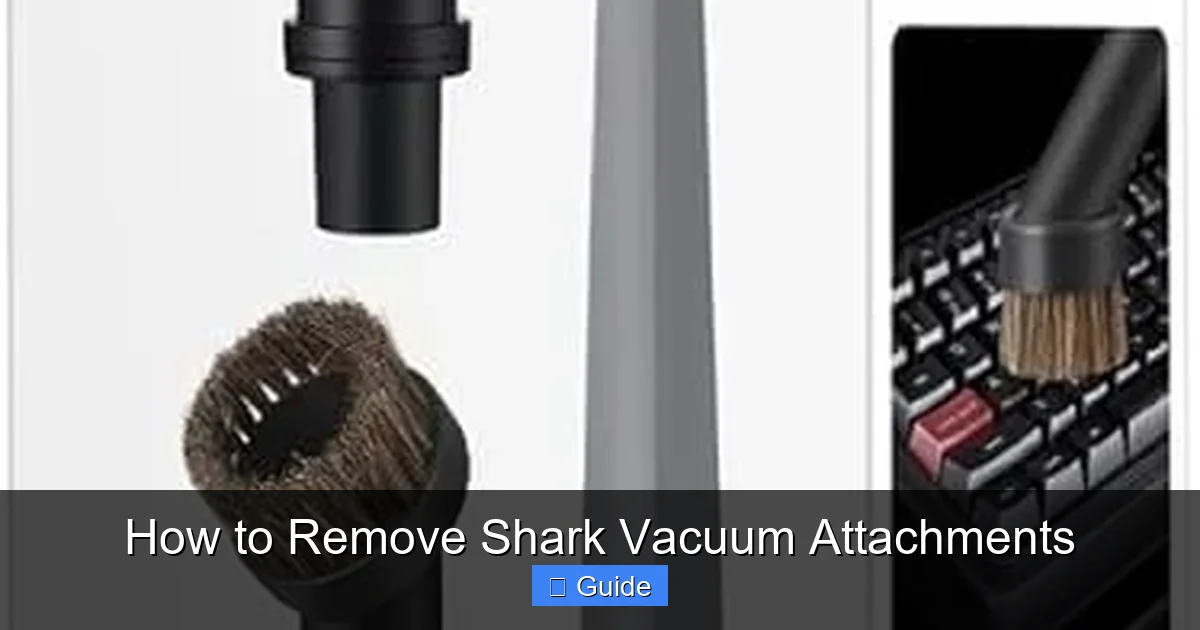
Removing Crevice Tools and Dusting Brushes
These long, slender tools are among the simplest. They connect directly to the upper wand. The release button is almost always on the tool itself, near where it plugs in.
- Ensure the vacuum is off and unplugged.
- Grip the tool firmly in one hand.
- Use your other hand’s thumb to press the release button (usually red or gray) located on the tool’s connector sleeve.
- While holding the button, pull the tool straight off the wand. The connection should be smooth.
Note: Some dusting brushes have a flexible neck. The release button is at the base of that neck, where the rigid connector begins. The flexible part itself does not twist or unscrew.
Removing the Pet MultiTool (or Pet Hair PowerBrush)
This is a common point of confusion. The Pet MultiTool is a motorized brush roll tool. It has two connection points: the main body connects to the wand, and the brush roll cartridge connects to the main body. We’re focusing on removing the entire tool from the wand here.
- Locate the release button. On the Pet MultiTool, it’s on the side of the connector, not the top or bottom. It may be a smaller, gray button.
- Check for the Secondary Lock: Many Pet MultiTools have a secondary sliding lock tab adjacent to the main button. You must slide this tab up or down (depending on model) while simultaneously pressing the main button.
- Once both are depressed, pull the tool straight off the wand.
Critical: Never try to remove just the brush roll cartridge from the tool body while it’s attached to the vacuum. First, remove the entire Pet MultiTool from the wand, then place it on a flat surface. Only then, locate the release lever on the tool body itself to open the cartridge for cleaning.
Removing the Self-Cleaning Brush Roll (The “No-Touch” Roller)
This is Shark’s signature feature on many models (like the Vertex or some Rotator series). The brush roll is housed inside a clear plastic roller head. You do not remove the brush roll itself from this housing for cleaning. Instead, you remove the entire roller head assembly from the vacuum’s lower wand. The genius of the design is its tool-free, button-free removal.
- With the vacuum off and unplugged, turn the vacuum over so you can see the brush roll head.
- Locate the large, gray release lever on the side of the connector where the head meets the lower wand. It’s a big, flat, easy-to-grip tab, not a small button.
- Using your thumb, pull this lever firmly outward (away from the vacuum body). You will feel a good amount of resistance; this is the locking mechanism disengaging.
- While holding the lever out, pull the entire brush roll head straight back off the wand. It will come off in one piece.
- To reattach, simply push the head back onto the wand until you hear a loud click. The lever will automatically snap back into the locked position. No buttons to press!
Warning: Do not try to pry or twist the Self-Cleaning Brush Roll head. The lever is the only correct release point. Forcing it can break the plastic housing.
Removing Attachments from a Stick Vacuum (Shark Vertex/Stick Series)
Stick vacuums like the Shark Vertex Pro or IZOO have a simpler, single telescoping wand. Attachments connect directly to the end of this wand. The principle is identical: find the button.
- The main motorized floor brush has a large red button on its top surface. Press it in and pull the brush off.
- The crevice tool and dusting brush have their buttons on the connector sleeve, just like with upright models.
- Some stick models have a wand release button on the main body to separate the wand from the motor unit for storage. This is a different button, usually located on the back of the motor housing where the wand inserts. Press this to separate the wand, then remove your tool from the detached wand.
The process is designed to be even more streamlined on sticks, as there are fewer connection points.
Model-Specific Considerations and Variations
While the above covers 95% of cases, Shark’s long history means there are quirks. Here’s how to handle uncertainty.
Visual guide about How to Remove Shark Vacuum Attachments
Image source: sharkvacuum.blog
Identifying Your Shark Model
This is your most powerful troubleshooting tool. Flip your vacuum over. The model number is on a silver sticker, typically on the back or bottom of the motor housing. It will look like NV356, NV752, HV322, AZ6002, IZ461, etc. Write it down or take a photo. With this number, you can:
- Find the exact digital manual on the Shark website.
- Search for “[Your Model Number] attachment removal” on YouTube for a visual guide.
- Contact Shark customer support for model-specific instructions.
Navigator vs. Rotator vs. Vertex: What’s the Difference?
For attachment removal, the differences are minimal.
- Navigator Series (NV models): Uses the classic push-button system for all attachments. The Self-Cleaning Brush Roll is not typically featured on older Navigators.
- Rotator Series (NV752, NV770, etc.): Also uses push-buttons. The Professional series (NV770) often includes the Pet MultiTool with the secondary lock tab.
- Vertex Series (AZ, HV models): This is where the Self-Cleaning Brush Roll with its unique lever is most common. The rest of the attachments (dusting brush, crevice tool) still use standard push-buttons.
- IZOO Series (IZ461, etc.): Stick vacuums. Single wand, push-button attachments. Very straightforward.
The key takeaway: the attachment type (brush roll, pet tool, dusting brush) is a better predictor of removal method than the overall vacuum series.
Troubleshooting: What to Do When an Attachment is Stuck
You’ve pressed the button, but it won’t budge. Don’t panic and don’t use a screwdriver or excessive brute force. Here’s your systematic approach.

Visual guide about How to Remove Shark Vacuum Attachments
Image source: sharkvacuum.blog
Step 1: Re-Confirm the Release Mechanism
Are you pressing the correct button? On some tools, like the Pet MultiTool, there are two. Are you pressing both? Is there a twist-lock instead of a button? Look very closely at the connection point. Sometimes a small arrow or icon is molded into the plastic indicating the direction of release or the presence of a secondary tab.
Step 2: Clean the Connection Point
This is the most common fix. A buildup of dust, hair, and carpet fibers can pack into the locking pin hole or around the connector sleeve, physically preventing the pin from retracting fully or allowing the parts to separate.
- Use a dry, stiff-bristled brush (an old toothbrush is perfect) to scrub around the button and the seam where the two parts connect.
- Use a compressed air canister to blow out debris from the button housing and the locking pin hole on the wand.
- For hair wraps, use needle-nose pliers to carefully pick out packed fibers from around the metal locking pin.
Step 3: Apply Controlled, Steady Force
Once you’re sure the mechanism is clear and fully depressed:
- Press and hold the button down continuously with one hand.
- With your other hand, grip the attachment as close to the connector as possible for maximum leverage.
- Pull with a steady, firm, straight force. Do not jerk or twist. The goal is to overcome static friction and the initial seal. A firm, consistent pull often works where a hesitant tug fails.
Step 4: The Gentle Tap (Last Resort)
If it’s still stuck, try this: With the button held down, give the wand (not the tool) a few gentle taps on the floor or against your palm. The vibration can sometimes jiggle the locking pin free enough for the pull to work. Never tap the tool itself, as this can damage delicate brush rolls or electronics in motorized tools.
Step 5: When to Seek Help
If, after thorough cleaning and correct technique, an attachment remains immovable, you may have a broken internal lock. The plastic housing could be cracked, or the metal pin bent. Forcing it will only make it worse. At this point, stop. Contact Shark Customer Care. They can often provide a replacement connector or attachment if it’s under warranty. Never attempt to drill out pins or saw parts off.
Maintenance Checklist: What to Do Every Time You Remove an Attachment
Removing attachments shouldn’t be a one-way ticket to putting them in a closet. Each time you take a tool off is a golden opportunity for quick maintenance that prevents bigger problems. Make this a habit.
Inspect and Clean the Brush Rolls
For any tool with a rotating brush (floor nozzle, Pet MultiTool, Self-Cleaning Brush Roll):
- Remove Hair and Fiber Wraps: Use a seam ripper or dedicated brush cleaning tool to cut and pull out any hair, string, or carpet fibers wound around the bristles and bearings. This is the #1 cause of brush roll burnout and loss of suction.
- Check for Wear: Look for bent, broken, or missing bristles. A damaged brush roll can scratch hard floors and is less effective at agitating carpet dirt.
- Clear Debris from Housing: While the brush roll is out, use your vacuum’s crevice tool or a brush to clean out the empty housing on the nozzle. Debris here can block airflow and re-wrap onto the clean brush roll.
Examine the Connection Points
Look at both the wand end and the attachment connector:
- Look for Cracks or Breaks: Plastic can become brittle over time. A hairline crack can expand and cause a permanent lock.
- Ensure Pins Move Freely: Press the release button and watch the locking pin. It should extend and retract smoothly without sticking. If it’s sticky, clean around it.
- Clear the Holes: The hole on the wand where the pin locks into should be clean and unobstructed.
Wipe Down the Attachments
A quick wipe with a dry or slightly damp microfiber cloth removes dust and grime that can accumulate on plastic surfaces. For tools with pads (like the dusting brush’s microfiber pad), remove them and wash them according to the manual. Clean tools are more effective and hygienic.
Check Filters (The Often-Forgotten Step)
This isn’t on the attachment, but it’s the perfect time. When you have the main vacuum body open to remove the lower wand, check your pre-motor and post-motor filters. Tap out debris, rinse washable filters (let them dry 24+ hours!), and replace if they’re damaged. A clogged filter reduces suction no matter how clean your attachments are.
Conclusion: Mastery for a Longer-Lasting Vacuum
Learning how to remove Shark vacuum attachments properly is a small investment that pays massive dividends. It transforms a moment of potential frustration into a seamless, 10-second swap. It empowers you to perform essential maintenance that protects your investment—cleaning brush rolls, clearing clogs, and inspecting for wear. The universal push-button system is brilliantly simple, and with the knowledge of the secondary tabs and the unique Self-Cleaning Brush Roll lever, you’re prepared for any Shark model in your home.
Remember the core mantra: Power Off, Find the Button (or Lever), Press Firmly, Pull Straight. Integrate the quick maintenance checklist into your routine every time you swap tools. A clean, well-inspected vacuum is a powerful vacuum. By taking these few extra seconds, you ensure your Shark is always ready to tackle the next mess, with maximum suction and minimal hassle. You’ve got this. Now go enjoy that freshly cleaned home, armed with the confidence of a true Shark attachment expert.
Frequently Asked Questions
My Shark vacuum attachment has no visible button—how do I remove it?
First, check if it twists. Some older crevice tools use a twist-lock mechanism (push on, twist clockwise to lock; twist counter-clockwise to unlock). If there’s no button and it doesn’t twist, you likely have the Self-Cleaning Brush Roll head. Look for a large, flat, gray lever on the side of the connector. Pull that lever out firmly while pulling the head straight back.
The release button on my Pet MultiTool seems stuck and won’t depress fully. What should I do?
Debris is almost always the culprit. Unplug the vacuum and use a dry toothbrush to scrub around the button housing and the connector seam. Use a can of compressed air to blow out any packed dust. After cleaning, press the button repeatedly to free its movement. If it still sticks, check for a secondary lock tab that must be held simultaneously.
Can I force an attachment off if I can’t find the release?
Never. Forcing attachments can break the plastic locking mechanism or bend the metal pin, making the tool permanently unusable. Always search for the release—check the sides, top, and bottom of the connector. Consult your model’s manual or Shark’s website for a diagram. If you believe the mechanism is broken, contact Shark customer support before applying force.
How often should I remove and clean my vacuum’s attachments?
For optimal performance, inspect and clean brush rolls after every 2-3 uses, especially if cleaning pet hair or long fibers. A full wipe-down of all attachments and a check of connection points should be done monthly. Deep cleaning, including washing pads and filters, should follow the schedule in your manual, typically every 1-3 months depending on use.
Is it safe to remove attachments while the vacuum is plugged in but turned off?
No, it is not safe. Always follow the full safety protocol: turn the vacuum off using the power switch, then unplug it from the wall outlet. This prevents the possibility of accidentally bumping the power switch with your hand while pulling an attachment, which could cause the motor to start unexpectedly and potentially injure you or damage the tool.
My Shark’s Self-Cleaning Brush Roll head won’t come off even when I pull the lever. Why?
The lever is spring-loaded and must be pulled outward (away from the vacuum body) with firm, steady pressure while you pull the head straight back. Do not twist. Ensure you are pulling the correct lever—it’s large and gray, located on the side of the connector. If it’s still stuck, there is likely a significant debris jam around the locking mechanism. Use a brush and compressed air to clean thoroughly around the lever and the connector sleeve on the wand before trying again.