Is your Shark Navigator NV502 Self-Drive suddenly refusing to start, navigate, or charge? This isn’t necessarily a death sentence for your robot vacuum. The issue is often a simple fix—like dirty sensors, a clogged brush roll, or a software hiccup—that you can resolve at home. This guide systematically walks you through the most common reasons for failure, from basic troubleshooting to deeper maintenance, helping you diagnose and solve the problem efficiently before considering costly repairs or replacements.
Key Takeaways
- Most “Self-Drive” failures are simple: Issues like dirty sensors, full dustbins, or tangled brushes are the #1 cause and are easily fixed.
- Start with the absolute basics: Always check power, battery charge, and that the robot is actually turned on before diving into complex diagnostics.
- Navigation problems are often sensor-related: The NV502 uses cliff, bumper, and optical sensors; cleaning these is critical for proper function.
- Software glitches happen: A simple power cycle reset or factory reset can resolve many unresponsive or erratic behavior issues.
- Maintenance is preventative: Regular cleaning of brushes, filters, and sensors prevents the vast majority of self-drive failures.
- Know when to seek help: If basic troubleshooting fails, the issue may be a failed motor, battery, or mainboard requiring Shark Support or a professional.
[FEATURED_IMAGE_PLACEHOLDER]
📑 Table of Contents
- Introduction: When Your Smart Vacuum Goes Dumb
- Section 1: The Absolute First Steps – Power & Basics
- Section 2: Navigation Failures – The Sensor Suite
- Section 3: Mechanical Mayhem – Brushes, Wheels, and Bin
- Section 4: Software Glitches & Resets
- Section 5: Advanced Diagnostics & When to Call It
- Section 6: Proactive Maintenance – Preventing Future Failures
- Conclusion: Your Robot’s Vital Signs
Introduction: When Your Smart Vacuum Goes Dumb
You invested in the Shark Navigator NV502 Self-Drive for its promise of effortless, intelligent cleaning. You set up the boundary strips, scheduled cleanings, and let it roam free. Then, one day, it just… stops. It won’t start a cycle. It bumps into walls and spins in circles. It refuses to find its dock. The “self-drive” part of your Shark Navigator NV502 has seemingly given up. Panic sets in. Did you break it? Is it expensive to fix?
Take a deep breath. A Shark Navigator NV502 Self Drive not working is a common frustration, but it’s rarely a catastrophic failure. This sophisticated little robot is a collection of sensors, motors, brushes, and a battery—all of which need care. In most cases, the problem is something you can diagnose and fix yourself in under 30 minutes with no special tools. This guide is your roadmap from “oh no” to “oh, that was easy.” We’ll break down every possible reason your robot is misbehaving, from the silly simple to the more complex, and give you clear, actionable steps to bring your automated helper back to life.
Section 1: The Absolute First Steps – Power & Basics
Before you take a screwdriver to anything, you must rule out the most fundamental issues. It’s easy to overlook the obvious when you’re troubleshooting.

Visual guide about Shark Navigator Nv502 Self Drive Not Working
Image source: sharkvacuum.blog
Is It Actually Turned On?
It sounds ridiculous, but the power switch on the side of the NV502 is easy to bump. A flipped switch means a dead robot. Locate the physical power button (usually a sliding or push-button switch near the charging pins) and ensure it’s in the “on” position. Some models also have a button on the top.
The Charging Conundrum
A robot that won’t start might just be a robot with a dead battery. But why is the battery dead?
- Check the Dock: Is the charging dock plugged into a working outlet? Is the green power light on the dock illuminated? Ensure the dock’s charging contacts are clean and not obstructed.
- Check the Connection: Place the robot directly on the dock, aligning the metal charging pins on the robot’s underside perfectly with the metal contacts on the dock. You should hear a chime and see a battery charging light (usually white or orange) on the robot.
- Clean the Contacts: Use a dry, lint-free cloth to gently wipe the charging pins on both the robot and the dock. Oxidation or dust can prevent a solid connection.
- Give it Time: If the battery was completely drained, it can take 3-4 hours to reach a full charge. Don’t expect it to run after 10 minutes on the dock.
The Classic “Full Dustbin” Shutdown
The NV502 has a safety feature: if the dustbin is full, it will stop cleaning to prevent motor strain and overheating. This can look like a self-drive failure. Simply press the release button, remove the dustbin, empty it into the trash, and re-seat it firmly until it clicks. This is the single most common reason for a mid-cycle stoppage.
Section 2: Navigation Failures – The Sensor Suite
Your Shark Navigator NV502’s “self-drive” intelligence relies on a suite of sensors. If it’s bumping into everything, getting stuck on simple obstacles, or can’t find its dock, dirty or faulty sensors are the prime suspect.
Visual guide about Shark Navigator Nv502 Self Drive Not Working
Image source: sharkvacuum.blog
The Critical Cliff Sensors
These are the downward-facing sensors on the underside of the robot that prevent it from falling down stairs or off ledges. If they’re dirty, the robot thinks it’s on a cliff and refuses to move forward.
- Locate them: Look for small, clear plastic windows on the bottom front of the robot.
- Clean them: Use a dry microfiber cloth. For stubborn grime, lightly dampen the cloth with water or a tiny drop of screen cleaner. Never spray liquid directly into the sensor windows.
- Test: After cleaning, place the robot on a solid floor. It should move normally. If it still behaves as if on a cliff, the sensor may be faulty.
The Bumper & Wall Sensor Array
The rubber bumper around the edge houses impact sensors. The front also has optical sensors for wall-following. A stuck bumper or dirty optical sensor will cause erratic movement.
- Check the Bumper: Press the bumper in on all sides. It should depress and rebound freely. If it’s stuck, clear any debris (like carpet fibers or hair) wrapped around its base or inside the seam.
- Clean Optical Sensors: On the front of the robot, you’ll see small, dark windows. These are the wall-following sensors. Gently clean them with a dry cotton swab.
Optical Navigation (V-SLAM) Issues
The NV502 uses a camera on top (under the clear dome) to map your home. If this camera lens is dirty, covered, or the robot is operating in very low light, navigation will be poor.
- Clean the Dome: Wipe the top clear plastic dome with a microfiber cloth. Ensure nothing is blocking the camera’s view from underneath.
- Lighting: The robot works best in normal room lighting. Very dark rooms can confuse its mapping system.
Section 3: Mechanical Mayhem – Brushes, Wheels, and Bin
Even with perfect sensors, a mechanical failure will halt your Shark Navigator NV502 Self Drive. The self-drive system can’t function if the robot can’t physically move.
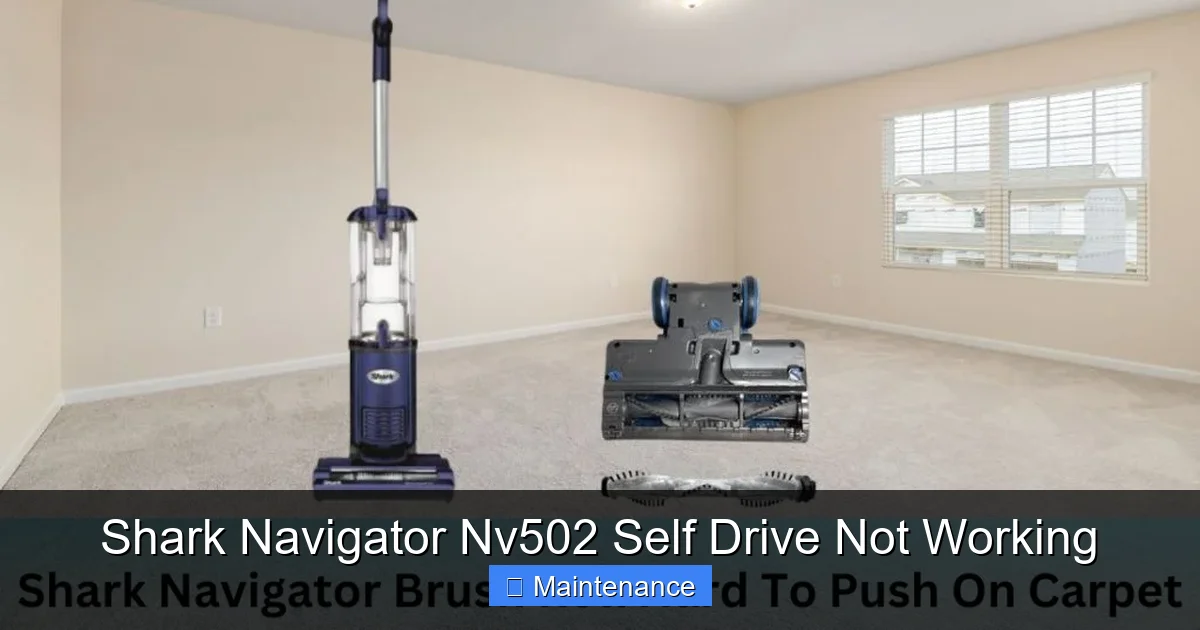
Visual guide about Shark Navigator Nv502 Self Drive Not Working
Image source: sharkvacuum.blog
The Brush Roll Nightmare
A tangled brush roll is the #1 cause of reduced suction and strange movement. Hair and fibers wrap around the axle and bristles, creating immense drag.
- Turn it Over: Flip the robot. Locate the brush roll compartment (usually a rectangular door on the underside).
- Remove the Brush: Open the compartment and pull the brush roll straight out. You’ll likely see a mass of hair.
- De-tangle: Use scissors or a seam ripper to carefully cut and remove all wrapped material. Clean the bristles and the rubber seals on either end.
- Reinstall: Ensure the brush is seated correctly and the compartment door is fully closed. An improperly seated brush can trigger error codes or prevent spinning.
Wheel Woes
Check the two large drive wheels and the smaller caster wheel (front swivel wheel).
- Debris: Remove any hair, string, or carpet fibers wrapped around the wheel axles. This restricts movement and can cause the robot to drag or turn poorly.
- Wear & Damage: Inspect the rubber tread on the drive wheels. If it’s smooth, cracked, or missing chunks, traction is lost. The caster wheel should spin freely. If it’s wobbly or doesn’t turn, it needs replacement.
The Dustbin & Filter Factor
A clogged filter or a bin that isn’t seated properly can cause the robot to shut down mid-cycle, thinking it’s full or that there’s an airflow blockage.
- Empty & Inspect: Remove the dustbin. Tap out all debris. Check the mesh filter inside the bin (if your model has one) and wash it with cold water. Let it dry completely for 24 hours before reinserting.
- Seat it Properly: Reinsert the dustbin until you hear and feel a firm click. An improperly seated bin won’t trigger the internal sensor that says “bin is in.”
Section 4: Software Glitches & Resets
Your Shark Navigator NV502 has a tiny computer. Like any computer, it can freeze or develop a software bug that causes unresponsive behavior, random shutdowns, or navigation errors.
The Power Cycle Reset (First Line of Defense)
This is the robot equivalent of turning it off and on again. It clears temporary memory and reboots the system.
- Place the robot on its charging dock.
- Press and hold the Power button on the robot for 10 seconds until you hear a beep and all lights turn off.
- Release the button. Wait 10 seconds.
- Press the Power button again to turn it back on.
- Let it charge fully, then try a cleaning cycle.
The Factory Reset (Nuclear Option)
If a power cycle doesn’t work, a factory reset will erase all schedules, maps, and settings, returning the robot to its out-of-box state. This resolves deep software corruption.
- Ensure the robot is powered on and on the dock.
- Press and hold the Dock button (the one with the house icon) for 10-15 seconds.
- You will hear multiple beeps and see the lights flash in a pattern. The robot will reboot.
- You will need to set up Wi-Fi, create a new map, and reprogram schedules from scratch.
Important: A factory reset does not fix physical hardware problems. If the issue returns after a reset, you have a mechanical or sensor fault.
Section 5: Advanced Diagnostics & When to Call It
You’ve cleaned sensors, de-tangled brushes, reset the software, and your Shark Navigator NV502 Self Drive is still not working. Now it’s time for deeper investigation or professional help.
Listening for Motor Sounds
When you press the clean button, do you hear:
- A faint whirring or clicking? The mainboard is sending power, but a motor (side brush, main brush, or fan) might be jammed or failed.
- Absolutely nothing? This points to a power delivery issue—a faulty battery, a broken connection between the battery and mainboard, or a failed mainboard itself.
Error Codes & Lights
The NV502 uses blinking light patterns to indicate specific faults. Consult your user manual’s “Troubleshooting” section. Common codes include:
- Solid Red Light: Often indicates a wheel lift sensor fault (the robot thinks it’s been picked up) or a severe jam.
- Flashing Red/Orange: Could be a battery communication error or a main brush jam.
Battery Health Check
Robot vacuum batteries degrade. If your NV502 runs for only 10-15 minutes on a full charge, the battery is at the end of its life (typically 2-3 years). Replacement batteries are available from Shark or third-party sellers. A swollen battery is a safety hazard—stop using the robot immediately and dispose of the battery properly.
The Point of No Return: Contacting Shark Support
If you’ve exhausted all self-help steps:
- Gather your robot’s serial number (on the underside) and purchase date.
- Contact Shark Customer Support. If your unit is under the limited warranty (typically 1-3 years), you may be eligible for a repair or replacement.
- Be prepared to describe the exact symptoms and all troubleshooting steps you’ve already taken. This speeds up the process.
Section 6: Proactive Maintenance – Preventing Future Failures
An ounce of prevention is worth a pound of cure. A consistent maintenance routine will keep your Shark Navigator NV502 Self Drive working reliably for years.
Create a Weekly Checklist
- Empty the dustbin after every single run.
- Clean the filter by tapping it out. Wash it monthly if your model allows.
- Inspect and clean the brush roll for hair wraps. Do this at least weekly, more if you have pets.
- Wipe all sensors (cliff, bumper, optical) with a dry cloth.
- Clear wheels of any debris.
Monthly Deep Clean
- Remove the side brush and clean its base and bristles.
- Use a compressed air canister (held at a distance) to blow out dust from the air intake vents, fan area, and inside the brush roll compartment.
- Wipe the charging contacts on both the robot and the dock.
- Check the rubber seals on the brush roll and wheels for wear.
Environmental Awareness
Your home’s environment dictates maintenance frequency. If you have long-haired pets, live in a dusty area, or have high-pile carpet, you must clean brushes and sensors more often. Keep the floor as clear as possible of small objects like socks, cords, and tassels that can cause jams.
Conclusion: Your Robot’s Vital Signs
A Shark Navigator NV502 Self Drive not working is a significant inconvenience, but it’s almost always a solvable problem. The key is methodical diagnosis. Start with the power and basics—the simplest solutions solve most problems. Move to the sensor suite, as navigation is the core of “self-drive.” Then address the mechanical components: brushes, wheels, and bin. Finally, address the software with resets. By following this hierarchy, you’ll efficiently pinpoint the issue without unnecessary part replacements. Remember, your robot vacuum is a workhorse that thrives on regular, simple care. A few minutes of weekly maintenance is the ultimate insurance policy against a breakdown. You’ve now got the knowledge to be your robot’s best mechanic. Get cleaning, and enjoy your restored automated helper!
Frequently Asked Questions
My Shark Navigator NV502 won’t turn on at all. What should I check first?
First, ensure the physical power switch on the robot’s side is in the “on” position. Next, place it directly on its charging dock and verify the dock’s power light is on. Clean the charging contacts on both the robot and dock with a dry cloth. If it still shows no signs of life after 10 minutes on the dock, the battery may be completely dead or faulty, or there could be an internal power issue.
The robot moves but bumps into everything and can’t find its dock. Is it broken?
This is almost always a sensor issue. The cliff sensors on the underside are likely dirty, causing the robot to think it’s on a ledge. Clean all downward-facing sensors with a dry microfiber cloth. Also, clean the front wall-following optical sensors and the top navigation camera dome. Ensure the bumper isn’t stuck. After cleaning, let it create a new map.
My NV502 starts but stops after 2 minutes with a full dustbin light, but the bin is empty.
This indicates the “bin full” sensor is being triggered falsely. First, ensure the dustbin is seated correctly until it clicks. Then, locate and clean the small sensor port inside the dustbin compartment (consult your manual). A clogged filter can also cause this error, so remove and clean the filter thoroughly, ensuring it is completely dry before reinserting.
Is a factory reset safe? Will it delete my cleaning schedules?
A factory reset is safe and often necessary to fix software glitches. However, it will permanently delete all stored maps, schedules, and no-go zone settings. You will need to set up the robot again from scratch, including running a new “Explore” run to create a map. It does not affect the physical hardware.
How often should I really clean the sensors and brushes?
For optimal performance, clean the cliff and optical sensors weekly with a dry cloth. The brush roll should be inspected and de-haired at least once a week, or more frequently if you have pets or long hair. The filter should be tapped out weekly and washed monthly (if washable). A consistent routine prevents 90% of common problems.
My robot is under warranty. What do I do before contacting Shark Support?
Before calling, perform all basic troubleshooting: clean sensors, brushes, and filter; check the dustbin seating; perform a power cycle and factory reset. Have your robot’s serial number (on the underside) and proof of purchase ready. Be prepared to detail exactly what happens (e.g., “moves in circles,” “beeps 3 times and stops”) and list every troubleshooting step you completed. This will expedite your support claim.