A clogged Shark vacuum hose is the #1 cause of lost suction and poor performance. This guide provides a detailed, safe method to disassemble, deep clean, and reassemble your hose using common household items. You’ll learn exactly where clogs hide, how to prevent them, and maintenance habits to keep your Shark vacuum operating at peak efficiency for years. Following these steps will restore powerful cleaning and save you from costly replacements.
You’re pushing your Shark vacuum across the floor, but it just doesn’t sound right. The familiar powerful whir is quieter, and you have to go over the same spot multiple times. Your first suspicion might be the brush roll or the filter, and you’d be right to check those. But more often than many realize, the culprit is hiding inside the long, flexible pathway that connects everything: the vacuum hose. A clogged Shark vacuum hose acts like a kinked garden hose, strangling the airflow and turning your powerful machine into a weak sweeper. The good news? Cleaning it is a straightforward, satisfying DIY task that restores your vacuum’s might and saves you money. This is your definitive, step-by-step guide on how to clean a Shark vacuum hose, from identifying the problem to reconnecting for peak performance.
Key Takeaways
- Clogs are inevitable: Hair, fibers, and debris will accumulate inside the hose over time, drastically reducing suction power.
- Simple tools are enough: You typically only need a long flexible brush, a coat hanger, a bucket, and mild soap to clean it effectively.
- Disassembly is key: Removing the hose from both the vacuum body and the wand/head is crucial to access and clear blockages fully.
- Prevention is easier than cure: A quick weekly shake-out and monthly rinse can prevent major clogs and extend hose life significantly.
- Inspect for damage: While cleaning, check for cracks, splits, or stiff areas that indicate the hose needs replacement, not just cleaning.
- Know your model: Some Shark models have quick-disconnect features or specific hose designs; consult your manual for model-specific tips.
📑 Table of Contents
Why Your Shark Vacuum Hose Needs Regular Cleaning
Before we dive into the “how,” let’s talk about the “why.” Understanding what happens inside that black tube makes you a more effective cleaner and helps you prevent future issues. Your Shark vacuum’s hose is the critical artery for suction. Air, along with dirt, hair, and small debris, gets sucked from the floor, through the wand, down the hose, into the dirt cup or bag, and finally through the filters before being expelled. Every step of that journey can leave traces behind.
The Anatomy of a Clog
Clogs don’t happen all at once. They build up gradually. The most common offenders are human and pet hair, which wraps around itself like a fuzzy rope. Damp hair is even worse, as it mats down and binds with carpet fibers and fine dust. Small particles of carpet fluff, paper bits, and even bits of string can get caught in this growing mass. Over weeks and months, this collection compacts and hardens against the inner walls of the hose, especially at bends and curves where airflow slows. This layer of debris doesn’t just block space; it creates a rough, uneven surface that grabs onto more passing debris, accelerating the problem.
Another sneaky issue is moisture. If you use your Shark vacuum on wet spills (unless it’s a specifically designed wet/dry model), that moisture travels into the hose. It can dampen the collected hair and dust, creating a sticky, cement-like clog that is far harder to remove. Even normal ambient humidity can, over a very long period, contribute to debris compacting.
The Performance Domino Effect
Why does a little clog matter? Because vacuum suction is a system of pressure. The motor creates a low-pressure zone, and atmospheric pressure pushes air and debris into it. A partial blockage in the hose increases resistance. The motor has to work harder against this resistance, but it can only spin so fast. The result is a measurable drop in Air Watts—the true measure of cleaning power. You’ll notice it as:
- Reduced pickup: Dirt and debris are left behind.
- Strange noises: A high-pitched whine or strained motor sound.
- Loss of agitation: On some models, reduced suction can even affect the brush roll’s rotation.
- Overheating: A struggling motor generates more heat, which can shorten the life of components and filters.
Cleaning the hose isn’t just about removing a visible plug; it’s about restoring the entire system’s designed efficiency.
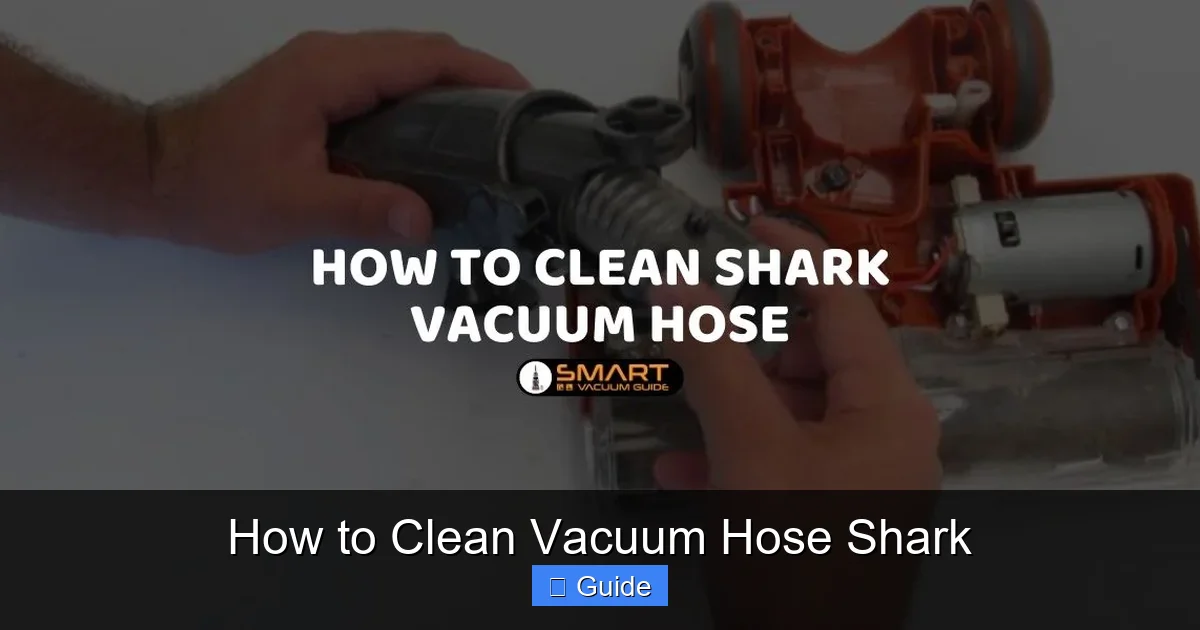
Gathering Your Cleaning Arsenal (Tools & Solutions)
You don’t need a special kit or expensive products. The beauty of Shark vacuum hose maintenance is its simplicity. A clean hose starts with a clean toolkit. Before you touch a screw, gather everything you’ll need so you’re not scrambling mid-process. This prevents you from leaving the hose disassembled for too long or forcing a tool that isn’t ideal.

Visual guide about How to Clean Vacuum Hose Shark
Image source: sharkvacuum.blog
Essential Tools
- A Long, Flexible Cleaning Brush: This is the star of the show. You can buy a dedicated vacuum hose cleaning brush set online or in hardware stores. They are typically nylon-bristled and bendable, with a long handle. A gutter cleaning brush or a flexible bottle brush can also work in a pinch. Avoid wire-bristled brushes, as they can scratch the hose’s inner plastic lining.
- A Wire Coat Hanger: The classic, low-tech solution. Straighten it out and bend a small hook on one end. It’s perfect for snagging and pulling out large, compacted clogs that the brush can’t move. You can wrap a bit of duct tape around the hook to make it smoother and less likely to scratch.
- A Bucket or Large Tub: You’ll need a container large enough to submerge the entire hose length for rinsing. A clean utility bucket or even a clean bathtub works perfectly.
- Mild Dish Soap: A few drops of a grease-cutting dish soap like Dawn will help cut through any oily residues from carpet cleaners or general dust.
- Rubber Gloves: Keep your hands clean and protected from any sharp debris inside the hose.
- A Shop Vac or Another Vacuum (Optional but Helpful): You can use this to suck water out of the hose after rinsing, speeding up the drying process.
- A Soft, Lint-Free Cloth: For wiping down the exterior and drying.
- A Screwdriver (If Needed): Some Shark models have screws securing the hose to the wand or vacuum body. Check your connection points.
Recommended Cleaning Solutions
For most routine cleaning, warm, soapy water is perfectly sufficient and safe for the plastic. However, for persistent odors or mold concerns (if the hose has been damp), you can create a disinfecting rinse. Mix a solution of:
- 1 part white vinegar to 1 part warm water. Vinegar is a natural disinfectant and deodorizer that won’t leave harmful residues. The smell dissipates completely when dry.
- Alternatively, a few drops of hydrogen peroxide (3%) in a quart of water can also sanitize. Never use bleach, as its fumes can be dangerous when trapped in the enclosed hose and its residues can damage filters later.
Important: Never use harsh chemical cleaners, solvents, or abrasive cleaners inside the hose. They can degrade the plastic, leave toxic residues that will be sucked into your home’s air, and damage the seals and gaskets on your Shark vacuum.
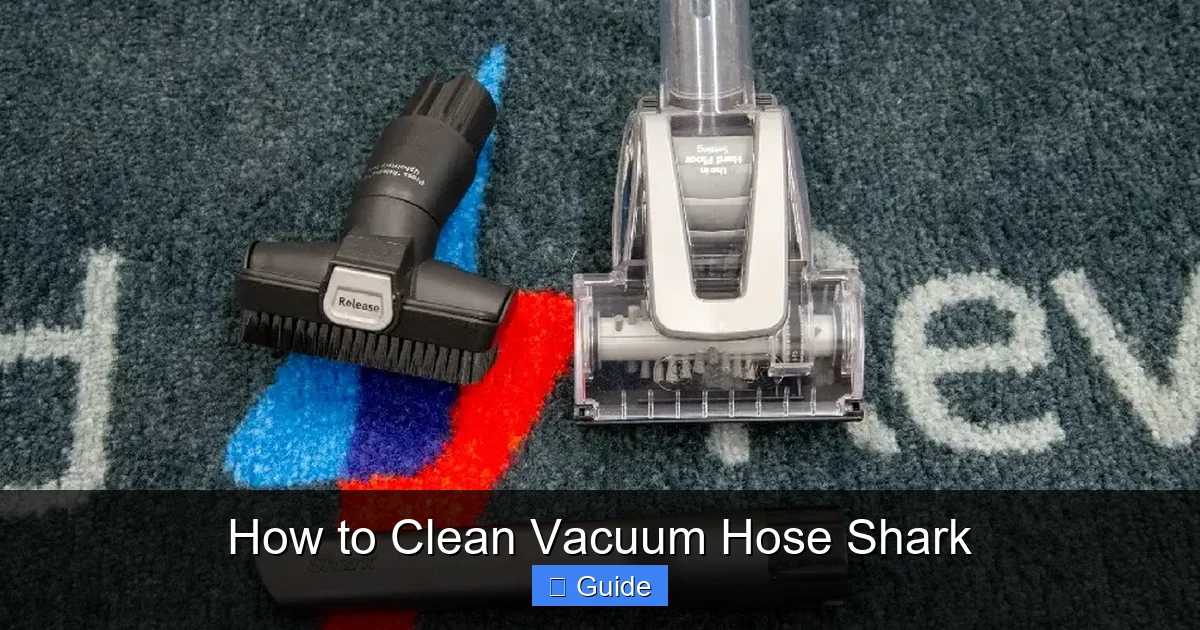
Step-by-Step: Deep Cleaning Your Shark Vacuum Hose
Now, the main event. This process is methodical. Rushing or skipping steps will lead to a partially clean hose or, worse, re-assembly problems. We’ll break it down into clear phases: preparation, disconnection, unclogging, rinsing, and re-assembly. Always remember the golden rule: ensure the vacuum is completely disconnected from any power source before you begin.
Visual guide about How to Clean Vacuum Hose Shark
Image source: smartvacuumguide.com
Phase 1: Preparation and Initial Disconnection
First, take your Shark vacuum to a well-ventilated area, preferably outdoors or in a garage, as debris and water will be involved. Lay a old towel or sheet on the floor to catch drips.
- Detach the Hose from the Wand/Nozzle: At the floor cleaning end (the wand or power nozzle), locate the connection. Shark vacuums typically use a twist-lock or a push-button release. For a twist-lock, turn the hose collar counter-clockwise until it releases. For a push-button, press the button and pull straight out. Gently work the hose free. You may need to wiggle it if it’s been seated for a long time.
- Detach the Hose from the Vacuum Body: Now go to the other end, where the hose connects to the canister or upright body. This connection is usually a simple push-fit with a locking ring or clip. Press any release tabs and pull the hose firmly away from the vacuum. You should now have the hose free as a single, long, flexible tube.
Pro Tip: As you disconnect each end, inspect the connection points. Look for tears, cracks, or worn seals. This is also a good time to clean the ports on the vacuum body and wand with a damp cloth.
Phase 2: The Unclogging Process (The Heart of the Matter)
This is where you reclaim your suction. Start with the least invasive method and escalate as needed.
Method A: The Shake and Tap
Before you go inside, try to dislodge the clog from the outside. Take the hose and, over a trash can or outside, give it a few firm, sharp shakes. Rotate it and tap it along its length, especially near the middle and the bends. Sometimes a compacted clog will break free and fall out one end. If you hear or feel a chunk drop out, you’re already done! Pull it out with your fingers (wear gloves) and proceed to rinsing.
Method B: The Flexible Brush
This is your primary cleaning tool. Insert the brush into one end of the hose. Gently push it through, feeling for resistance. When you hit the clog, use a sawing, twisting motion. The bristles will agitate and grab the debris. Slowly pull the brush back out—it will often bring the clog with it. If the clog is stubborn, work the brush from the other end. You may need to do this several times. Periodically pull the brush out and wipe the debris off it into your trash bag.
Method C: The Wire Hanger (For Stubborn Clogs)
When the brush can’t budge it, bring in the hanger. Straighten it and create a small hook on one end. Gently feed the hooked end into the hose until you feel the clog. Try to hook onto a piece of it and pull it out gently. Do not force it or jab aggressively. You risk puncturing the hose wall. The goal is to break up the clog enough so your brush can finish the job. You can also use the straight end to carefully break up the mass from the outside by pressing on the hose wall at the clog location (be very gentle).
Method D: The Pressure Wash (Advanced)
If you have access to a low-pressure garden hose (with a gentle spray nozzle), you can try flushing the clog from the opposite direction of normal suction. CAUTION: Never use high pressure, as it can damage the hose’s interior or force water into connections. Insert the gentle stream into the hose end that connects to the vacuum body (the “suction” end). The water pressure can sometimes blast out compacted debris. Have a bucket ready to catch the runoff. This method is best followed immediately by thorough soap-and-water rinsing.
Phase 3: The Deep Rinse and Dry
Once the clog is physically removed and you feel the hose is clear (air should flow freely when you blow into one end), it’s time for a deep clean to remove microscopic dust and residues.
- Soak: Fill your bucket or tub with warm water and add a generous squirt of dish soap. Submerge the entire hose. Let it soak for 15-30 minutes. This loosens any remaining fine particles.
- Agitate: Run your flexible brush through the hose one more time while it’s submerged. You’ll see dirty water swirl out the ends.
- Rinse Thoroughly: Drain the soapy water. Fill the tub with clean, warm water. Submerge and swish the hose vigorously. Repeat this rinse process until the water runs completely clear. If you used a vinegar solution, do a final rinse with plain water to remove any lingering vinegar smell.
- Remove All Water: This is critical. Shake out as much water as possible. Then, take a clean, dry cloth and feed it through the hose with a long stick or your brush handle to wick away moisture. If you have a shop vac, you can carefully suck the water droplets from each end. Lay the hose straight in a warm, dry, well-ventilated area (like a sunny garage floor) for at least 24 hours. Do not re-assemble or use the vacuum with a damp hose. Trapped moisture can travel to the vacuum’s motor and filters, causing mold or damage.
Phase 4: Re-Assembly and Test
After the hose is completely dry to the touch (and inside), it’s time to put it all back together.
- Inspect: Give the hose one final external and internal look. Ensure it’s entirely clean and free of any debris. Check for cracks, especially along the spiral reinforcement or at the ends where it connects.
- Reconnect: Firmly push the hose back onto the vacuum body port until you hear it click or feel it seat fully. Ensure any locking rings or clips are engaged. Then, connect the other end to your wand or power head, making sure that connection is secure too.
- The Ultimate Test: Reconnect the vacuum to power. Turn it on without the floor head attached (hold it in the air). Place your hand over the hose end. You should feel a strong, steady suction. The sound should be the familiar, powerful roar, not a strained whine. Now, attach your usual cleaning head and run it over a test area. You should immediately notice the improved pickup and ease of movement.
Proactive Maintenance: Keeping Your Hose Clog-Free
Cleaning a severely clogged hose is a rescue mission. The real secret to effortless Shark vacuum care is a proactive maintenance routine that prevents clogs from ever becoming a problem. It takes seconds, not hours, and keeps your vacuum performing like new.
Visual guide about How to Clean Vacuum Hose Shark
Image source: indoorense.com
The 60-Second Weekly Habit
Once a week, after you’ve finished vacuuming and before you store the machine, do this:
- Take the hose off the vacuum body and the wand.
- Take it outside or over a trash can.
- Give it 5-10 sharp shakes, rotating it to cover all sections.
- Blow hard into one end (or use a small fan) to push out any loose dust and hair that’s settled near the connections.
- Wipe the exterior with a dry microfiber cloth.
This simple act dislodges the very first layers of debris before they have a chance to mat and bind. It’s the single most effective thing you can do.
The Monthly Quick Rinse
Once a month, even if you don’t suspect a clog, give the hose a quick rinse.
- Disconnect it from the vacuum.
- Take it to a sink or outside.
- Run warm water through one end, letting it flow out the other. Tilt it back and forth to wash the interior walls.
- Shake out excess water and hang it over a railing or shower rod to air-dry completely before reattaching.
This monthly flush prevents the fine dust from forming a permanent, baked-on layer inside the hose.
Smart Vacuuming Practices
Your habits while vacuuming directly impact hose health.
- Mind the Wet: Never use your standard Shark vacuum (unless it’s a true wet/dry model) on liquid spills or saturated areas. Even a damp pet accident can introduce moisture that causes clogs and odors.
- Pre-tangle Hair: If you have long hair or heavy-shedding pets, consider wearing a hair tie or using a pet hair remover on your rugs before vacuuming. Less hair going in means less hair binding inside the hose.
- Don’t Vacuum the Un-vacuumable: Avoid sucking up sharp objects (tacks, pins), large string or ribbon, or anything that could ball up and jam immediately.
- Use the Right Attachment: For cleaning upholstery, car interiors, or tight spaces, use the smaller crevice tool. The main hose is wider and more prone to clogging with large debris from these areas.
Troubleshooting: When Cleaning Isn’t Enough
You followed every step. The hose is spotless, dry, and reconnected. But the suction is still weak. Now what? The problem may lie elsewhere, or the hose itself may be damaged.
Checking the Rest of the Airflow Path
The vacuum system is a sealed chain. A blockage anywhere will cause the same symptom. With the hose removed, perform these checks:
- The Dirt Cup/Canister: Is it completely empty? Is the seal on the lid clean and intact? A poorly sealed lid leaks suction.
- The Pre-Motor Filter: This is a common clog point. Remove it (consult your manual). Is it black with dirt? Gently tap it out over a trash can. If it’s washable (most Shark filters are), rinse it with cold water until clear and let it dry for 24 hours before reinserting. A clogged filter chokes the motor.
- The Post-Motor Filter: Located near the exhaust. Check and clean this as well.
- The Brush Roll: Is it jammed with hair and carpet fibers? A seized brush roll creates immense drag. Clean it thoroughly.
- The Wand and Floor Head: Look inside the wand and the neck of the power head. Clogs love to hide in these bends too. Use your coat hanger or brush here as well.
Hose Damage: The Silent Suction Killer
Sometimes, the hose isn’t clogged—it’s broken. Inspect your hose closely under a bright light:
- Cracks or Splits: Even a tiny crack in the plastic wall will suck in air from the outside instead of from the floor, destroying suction power. Feel along the entire length, especially at the ends where it bends the most.
- Punctures: A small hole from a sharp object has the same effect.
- Kinks or Permanent Bends: If the hose has been severely kinked, the inner spiral may be crushed, creating a permanent, narrow restriction that no amount of cleaning can fix.
- Stiffness: An old hose can become brittle and stiff, especially if exposed to sunlight or extreme temperatures. This can lead to cracks and poor flexibility that kinks easily.
If you find any of this damage, cleaning is a waste of time. The hose must be replaced. Shark sells replacement hoses for most models. Using a damaged hose will also put extra strain on your motor and reduce the life of your vacuum.
Shark Model-Specific Tips & Considerations
While the core process is universal for all Shark stick, upright, and canister vacuums with a flexible hose, a few model-specific nuances can make your life easier.
Detachable vs. Fixed Hoses
Most modern Shark vacuums (like the Navigator, Rotator, and Vertex series) have a detachable hose that connects to the main body with a simple click-lock. This is designed for easy removal. Older models or some specific designs might have the hose permanently attached to the canister body. For these, you cannot remove the hose for full cleaning. Your cleaning must be done from the wand end only, using a long brush and coat hanger. It’s less effective but still better than nothing. Always consult your user manual for your specific model number (usually on a label on the back or bottom).
The “Anti-Hair Wrap” Feature
Many Shark vacuums boast “Anti-Hair Wrap” technology in the brush roll. This is fantastic for the floor head, but it does not extend to the hose. Hair that gets sucked into the hose has no such mechanism and will accumulate just like in any other vacuum. Don’t be lulled into a false sense of security about the hose. The maintenance schedule remains the same.
Hose Length and Material
Shark hoses vary in length (from 5 feet to over 8 feet) and sometimes in internal diameter. A longer hose has more surface area for debris to cling to and more bends where clogs form. If you have a very long hose, be extra diligent with your weekly shakes. Also, some premium models have a smoother interior lining that is slightly more resistant to debris buildup, but it’s not immune.
Storage Matters
How you store your Shark vacuum affects the hose. Never store it with the hose tightly coiled or kinked. This can create a permanent set in the plastic, making it more prone to kinking during use and creating stress points for cracks. Store it loosely draped or hanging if possible. If you must coil it, make large, gentle loops.
By understanding your specific Shark model and treating its hose with regular, simple care, you invest in the long-term health and power of your entire cleaning system. A clean hose is not a chore; it’s the key to a vacuum that works as hard as you do.
Frequently Asked Questions
Where do most clogs happen in a Shark vacuum hose?
Clogs most commonly form at the bends inside the hose, particularly the 90-degree turn near where it connects to the wand or power head. This is where airflow slows down, allowing hair and fibers to settle and wrap around themselves.
How often should I deep clean my Shark vacuum hose?
For most households, a full disassembly and deep cleaning every 3-6 months is sufficient. However, if you have pets, long hair, or vacuum a lot of carpet, aim for every 2-3 months. Always follow up with the weekly shake-out habit.
Can I use vinegar to clean the inside of my Shark hose?
Yes, a 50/50 white vinegar and warm water solution is safe and effective for disinfecting and deodorizing the hose interior. Just be sure to rinse thoroughly with clean water afterward to remove any vinegar scent, and allow the hose to dry completely.
Should I use a wire coat hanger or a specialized brush?
Always start with a flexible nylon brush. It’s designed for the job and won’t damage the hose lining. Reserve the wire coat hanger (with a taped hook) for stubborn clogs the brush can’t move, and use it very gently to avoid puncturing the hose.
How do I know if my hose needs replacing instead of just cleaning?
If you find visible cracks, splits, punctures, or permanent kinks/crushed sections in the hose wall, it needs replacement. Also, if after a thorough cleaning and checking all other filters/seals, suction is still weak, a hidden leak or damage in the hose is the likely culprit.
What if I can’t reach or remove a clog no matter what I try?
If the clog is firmly impacted and unreachable from either end, try the low-pressure water flush method from the vacuum body end. If that fails, the clog may be so dense it requires professional tools, or the hose may be damaged internally. In this case, hose replacement is often the most practical solution.