Getting your Shark robot to map successfully is the key to unlocking its full, efficient cleaning potential. A complete, accurate map allows for precise room targeting, no-go zones, and systematic cleaning paths. This process requires careful preparation, a stable Wi-Fi connection, and patience through its initial exploratory runs. Common mapping issues are almost always fixable by checking your home’s layout, robot sensors, and app settings, ensuring your Shark becomes a truly intelligent cleaning partner.
Key Takeaways
- Preparation is Crucial: Clear clutter, pick up cords, and ensure good lighting for the robot’s sensors to create an accurate map on the first try.
- Wi-Fi is Non-Negotiable: A strong, stable 2.4GHz Wi-Fi signal is required for the robot to communicate with the Shark app and build/save its map.
- Mapping is a Process, Not a Moment: Expect 2-4 complete cleaning runs for the robot to fully learn, refine, and finalize your home’s map.
- The App is Your Command Center: All mapping actions—starting the process, editing maps, setting no-go zones—are controlled through the Shark Clean app.
- Sensor Care is Map Care: Regularly clean the robot’s cliff, bumper, and drop sensors; dirty sensors are a leading cause of mapping failures and navigation errors.
- Start Simple: Begin mapping with a single, uncluttered floor. Once mastered, you can add more floors or complex layouts.
[FEATURED_IMAGE_PLACEHOLDER]
📑 Table of Contents
- Why Mapping Matters: From Random Bumps to Smart Cleaning
- Pre-Mapping Preparation: Setting the Stage for Success
- Step-by-Step: The Actual Mapping Process
- Troubleshooting: When Mapping Goes Wrong
- Advanced Mapping Features and Optimization
- Maintenance for Lasting Mapping Success
- Conclusion: Your Smart Home, Mapped and Mastered
Why Mapping Matters: From Random Bumps to Smart Cleaning
So, you’ve unboxed your shiny new Shark robot vacuum. It whirs to life, bumps chaotically into your coffee table, zips under the couch, and seems to clean in a happy, random pattern. It’s entertaining, sure, but is it *efficient*? Probably not. This is where the magic of smart mapping comes in. Getting your Shark robot to map your home transforms it from a simple, bump-and-go machine into a intelligent cleaning system. A detailed, accurate map is the foundation for features like room-specific cleaning, setting no-go zones (like around your pet’s water bowl or a delicate rug), and systematic, efficient routes that save time and battery. Without a map, your Shark is essentially cleaning blind. With one, it knows exactly where it’s been and what’s left to do. This guide will walk you through every single step, from unboxing to a perfectly optimized clean, ensuring you get the intelligent performance you paid for.
Pre-Mapping Preparation: Setting the Stage for Success
Before you even press the “Start Mapping” button in the app, your home needs to be ready. Think of this stage as prepping a canvas for a painter. A messy canvas leads to a messy painting. The same is true for your Shark’s sensors and algorithms.

Visual guide about How to Get Shark Robot to Map
Image source: i.ytimg.com
The Great Declutter: Your First Task
This is the most important, non-negotiable step. Your Shark’s navigation system uses a combination of visual sensors (cameras or lidar, depending on your model) and bumper/ cliff sensors. It needs a clear line of sight and unobstructed paths to build a coherent map.
- Pick Up: All clothes, shoes, toys, books, and loose items from the floor. Even small objects can confuse the robot or cause it to get stuck.
- Secure Cords: Use cord clips or simply tuck lamp cords, charger cables, and blind pulls out of the way. These are the number one cause of robots getting tangled and stuck during mapping.
- Protect Vulnerables: Move pet food/water dishes, delicate decorative items, and important papers to a safe location. While mapping, the robot will bump into things.
- Lift the Rugs: If you have lightweight area rugs, consider rolling them up or securing their edges. High-pile rugs can interfere with sensor readings and wheel traction.
Lighting and Environment: See the Light
Shark robots with visual navigation (most common) rely on seeing contrast and features on your floor. Poor lighting is a silent mapping killer.
- Brighten Up: Turn on all lights in the rooms you want mapped. Open blinds and curtains to let in natural light. The more light, the better the robot can “see” walls, furniture legs, and room boundaries.
- Watch for Shadows: Be mindful of very dark, solid-colored carpets (like black) in a dark room. They can sometimes appear as “holes” or voids to the sensors. Adding a light source directly over these areas can help.
- Consistency is Key: Try to map your home in a similar lighting condition to how you normally live. If you always clean with blinds closed, map with blinds closed.
Charging and Wi-Fi: The Power and Connection Duo
Your Shark must be fully charged and connected to your home network to perform the mapping function, which is processed via the cloud.
- Full Battery: Always start with the robot on its charging base with a 100% charge. A low battery during mapping can cause it to return to the dock prematurely and create an incomplete map.
- 2.4GHz Wi-Fi Only: This is a critical technical point. Shark robots do not connect to 5GHz Wi-Fi networks. Ensure your phone is connected to your 2.4GHz network when setting up the robot in the app. If your router combines both bands (a “smart connect” feature), you may need to temporarily disable the 5GHz band or create a separate 2.4GHz SSID during setup.
- Signal Strength: Place your charging base in a central location with a strong Wi-Fi signal. A weak signal can cause the robot to lose connection mid-map, leading to errors.
Step-by-Step: The Actual Mapping Process
With your home prepped and your robot charged and connected, it’s time to begin. The process is designed to be simple, but understanding each step reduces frustration.
Visual guide about How to Get Shark Robot to Map
Image source: i.ytimg.com
1. App Setup and Robot Connection
If you haven’t already, download the Shark Clean app (not “Shark IQ” or other variants) on your iOS or Android device. Create an account and follow the in-app instructions to add your robot model. This involves putting the robot in pairing mode (usually a dedicated button) and connecting it to your Wi-Fi network. Ensure you grant all necessary permissions, especially location access, which is sometimes needed for certain features.
2. Initiating the Map
Once your robot is connected in the app, the main dashboard will appear. Look for a button that says “Create a Map”, “Start Mapping”, or a “+” icon to add a new map. The exact wording varies by model series (Shark AI, Shark ION, etc.). Tap this to begin.
3. The Exploratory Run: Let It Do Its Thing
Place the robot on the floor in an open area of the first room you want to map, ideally near the center or a corner. Press the physical “Clean” button on the robot or the “Start” button in the app. Now, the most important rule: DO NOT interrupt it. Let it run until it automatically returns to the dock. This first run is its “exploration” phase. It will move in a seemingly random pattern, bumping gently, spinning, and covering the entire accessible area. This can take 30-90 minutes for an average home. It is building a raw, preliminary map based on its sensor data and the walls/furniture it encounters.
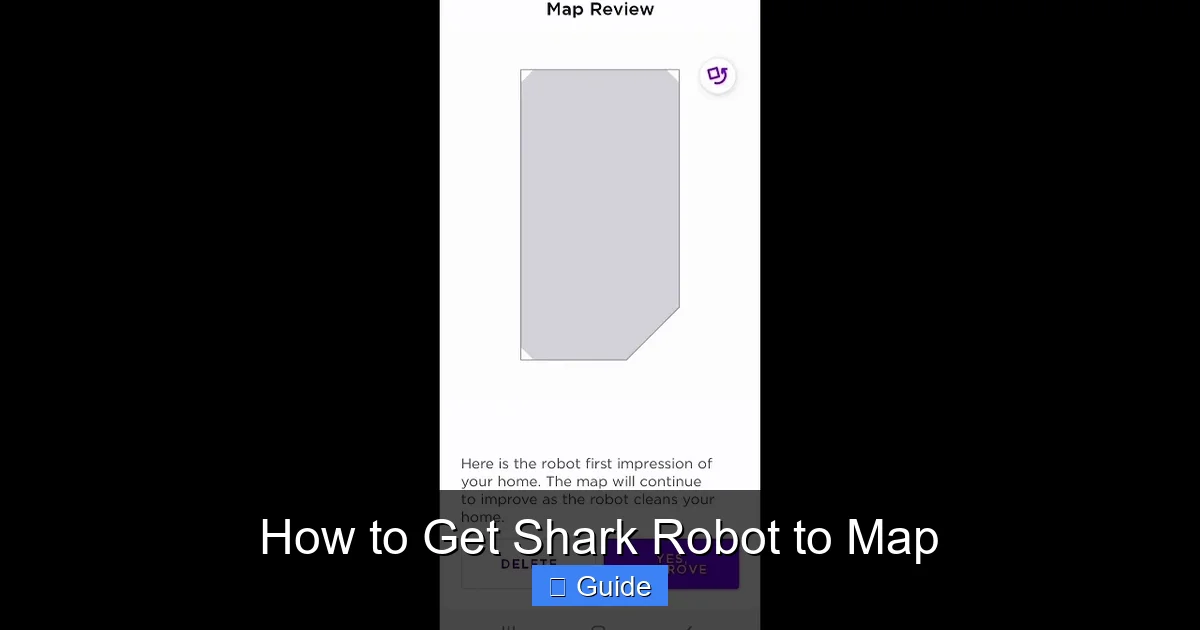
4. Reviewing and Naming the Preliminary Map
Once the robot docks and the run is complete, the app will notify you. Open the app, go to your “Maps” section. You will see a basic, often slightly messy, outline of your home. This is the preliminary map. The app will ask you to label it (e.g., “First Floor,” “Upstairs”). It may also ask you to confirm room divisions—sometimes it automatically segments rooms; sometimes you need to draw dividers manually. Take this time to review. Are all rooms included? Is a wall missing? If it looks mostly correct, save it. Do not edit it extensively yet. The robot needs more data to refine it.
5. The Refinement Runs: Letting It Learn
This is where patience pays off. For the next 2-3 cleaning cycles (you can run regular “Clean” jobs now), the robot will use the preliminary map but continue to learn. It will take slightly different paths, fill in gaps, and correct errors. It learns about permanent obstacles like furniture legs and the true geometry of hallways. You must allow it to complete these full-cycle runs without manually moving it or interrupting it frequently. After about 3-4 successful full-home cleanings, the map will stabilize into a clean, accurate, and final version. You will then have the full suite of editing tools available.
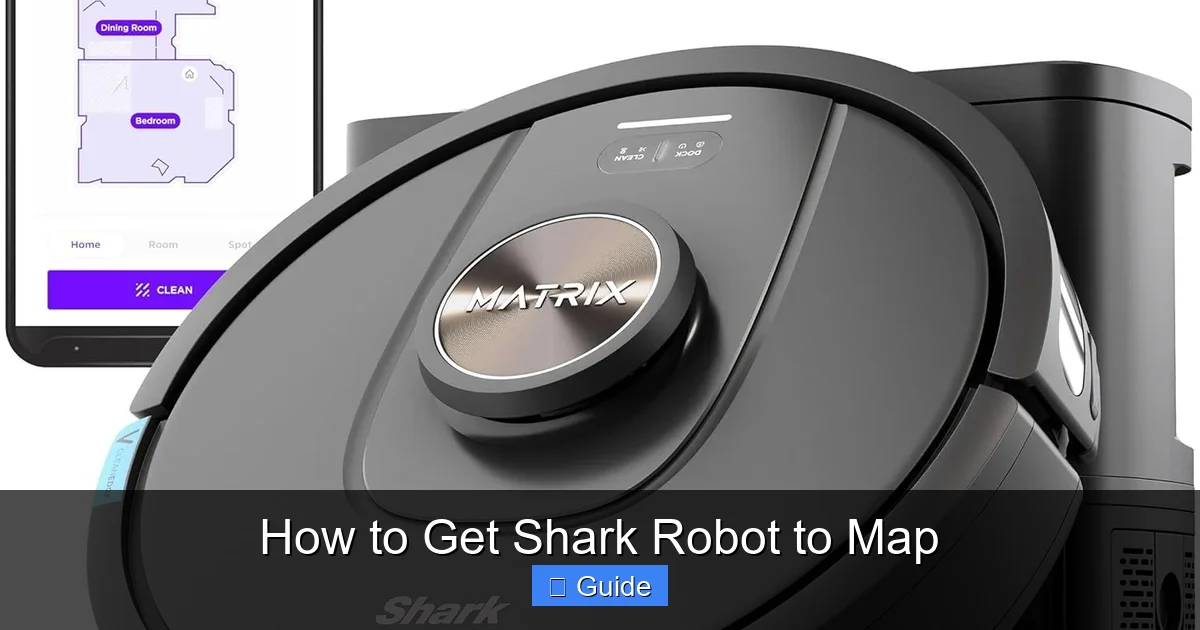
6. Final Map Editing and Feature Activation
With a stable map, you can now unleash the smart features. In the map editor, you can:
- Rename Rooms: Tap on a segmented room and name it “Kitchen,” “Bedroom,” etc.
- Draw No-Go Zones: Create polygons around pet areas, fragile rugs, or charging stations the robot must avoid.
- Set No-Go Lines: Draw simple straight lines to block off doorways or hallways you don’t want it to cross.
- Create Clean Zones: Define high-traffic areas like entryways for more frequent spot cleaning.
- Select Rooms to Clean: Now you can tell your Shark, “Just clean the living room and kitchen,” and it will navigate directly to those rooms, clean them efficiently, and return to the dock.
Troubleshooting: When Mapping Goes Wrong
Even with perfect prep, mapping can hiccup. Don’t panic—these issues are almost always solvable.
Visual guide about How to Get Shark Robot to Map
Image source: m.media-amazon.com
The Incomplete or “Cut-Off” Map
Symptom: The map shows only part of your home, or a room is half-missing, often looking like it was “cut off” by an invisible wall.
Causes & Fixes:
- Interruption: The most common cause. The robot was picked up, got stuck, or the battery died mid-run. Solution: Let it complete a full cycle from start to dock without interference. Ensure the charging base has a clear, level spot.
- Physical Barrier: A closed door, a piece of furniture moved during mapping, or a heavy rug it couldn’t cross created a barrier. Solution: Ensure all interior doors are open during initial mapping runs. Keep the environment consistent.
- Weak Wi-Fi Drop: The robot lost connection and couldn’t upload its progress. Solution: Improve Wi-Fi signal near the robot’s operating area or move the charging base.
The “Messy” or Inaccurate Map (Wrong Walls, Ghost Rooms)
Symptom: The map shows walls in the middle of a room, or two separate rooms are merged into one.
Causes & Fixes:
- Poor Lighting/Reflective Surfaces: Glass doors, mirrors, or highly polished floors can confuse visual sensors. Solution: Apply a small piece of masking tape or a non-reflective sticker to the glass door at robot height. Ensure good, even lighting.
- Sensor Obstruction: Dust or hair on the robot’s front bumper camera/lens or drop sensors. Solution: Power off the robot. Use a dry, soft microfiber cloth to gently wipe the entire front bumper assembly and the sensors on the underside (the small windows). Do this regularly.
- Complex Layout: Very open-concept floor plans with few distinct walls can be challenging. Solution: Place a lightweight, temporary object (like a cardboard box) in key areas to create “virtual walls” for the first mapping run, helping it define spaces. Remove it after.
The Map Keeps Changing or Won’t Save
Symptom: Every time you start a clean, the app says “Mapping in progress” and generates a new, different map. Or, you edit the map but it resets next time.
Causes & Fixes:
- No “Home” Location: The robot doesn’t know where its dock is relative to the map. Solution: In the map editor, look for an option to “Set Dock Location” or “Calibrate Dock.” Follow the instructions, usually involving placing the robot on the dock and letting it orient itself.
- Unstable Map: The robot hasn’t done enough consistent runs to lock the map. Solution: Let it complete at least 3-4 full, uninterrupted cleanings using the same preliminary map. Do not delete and restart the process.
- App/Software Glitch: A temporary bug. Solution: Force-close the Shark Clean app. Restart your phone. Restart the robot (hold the power button for 10 seconds). Try again.
Advanced Mapping Features and Optimization
Once your map is solid, you can optimize your Shark’s performance like a pro.
Multi-Floor Mapping
If you have a multi-story home, your Shark can store multiple maps. The process is the same: prep and map each floor separately. Key Tip: The robot uses its dock’s location as the reference point for each map. Therefore, you need a dedicated charging base on each floor you want mapped and cleaned autonomously. When the robot is placed on a different floor’s base, it will automatically load that floor’s map. You cannot carry the robot to another floor without a base and expect it to map correctly.
No-Go Zones and No-Go Lines: Precision Control
These are your primary tools for customization. Use No-Go Zones (polygons) for irregular shapes like around a pet crate or a large plant. Use No-Go Lines (straight lines) to block off a hallway between rooms or to keep the robot out of a child’s play area. You can set these in the map editor and they will be respected on every clean. You can also schedule different no-go zones for different times of day if needed.
Room-Specific Cleaning and Schedules
With named rooms, you can create incredibly specific schedules. For example: “Every Monday, Wednesday, Friday, clean the Kitchen and Dining Room at 10 AM.” Or, “On weekends, only clean the basement playroom.” This eliminates the need for the robot to clean the entire house every single time, saving time and wear and tear. You can also manually select just one room for an immediate clean right from the app’s main screen.
Maintenance for Lasting Mapping Success
Mapping isn’t a “set it and forget it” task. To keep your Shark performing optimally for years:
- Sensor Cleaning Schedule: Wipe the main bumper/camera lens and all cliff/drop sensors (the small windows on the bottom) once a week with a dry microfiber cloth. Use a soft brush to remove hair from the sensor wells.
- Keep the Environment Consistent: Try not to drastically rearrange large furniture pieces. If you do, you’ll need to trigger a new map update (usually an option in the app called “Remap” or “Update Map”).
- Maintain Clear Pathways: The habits you built for initial mapping—picking up cords and clutter—should become routine. A tidy home is a robot-friendly home.
- App and Firmware Updates: Keep the Shark Clean app updated on your phone. Also, ensure your robot’s firmware is current (check in the app’s settings). Shark frequently releases updates that improve mapping algorithms and navigation intelligence.
- Clean the Wheels and Brushes: Tangled hair or debris on the main brush or drive wheels can cause slippage, making the robot think it’s moved a different distance than it has, corrupting its internal positioning. Clean these parts regularly per the manual.
Conclusion: Your Smart Home, Mapped and Mastered
Getting your Shark robot to map your home is the single most important step in transitioning from basic automation to true smart cleaning. It requires an upfront investment of time—for preparation, for those initial exploratory runs, and for a bit of patience as the algorithm learns. But the reward is immense. You gain precise control, efficient cleaning paths that finish faster, and the profound convenience of telling your robot to clean just the kitchen after a big meal. Remember the golden rules: prepare your home, ensure a strong 2.4GHz Wi-Fi connection, let it finish complete cycles, and keep those sensors clean. Follow the troubleshooting steps if you hit a snag; the solution is almost always simple. With a perfect map in place, your Shark robot transforms from a gadget into an indispensable, intelligent member of your household cleaning crew, working smarter so you can relax.
Frequently Asked Questions
Why is my Shark robot not creating a map at all?
First, ensure it is connected to your 2.4GHz Wi-Fi network in the Shark Clean app. A weak signal or 5GHz connection will prevent map creation. Also, confirm the robot has a 100% charge and that you have pressed “Start Mapping” from the app’s map section. Finally, make sure the robot’s sensors are clean and it has clear, unobstructed space to begin its run.
How long does it take for Shark robot to fully map a house?
The initial exploratory run takes 30-90 minutes depending on your home’s size. However, for the map to become stable and accurate, you should allow the robot to complete 3-4 full cleaning cycles (each about 60-120 minutes for a typical home). The map refines with each subsequent run as the robot gathers more data.
Can I map my home if I have a lot of dark furniture or black carpets?
Yes, but it can be more challenging. Visual navigation robots sometimes struggle with very dark, non-textured surfaces as they lack contrast. Ensure the room is very brightly lit. You can temporarily place a light-colored rug runner or cardboard on the darkest areas during the first mapping run to give the robot reference points, then remove it.
My map is wrong after I moved furniture. How do I fix it?
Do not delete the entire map and start over. Open the Shark Clean app, go to your map, and look for an option like “Remap” or “Update Map”. This tells the robot to re-explore while keeping the basic layout. Start it from the dock and let it run a full cycle. The new data will update the existing map with the new furniture positions.
Can I have two different maps for the same floor?
No. The Shark robot creates and saves one map per floor (identified by the location of its charging base). If you significantly rearrange a room, you must update the existing map for that floor. The system is designed to learn and maintain a single, coherent layout for each distinct floor level.
Why does my Shark robot sometimes ignore my no-go zones?
This usually happens if the no-go zones were set on an old, unrefined map that was later overwritten. Ensure you are editing the final, stable map (after 3-4 cleanings). Also, check that the no-go zones are drawn correctly and are not placed in an area the robot must cross to reach a room you’ve selected for cleaning. Finally, a software glitch might be the cause; try restarting the robot and the app, then re-apply the no-go zones.