Don’t toss that underperforming Shark steam cleaner! Many common issues like loss of steam, leaking, or strange noises are fixable with simple, at-home troubleshooting. This guide walks you through step-by-step diagnostics and repairs for the most frequent problems, emphasizing safety and proper maintenance. Save money and extend the life of your cleaning tool with our comprehensive, easy-to-follow repair advice.
That trusty Shark steam cleaner has been your go-to for chemical-free, sanitizing deep cleans on floors, countertops, and even clothing. But one day, you press the trigger and… nothing. Or maybe it’s sputtering, leaking, or making a noise that sounds all wrong. Your first instinct might be to sigh and start shopping for a replacement. Hold that thought. Before you resign yourself to a new purchase, take a deep breath. A surprising number of Shark steam cleaner problems are not only common but are also quite fixable with a little patience, some basic household tools, and a clear guide. This article is your comprehensive manual for diagnosing and repairing your Shark steamer, saving you money and keeping a reliable tool in your cleaning arsenal.
We’ll approach this systematically. We’ll start with the absolute essentials—safety and the simplest checks. Then, we’ll dive into the most frequent complaints: no steam, leaks, overheating, poor cleaning power, and unsettling noises. For each, we’ll provide clear, step-by-step instructions. Think of this as a friendly conversation with someone who’s been in your shoes, elbow-deep in a disassembled steam mop. Remember, your specific model number (usually on a label on the back or base) is your best friend; you can often find model-specific parts diagrams and videos from Shark. But these fundamental principles apply across the vast majority of Shark handheld steam cleaners, steam mops, and garment steamers.
Key Takeaways
- Safety First: Always unplug your Shark steam cleaner and allow it to cool completely before attempting any inspection or repair to avoid burns or electric shock.
- Check the Basics: Over 50% of “failures” are due to simple issues like an empty water tank, a clogged nozzle, or a locked steam trigger.
- Descaling is Crucial: Mineral buildup from hard water is the #1 cause of poor steam performance and overheating; regular descaling with vinegar or a commercial descaler is essential maintenance.
- Inspect Seals & Gaskets: Leaks are often caused by worn, cracked, or misplaced silicone seals around the water tank, cap, or hose connections; these are cheap and easy to replace.
- Know When to Stop: If you smell burning, see damaged wiring, or have internal component failure after basic checks, stop and contact Shark customer support or a professional appliance repair service.
📑 Table of Contents
- Essential Pre-Repair Protocol: Safety and Initial Diagnosis
- Problem 1: No Steam or Very Weak Steam Output
- Problem 2: Water Leaking from Various Points
- Problem 3: Overheating, Auto-Shutoff, or Loss of Pressure
- Problem 4: Poor Cleaning Performance (Steam Seems Weak or Inconsistent)
- Problem 5: Strange Noises, Vibrations, or Smells
- Conclusion: When to Fix, When to Replace
Essential Pre-Repair Protocol: Safety and Initial Diagnosis
Rushing into a repair on an electrical appliance that heats water to scalding temperatures is a recipe for disaster. This section isn’t glamorous, but it’s the most important one you’ll read. Skipping these steps can lead to personal injury or further damage to your machine.
The Golden Rules of Steam Cleaner Repair
Unplug and Cool: This is non-negotiable. The heating element inside your Shark steamer remains extremely hot for a long time after use. Before you touch anything beyond the outer casing, ensure the unit is unplugged from the wall outlet and has had at least 30-60 minutes to cool down completely. A quick touch test on the metal body (away from any openings) should confirm it’s room temperature.
Work in a Safe Space: Lay down a towel or work on a surface you don’t mind getting wet. Have a container for water and disassembled parts. Good lighting is crucial—you’ll be looking for small cracks and mineral deposits.
Gather Your Tools: You likely won’t need much. A screwdriver set (usually Phillips head #1 or #2), a soft cloth, white vinegar, a small funnel, a bucket, and possibly a replacement seal (which we’ll discuss later) are the basics. Needle-nose pliers can be handy for removing stubborn clips.
The 5-Minute Diagnostic Checklist
Before you take anything apart, run through this quick mental and physical checklist. This solves most “mystery” problems instantly.
- Is it plugged in? Sounds silly, but check the outlet with another device. Ensure the plug is fully inserted.
- Is the water tank filled with clean, cool water? Never use distilled water unless specified by your model’s manual. Shark generally recommends regular tap water, but if you have very hard water, consider using a 50/50 mix of water and white vinegar to help prevent scale.
- Is the safety lock engaged? Many Shark steam mops have a child safety lock or a trigger lock. Consult your manual; there’s often a small button or switch that needs to be pressed before the steam trigger will activate.
- Is the steam trigger fully depressed? Press it firmly and hold it for 10-15 seconds. Some models have a priming period before steam flows.
- Are all connections tight? Check that the water tank cap is screwed on securely. If your model has a removable water tank, ensure it’s seated correctly in its housing. Check the hose connection to the handle/body if applicable.
- Is the nozzle or cleaning head clogged? This is a huge one. Turn the unit off and unplugged. Use a paperclip or a thin, straight pin (be gentle!) to carefully poke through the steam output holes on the nozzle or cleaning pad attachment. You might be surprised by the layer of mineral crust or debris blocking the flow.
If you’ve checked all of the above and your Shark steam cleaner still isn’t functioning, it’s time to move to the specific problem sections below.
Problem 1: No Steam or Very Weak Steam Output
This is the most common complaint. The motor hums, the unit gets hot, but barely a wisp of steam emerges. The culprit is almost always related to water flow or mineral blockage.
Visual guide about How to Fix a Shark Steam Cleaner
Image source: sharkvacuum.blog
Diagnosis: Is It Heating or Not?
First, determine if the heating element is working. After the unit has been plugged in for 2-3 minutes (and you’re careful not to touch metal parts), feel the body. Is it getting warm or hot? If it’s stone cold, the problem may be electrical (fuse, thermostat, wiring) and beyond simple DIY. If it’s getting hot but no steam comes out, the issue is a blockage in the water path or a failed pump.
Step-by-Step Fix: Unclogging and Priming
Step 1: Deep Clean the Nozzle/Output. As mentioned in the checklist, this is priority one. With the unit cool and unplugged, remove the cleaning head or nozzle attachment. Use a paperclip to meticulously clear each steam jet hole. For fabric steamers, check the soleplate holes. Run water through it to flush loose debris.
Step 2: Flush the Internal System. This is the most effective remedy for internal scale buildup. Create a descaling solution: For a typical Shark steamer, mix 1 cup of white vinegar with 1 cup of water. Do not use commercial descaling acids unless the manufacturer explicitly approves them, as they can damage seals. Carefully pour this solution into the water tank. Do not exceed the max fill line.
Step 3: The “Hot Soak” Method. Reassemble the unit (just the tank, no attachments needed). Plug it in and turn it on. Let it heat up. Once it’s hot (body is warm to the touch), press and hold the steam trigger for 2-3 minutes. You will likely hear gurgling and see a mixture of vinegar steam and water dripping from the nozzle. This is the solution working its way through the heating chamber and hose, dissolving limescale. Do this in a well-ventilated area, as the vinegar smell will be strong. After 2-3 minutes, unplug and let it cool completely.
Step 4: Rinse Thoroughly. Once cool, empty any remaining solution from the tank. Fill the tank with fresh, clean water. Repeat the heating and trigger-holding process for another 2-3 minutes to flush out any residual vinegar. Do this rinse cycle 2-3 times. Your first few uses after this may still have a faint vinegar smell; it will dissipate.
When to Suspect a Failed Pump or Heating Element
If the unit heats up normally, you’ve thoroughly descaled, and there’s still zero steam (or only cold water drips), the internal diaphragm pump may have failed. This is a more involved repair requiring disassembly and part replacement. Similarly, if the unit doesn’t heat at all, the thermal fuse or heating coil could be blown. For these issues, unless you are experienced with appliance electronics, contacting Shark support or a professional is the safest and most cost-effective route. Check your warranty status first.
Problem 2: Water Leaking from Various Points
Finding puddles under your Shark steamer is frustrating and a potential hazard (slippery floors, electrical risk). Leaks can occur from several different seals and connections. The key is to pinpoint the source.
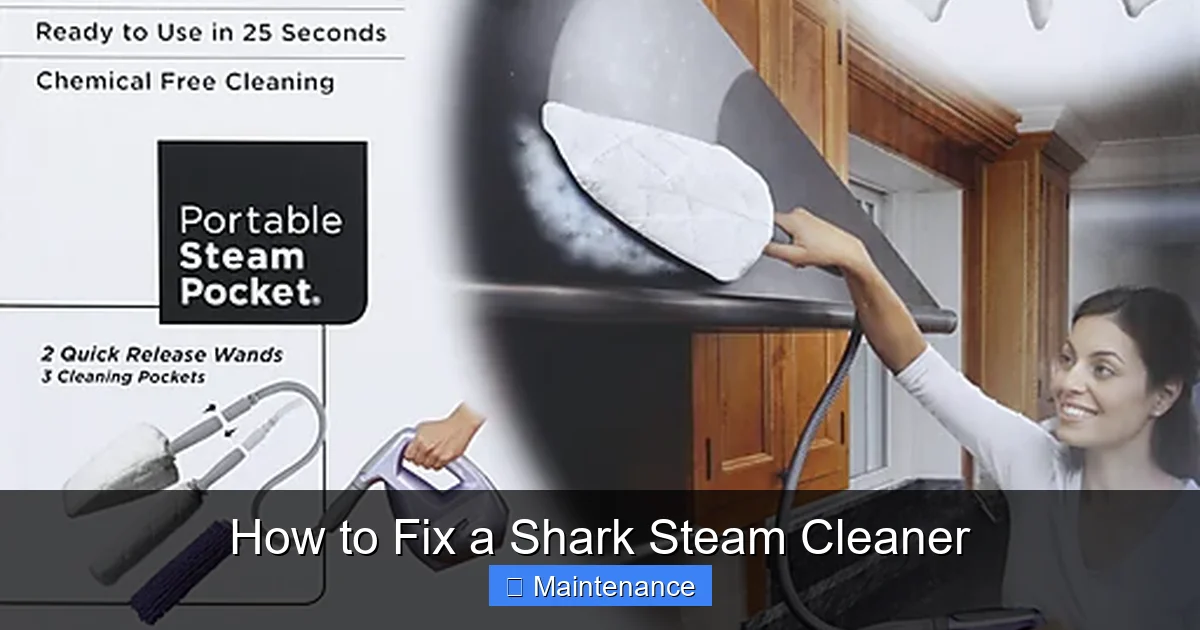
Visual guide about How to Fix a Shark Steam Cleaner
Image source: images.freshop.ncrcloud.com
Identifying the Leak Source
Perform a “dry test” first. Ensure the unit is completely dry. Fill the water tank only halfway. Plug it in and let it heat up (do not press the trigger yet). Watch carefully. Is water dripping from:
- The water tank cap or its seal? Check the rubber gasket inside the cap for tears or misalignment.
- The joint where the tank meets the body? This indicates a seal on the tank’s inlet port is damaged or the tank isn’t seated.
- The handle/hose connection? A common leak point on models with a separate water tank and handheld unit.
- The steam nozzle itself? Could be a cracked nozzle housing (rare) or, more likely, a failed internal valve seal where the hose meets the heating chamber.
- The bottom of the unit (mop models)? Could be the water tank seal or a crack in the plastic reservoir.
Fixing Leaks: Seal Replacement Guide
Most Shark steam cleaner leaks are due to deteriorated silicone seals. These seals harden, crack, and shrink over time and with repeated heat cycles. Replacing them is the fix.
Step 1: Source the Correct Seal. Identify your exact model number (e.g., S1000, P450, etc.). Search online for “[Your Model Number] gasket” or “[Your Model Number] seal kit.” Shark sells official parts, and third-party suppliers on sites like Amazon or eBay often carry kits. A typical kit includes seals for the tank cap, tank inlet, and hose connections. They are inexpensive, usually $5-$15.
2: Disassembly and Replacement. Unplug and cool the unit. Carefully disassemble the leaking section. This often involves unscrewing the water tank cap, removing the tank, and possibly unscrewing the hose from the body or handle. You’ll find the old seals. Pry them out gently with a plastic tool (like a guitar pick) or your fingernail. Clean the groove where the new seal will sit with a cloth. Press the new silicone seal firmly and evenly into its groove. Ensure it sits flush and isn’t twisted.
3: Reassembly and Test. Reassemble everything hand-tight. Do not over-screw plastic parts. Fill with water and perform the dry heat test again (as described above). If the leak is gone, do a full wet test on a protected floor surface. If it persists, double-check that the new seal is the correct size and is properly seated. A tiny misalignment can still cause a leak.
Problem 3: Overheating, Auto-Shutoff, or Loss of Pressure
Your Shark steamer gets excessively hot to the touch, shuts itself off prematurely, or steam pressure starts strong but fades quickly. This points to issues with the water supply, thermal protection, or internal pressure system.
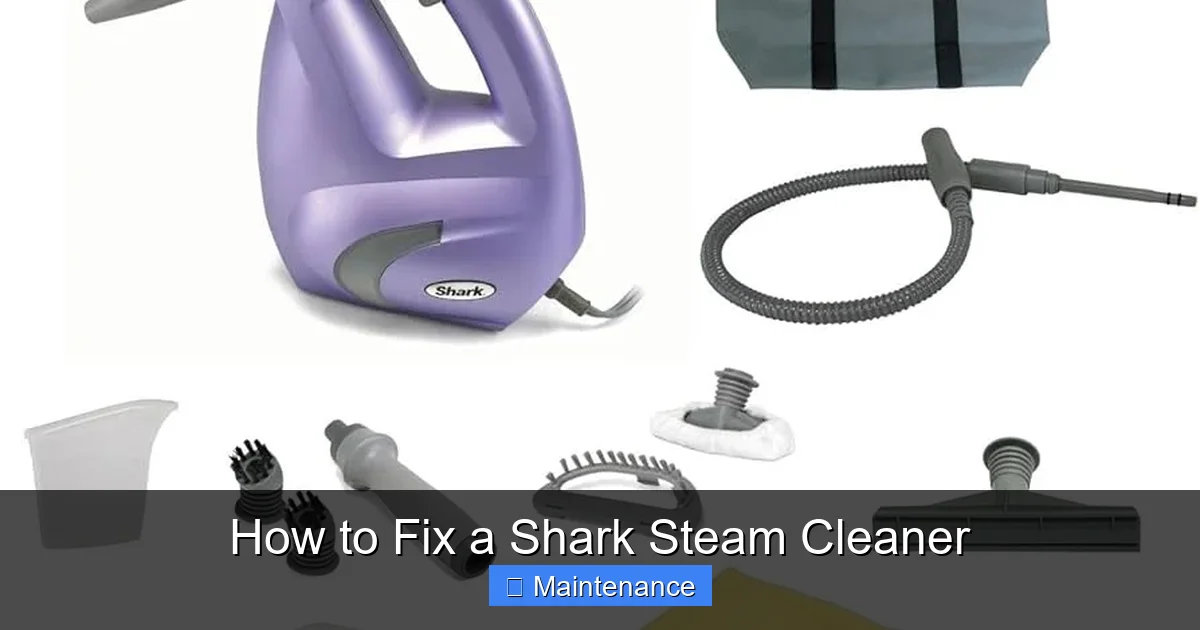
Visual guide about How to Fix a Shark Steam Cleaner
Image source: m.media-amazon.com
The Culprit: Scale Buildup (Again!)
This bears repeating: mineral scale is public enemy number one. A thick layer of limescale acts as an insulator around the heating element. This has a double-whammy effect: 1) The element has to work much harder to heat the water, causing it to overheat and trigger the thermal cut-off, and 2) The scale restricts water flow through the heating chamber, reducing steam pressure and output. A thorough descaling (as detailed in Problem 1) is the first and most likely solution.
Checking the Thermal Fuse and Thermostat
If descaling doesn’t resolve the overheating/shutoff issue, the thermal safety fuse may have blown. This is a one-time-use safety device designed to cut power if temperatures get too high. It’s usually located near the heating element. Accessing it requires significant disassembly. You can test it for continuity with a multimeter (it should read near zero ohms). If it’s open (infinite resistance), it needs replacement. Similarly, the resettable thermostat (if your model has one) might be faulty. These are more advanced repairs. If you’re not comfortable with electronics, this is the point to call Shark support. A blown fuse often indicates the root cause (like severe scale) wasn’t fully addressed, so the new fuse might blow again if the underlying issue persists.
Problem 4: Poor Cleaning Performance (Steam Seems Weak or Inconsistent)
The unit produces steam, but it doesn’t seem to have the power to tackle grime. It might sputter or produce a weak, intermittent stream. This is often a flow issue, not necessarily a heating issue.
Hose and Handle Obstructions
The steam path from the heating chamber to the nozzle includes small internal channels in the hose and handle. These can get clogged with mineral debris or, in garment steamers, with residue from fabric softeners or starch.
Clearing the Hose: With the unit cool and unplugged, detach the hose from both the body and the handle/nozzle. Use a flexible, thin brush (like a small bottle brush) or a compressed air canister (use short bursts) to gently clear the hose. You can also try forcing a mixture of vinegar and water through it with a turkey baster or syringe, then flushing with clean water. Be careful not to damage the inner lining.
Water Tank Ventilation Hole
Almost all water tanks have a small vent hole (often covered by a removable cap or filter) to allow air in as water leaves, maintaining proper pressure. If this vent is clogged with debris or scale, it creates a vacuum that prevents water from flowing smoothly to the heating element. Locate this vent (consult your manual) and clean it meticulously with a pin and a damp cloth.
Using the Right Water and Technique
Sometimes, the “problem” is user technique or water choice. Using 100% distilled water can actually cause issues in some steam cleaners because it lacks the trace minerals that help with conductivity in some pump designs (check your manual—Shark’s stance varies by model). Very hard water will clog fast. The ideal is filtered tap water. Also, ensure you’re moving the steamer slowly enough. For tough grime, hold the nozzle a few inches from the surface for 5-10 seconds to let the heat and moisture penetrate before wiping.
Problem 5: Strange Noises, Vibrations, or Smells
Your Shark steamer is humming, gurgling, rattling, or—most alarmingly—emitting a burning smell. This requires immediate attention.
Normal vs. Abnormal Sounds
Normal: A steady hum from the motor/pump. A gentle gurgling or boiling sound from the water heating. A hiss of steam when the trigger is pressed.
Abnormal: Loud rattling or knocking (could be a loose internal component or severe scale causing “kettling”). A high-pitched whine (pump struggling). Excessive gurgling (air in the system, low water). A grinding sound (motor bearing failure).
Diagnosing and Addressing Noises
Rattling/Knocking: This is classic “kettling” from severe scale buildup on the heating element. The water boils unevenly on the crusty surface. The fix is an aggressive, repeated descaling process. If descaling doesn’t resolve it, a heating element replacement may be needed.
Burning Smell: UNPLUG IMMEDIATELY. This is a critical warning. It could be: 1) Dust or debris burning on a hot element (if the unit was stored dusty). Let it cool, then clean all vents with compressed air. 2) Insulation on a wire melting due to a short circuit. 3) A failing motor overheating. 4) A clogged system causing the pump to work excessively and overheat. After cooling, inspect for visible damage. If no debris is found and the smell returns upon next use, discontinue use and seek professional repair. Do not ignore this symptom.
Conclusion: When to Fix, When to Replace
You’ve now armed yourself with the knowledge to tackle the most common Shark steam cleaner ailments. The recurring themes are clear: regular descaling is the single most important maintenance task, and most leaks are cured by replacing cheap, soft seals. By performing these simple acts of care, you can easily double or triple the lifespan of your appliance.
However, know your limits. If you’ve performed thorough descaling, replaced seals, cleared all obstructions, and the unit still fails to heat, has no power, or emits burning smells, the core components—the heating element, pump motor, or main PCB—have likely failed. At this point, get a repair quote from an authorized Shark service center or a reputable small appliance repair shop. Compare the quote to the price of a new comparable model. Given the relatively low cost of many Shark steam cleaners (often under $100), replacement is frequently the more economical choice for major internal failures, especially if the unit is older than 3-5 years.
Ultimately, the decision is yours. But by following this guide, you’ve already saved yourself the cost and waste of prematurely discarding a repairable machine. You’ve also gained a deeper understanding of how your cleaning tool works. That’s a win. Now, go give that Shark steamer the care it deserves—it’s earned it.
Frequently Asked Questions
Can I use vinegar to descale my Shark steam cleaner?
Yes, a 50/50 solution of white vinegar and water is the safest and most effective DIY descaling method for Shark steamers. Run the solution through the system as described, then rinse thoroughly 2-3 times with clean water to remove any vinegar residue and smell.
Where can I find replacement seals for my Shark steamer?
Identify your exact model number on the label. Search online for “[Your Model Number] seal kit” or “[Your Model Number] gasket.” Shark’s official parts website, Amazon, and appliance part retailers like Encompass or PartSelect are reliable sources. Kits usually include all necessary seals for under $15.
My Shark steamer heats up but only drips cold water. What’s wrong?
This indicates the heating element is working, but the internal pump that forces water to the element has failed, or the water pathway is completely blocked. Start with a vigorous descaling. If that fails, the pump diaphragm or motor may need replacement, which is a complex repair often not cost-effective for older units.
Is it normal for my Shark steam mop to sputter or spurt steam?
Occasional sputtering when you first start can be normal as air purges from the system. However, consistent sputtering during use usually means the water tank is low, the vent hole is clogged, or there is significant scale buildup causing irregular water flow. Refill the tank and check/clean the vent first.
How often should I descale my Shark steam cleaner?
This depends entirely on your water hardness. With moderately hard water, descale every 1-2 months with regular use. With very hard water, do it every 3-4 weeks. If you notice reduced steam output, overheating, or sputtering, descale immediately as a first step. Using filtered water can extend the time between descaling.
My Shark steamer is still under warranty. Can I fix it myself?
Generally, no. Opening the unit will likely void the manufacturer’s warranty. If your Shark is under warranty, your first and best step is to contact Shark Customer Support directly. They will troubleshoot with you and, if necessary, authorize a repair at an authorized service center or provide a replacement. Only attempt DIY repairs on out-of-warranty units.