A non-spinning side brush on your Shark Ion Robot is a common but fixable issue, usually caused by hair and debris wrap or a simple misalignment. This guide provides a systematic approach to diagnose and resolve the problem, from quick 5-minute clean-ups to checking for internal motor faults. Regular preventive maintenance is the most effective strategy to keep your robot’s side brush functioning optimally and ensure thorough edge cleaning.
You’ve set your Shark Ion Robot to clean, you hear the familiar whir of the main roller, but something’s missing. That distinct, efficient *swish-swish-swish* of the side brush as it tackles edges and corners is silent. Your robot is moving, but it’s leaving that tell-tale line of dust along baseboards and furniture legs. A Shark Ion Robot side brush not spinning is one of the most frequent hiccups owners face, and while it’s frustrating, it’s rarely a catastrophic failure. In most cases, it’s a straightforward maintenance issue you can resolve yourself in under ten minutes with a few simple tools. This comprehensive guide will walk you through everything you need to know, from the brush’s vital function to advanced troubleshooting, empowering you to get your robot back to its full, edge-cleaning potential.
Key Takeaways
- Hair and fiber wrap is the #1 culprit: The side brush is the primary collector of long hairs and carpet fibers, which must be removed regularly to prevent binding.
- Always power off and remove the robot from the dock: Safety first. Disconnect power before any inspection or cleaning to prevent accidental activation.
- Inspect and clean the brush axle and housing: Debris often jams the brush against its plastic housing or clogs the axle socket, not just the bristles themselves.
- Ensure proper re-seating after cleaning: The side brush must click fully and securely into its motor socket; a partially engaged brush will not spin.
- Check the main brush and wheels first: A jammed main brush or wheel can overload the system and trigger safety cut-offs that stop all motion, including the side brush.
- A reset can clear temporary errors: A full power cycle (holding the power button for 10+ seconds) can reset the robot’s internal sensors and motor controllers.
- Warranty and professional help are options: If cleaning and resetting fail, and the robot is under warranty, contact Shark support before attempting internal repairs that could void coverage.
📑 Table of Contents
Understanding the Critical Role of the Side Brush
Before we dive into fixes, it helps to appreciate *why* that little spinning brush matters so much. The Shark Ion Robot, like most robot vacuums, uses a combination of suction and agitation. The main roller (or brushroll) in the center does the heavy lifting—agitating carpet fibers and lifting debris into the suction path. However, the main roller is designed for open floor areas. It cannot reach into corners, along baseboards, or under the overhangs of furniture. This is the exclusive domain of the side brush.
The “Sweep and Fling” Mechanism
The side brush operates on a brilliant, simple principle: sweep and fling. As the robot approaches a wall or corner, the flexible side brush extends (or is already positioned) just beyond the robot’s main chassis. Its spinning bristles sweep debris—dust bunnies, hair, crumbs, and pet fur—away from the vertical edge and outwards. This action flings the debris into the path of the main suction nozzle, where it can be vacuumed up. Without this action, the robot would simply push debris along the wall, creating a neat but unclean line. A non-spinning side brush means all that edge debris is being completely missed, significantly reducing your home’s overall cleanliness.
Design Vulnerabilities and Common Failure Points
The very design that makes the side brush effective also makes it vulnerable. It’s a small, exposed, rapidly spinning component that works in the dirtiest part of the cleaning path: the perimeter. It encounters a high volume of long, stringy materials like human hair, pet fur, and carpet fibers that love to wrap around rotating axles. Furthermore, the brush is mounted on a small motor with a plastic gear train, which can be stressed if the brush is physically jammed. The most common failure sequence is: debris wrap → brush binds against housing → motor stalls → brush stops spinning. Understanding this sequence is key to effective diagnosis and repair.
The Most Common Causes: Hair, Debris, and Misalignment
When your side brush stops, the cause is overwhelmingly mundane and mechanical, not electronic. Let’s break down the usual suspects, starting with the most likely.
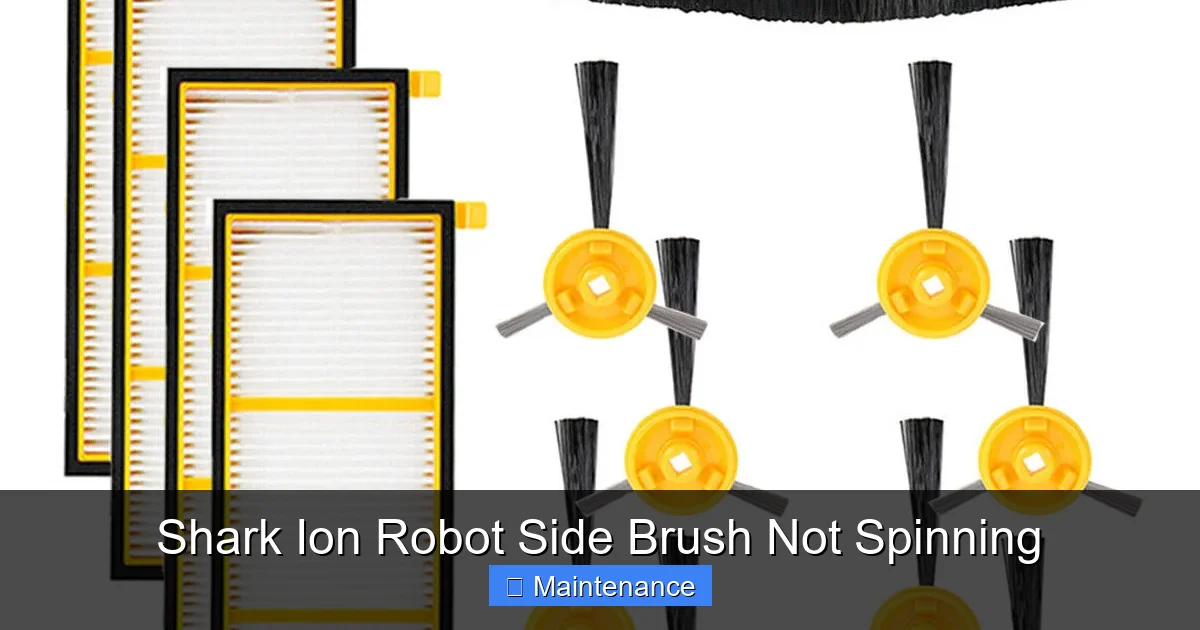
Visual guide about Shark Ion Robot Side Brush Not Spinning
Image source: sharkvacuum.blog
1. The Inevitable Hair Wrap
This is the undisputed champion of side brush failures. Long hair and synthetic fibers wrap tightly around the base of the brush bristles, where they meet the plastic axle hub. As more hair accumulates, it forms a thick, dense mat. This mat does two damaging things: first, it adds significant rotational mass and friction, straining the small motor. Second, and more commonly, it physically pushes the entire brush assembly sideways until the bristles rub harshly against the plastic housing wall. This creates so much resistance that the motor can’t turn it anymore, and it stops. You might even see the brush trying to *twitch* or *jerk* as the motor struggles against the bind. Always check for hair wrap first—it solves the problem 80% of the time.
2. Debris Jamming the Axle Socket
Even without hair, small, hard debris can find its way into the socket where the brush’s metal axle inserts into the motor’s drive shaft. A tiny pebble, a piece of hard plastic, or a wad of dried, crusty mud can lodge in this socket. This prevents the axle from seating properly and transmitting rotational force. The motor might hum or whine, but the brush remains stationary. This is less common than hair wrap but is a frequent secondary issue after a hair jam has been forcibly cleared, leaving small fragments behind.
3. Physical Damage or Wear to the Brush or Housing
Over time, the plastic bristles can become brittle and break off. A broken bristle can splay out and catch on the housing. The plastic housing itself can crack or warp, especially if the robot has had a significant collision. A warped housing means the clearance between the spinning brush and the wall is uneven, causing constant friction in one position. Similarly, the small plastic gear inside the side brush motor can strip or wear out, especially if the brush has been repeatedly jammed while the motor strained. A stripped gear will make a distinct grinding or clicking noise but won’t transmit power.
4. Improper Re-seating After Cleaning
This is a classic “user-caused” issue. The side brush is designed to pop off easily for cleaning. You pull it straight out, clean it, and then push it back in. However, if you don’t push it in firmly and evenly until you hear/feel a definitive *click*, it hasn’t fully engaged with the motor’s drive shaft. The brush will be loose, wobbly, and won’t spin. It might spin a little if you nudge it by hand, but the motor’s torque isn’t enough to engage it properly. Always ensure a firm, complete click when reattaching.
Step-by-Step Diagnostic and Repair Guide
Now, let’s get our hands dirty. Follow this systematic approach. You’ll need a small, pointed tool like a toothpick, a tweezers, a pair of scissors, and a bright light.
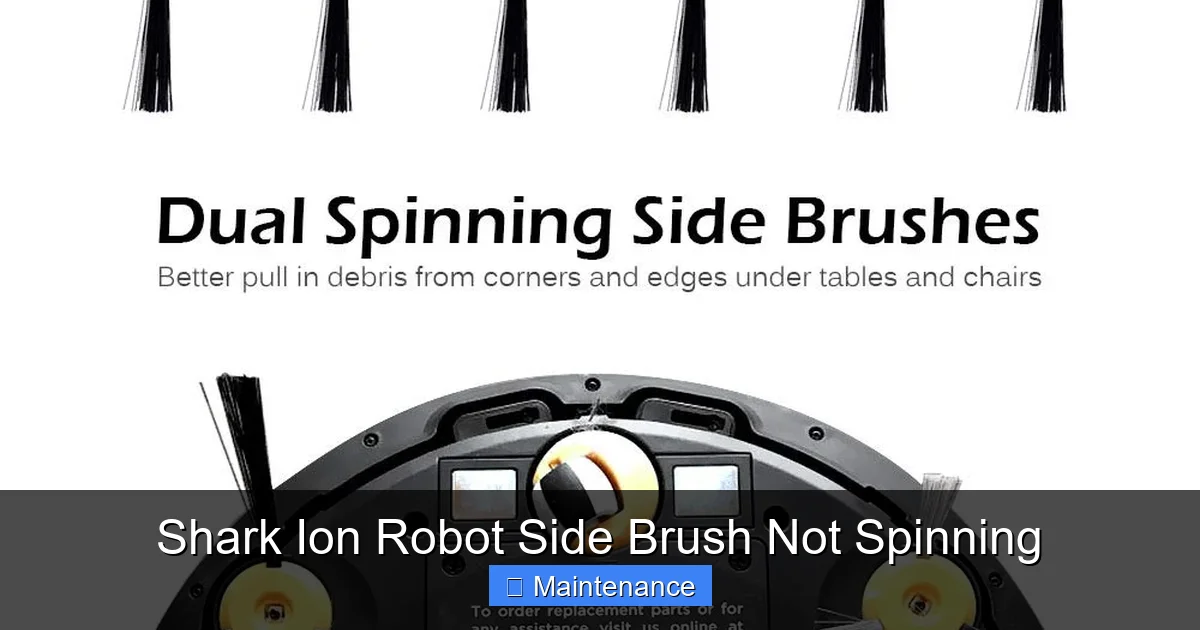
Visual guide about Shark Ion Robot Side Brush Not Spinning
Image source: i.ebayimg.com
Step 1: Safety and Initial Setup
Place the Shark Ion Robot on a flat, well-lit surface. Press and hold the Power button for at least 10 seconds to ensure it is completely powered off. For maximum safety, flip the robot over and locate the main power switch (usually on the side or bottom) and turn it OFF. This prevents any accidental startup while your fingers are near moving parts. Remove the robot from its charging dock.
Step 2: Locate and Remove the Side Brush
Flip the robot onto its back. The side brush is on one side, held in by a simple friction fit or a small retaining clip. For most Shark Ion models, you simply pull the entire brush assembly straight outwards, perpendicular to the robot’s body. It should come out with a gentle but firm tug. If there’s a clip, depress it while pulling. Set the robot aside. Take the brush assembly to your cleaning area.
Step 3: The Thorough Clean-Up (The Most Important Step)
This is where you solve most problems. You need to clean four distinct areas:
- The Bristles: Use your fingers and scissors to meticulously pick and cut away any hair, string, or carpet fiber wrapped around the base of the bristles, working your way to the tips. Don’t just pull; cut to avoid tightening the wrap.
- The Axle Hub: The central plastic piece the bristles stem from. This is the hair trap. Use the pointed end of a toothpick or a tweezer to dig out any matted hair packed in the crevices around the metal axle that runs through the hub. Spin the brush by hand as you do this to expose all sides.
- The Metal Axle Itself: Wipe the entire length of the metal axle with a dry cloth. Check for any nicks or debris stuck to it.
- The Motor Socket on the Robot: This is the step people miss. Look into the hole on the side of the robot where the brush axle inserts. Use a flashlight. You’ll often see a buildup of hair, dust bunnies, and grit packed into the bottom and sides of this socket. Use your toothpick and tweezers to excavate this debris completely. This socket must be perfectly clean for the axle to seat correctly and spin freely.
Once all parts are visually and tactilely clean, spin the brush by hand. It should rotate smoothly and silently, with no gritty feeling or resistance.
Step 4: Re-seat and Test
Align the brush axle with the socket on the robot. Push it in firmly and evenly. You must feel and hear a solid, satisfying *CLICK*. This indicates the brush is fully seated on the motor’s drive shaft. Do not just push it until it stops; push until it clicks. Now, flip the robot over, turn the main power switch back ON, and press the Power button to start it. You can initiate a spot clean or simply watch it on a flat surface. The side brush should immediately begin spinning. Listen for any abnormal noises (grinding, clicking) and watch for any wobble.
Step 5: If It Still Doesn’t Spin – Advanced Checks
If the clean re-seat didn’t work, it’s time to dig deeper.
- Check the Main Brush and Wheels: A severely jammed main brush or a wheel tangled in hair can cause the entire robot to enter a protective error state, stopping all motion. Remove and thoroughly clean the main brushroll and both drive wheels. Clear any debris from their axles and bearings. Reinstall and try again.
- Perform a Full Reset: With the robot on its dock (or on the floor), press and hold the Clean/Power button for 10-15 seconds until you hear a tone or see the lights cycle. This resets the robot’s internal computer and can clear a false “motor stall” error. Power it back on and test.
- Listen Carefully: Place your ear near the side brush area when you command a clean. Do you hear a faint high-pitched whine or a grinding/clicking sound? A whine with no spin suggests the motor is getting power but the mechanical connection is broken (stripped gear, broken axle). A grinding sound points to a broken gear inside the motor unit.
- Inspect for Physical Damage: Examine the plastic brush housing on the robot. Is it cracked or pushed inwards? Even a slight warp can cause constant friction. Also, check the side brush itself. Are the bristles splayed out or broken in a way that would catch on the housing? A damaged brush needs to be replaced.
Preventive Maintenance: The Key to Longevity
An ounce of prevention is worth a pound of cure. Incorporating side brush maintenance into your weekly routine will save you countless hours of troubleshooting.
Visual guide about Shark Ion Robot Side Brush Not Spinning
Image source: m.media-amazon.com
Establish a Weekly Cleaning Ritual
Once a week, during your regular emptying of the dustbin, take 60 seconds to perform side brush surgery. Pull the brush out. Use scissors to trim any visible hair at the base. Use a dry toothbrush or a blast of compressed air to dislodge dust from the bristles and the brush hub. Most importantly, get in the habit of cleaning the motor socket on the robot itself. A quick pick with a toothpick in that socket will remove the debris before it packs in tight. This 60-second habit prevents 95% of all side brush failures.
Monthly Deep Clean and Inspection
Once a month, perform the full, thorough cleaning procedure described in Step 3. Disassemble completely, clean every crevice, and inspect. Look for:
- Bristles that are permanently bent, frayed, or missing large clumps. These reduce sweeping efficiency.
- Cracks or stress marks on the plastic brush head.
- Any looseness or wobble in the brush when re-seated, indicating a worn connection.
- Build-up of a gritty, paste-like mixture of dust and hair inside the motor socket—this needs to be fully excavated.
Environmental Considerations
If you have long-haired pets or family members, your maintenance frequency must increase. Consider running the robot in “Spot Clean” mode along perimeter walls more frequently, as this puts less sustained stress on the side brush than a full-room run. Also, be mindful of area rugs with long fringe; the side brush can easily tangled in fringe, so you might need to use boundary strips to keep the robot off those rugs.
When to Suspect a Motor Failure and Seek Help
If you have performed the immaculate cleaning, confirmed proper re-seating, reset the robot, and the side brush still does not spin—and you hear that distinct whining or grinding sound from the motor unit—you have likely exhausted DIY options. The small DC motor or its internal plastic gear train has failed.
Diagnosing a Failed Motor
The side brush motor is a small, sealed unit attached to the robot’s mainboard via a simple two-pin connector. Failure is usually due to: 1) Age and wear (brushes inside the motor wear out), 2) Repeated stress from jams (overheating and gear stripping), or 3) A power surge (less common). The symptom is consistent: you hear the motor trying to turn (a high-pitched electromagnetic whine) but the brush doesn’t move. Sometimes, the motor may be completely dead (no sound at all), which could indicate a fault on the main control board that supplies power to that specific motor circuit.
Your Options: Repair vs. Replace
For most Shark Ion Robot models, the side brush motor is not designed to be a user-replaceable part. It is typically soldered or deeply clipped onto the main PCB. Attempting to replace it requires advanced soldering skills and carries a high risk of damaging the mainboard. Therefore, your practical options are:
- Contact Shark Support: If your robot is under the limited warranty (typically 1-3 years depending on model and registration), this is your first and best call. Explain the troubleshooting you’ve done. They may offer to mail you a replacement motor assembly or, more likely, a refurbished or replacement robot. Do not mention opening the robot, as this can void the warranty.
- Purchase an Official Replacement Part: You can often find the official Shark side brush motor assembly (part number varies by model) on Shark’s website or through authorized parts retailers. This is a pre-assembled unit with the motor and connector. However, installing it still requires you to open the robot’s bottom cover, disconnect the old motor, and connect the new one—a moderately difficult task requiring care and the right tools (usually a Phillips screwdriver).
- Live with a Non-Functional Side Brush: As a last resort, you can continue using the robot. Its main cleaning performance on open floors will be unaffected. You will simply need to manually sweep or use a handheld vacuum along edges and corners weekly. This compromises the “set-and-forget” convenience but is a viable stopgap.
- Upgrade: If the robot is older and out of warranty, the cost of a new motor plus your time might approach the cost of a new, newer model robot vacuum with improved features.
Conclusion: Proactive Care for Peak Performance
A Shark Ion Robot side brush not spinning is rarely a mystery and almost never a reason to retire your trusted cleaning companion. The vast majority of these incidents are caused by the very debris the brush was designed to tackle—specifically, hair and fiber wrap. By adopting a simple, proactive maintenance habit of removing the brush weekly for a quick hair-cut and socket clean-out, you can prevent the vast majority of failures. When a problem does arise, follow the systematic diagnostic path: power down, remove and clean the brush and the socket, ensure a firm re-seat, and reset the system.
Remember, the side brush is your robot’s specialized tool for edge cleaning. Keeping it in prime condition is the single most effective way to maintain your Shark Ion Robot’s advertised cleaning performance and ensure it lives up to its potential. Treat it with a little regular care, and it will reward you with consistently clean edges and corners for years to come. If all else fails and a motor has truly burned out, weigh the cost of repair against replacement, starting with a warranty claim. Your robot’s side brush is a small part with a big job—keep it spinning, and your floors will thank you.
Frequently Asked Questions
Can I use lubricant like WD-40 on my side brush axle to make it spin more freely?
No, you should never use wet lubricants on the side brush axle or inside the motor socket. Lubricants will attract and trap dust and hair, creating a gritty paste that accelerates jamming. The mechanism is designed to run dry. Proper cleaning is the only solution.
Is it normal for the side brush to be slightly loose or wobbly when I reinstall it?
No, it should not be loose. A properly seated side brush has a firm, snug fit with no perceptible side-to-side play. If it’s wobbly, it means you did not push it in firmly enough to engage the drive shaft fully. Push until you hear a click. A persistent wobble after a firm click indicates a worn plastic socket on the robot or a worn axle on the brush, both of which require part replacement.
Will a non-spinning side brush void my Shark warranty if I open the robot to clean it?
Routine external maintenance, like removing the side brush for cleaning, does not void the warranty. However, opening the main chassis of the robot (removing the bottom cover screws) to access internal components like the motor may be considered unauthorized repair and could void the warranty. Always check your warranty terms and contact Shark support before performing any internal repairs if your robot is still covered.
My side brush spins but makes a loud grinding or clicking noise. What is this?
A grinding or clicking noise that accompanies spinning usually indicates that the plastic gear inside the side brush motor has stripped or broken. This is often the result of the brush being repeatedly jammed (by hair, etc.) while the motor was running, causing the gears to skip and wear down. This is a motor failure and requires replacement of the motor assembly.
How often should I really clean the side brush if I have two long-haired dogs?
With multiple long-haired pets, you should clean the side brush and its socket every 2-3 days. Pet hair is prolific and will wrap tightly in a very short time. Neglecting this interval will almost certainly lead to a jam. Consider incorporating it into your routine of emptying the dustbin after each run.
What’s the difference between the side brush not spinning and the whole robot not moving?
They are related but different issues. If only the side brush isn’t spinning but the robot moves and the main brush spins, the problem is isolated to the side brush assembly (hair wrap, mis-seating, or that motor). If the entire robot is not moving (no main brush, no wheels, no side brush), the problem is likely more systemic: a jammed main brush/wheel triggering a safety cut-off, a dead battery, a software glitch needing a reset, or a failure of the main drive motors. Always check the main brush and wheels first when the whole robot is stuck.