Is your Shark vacuum suddenly struggling to pick up dirt? The loss of suction is almost always fixable and rarely means a broken machine. In most cases, it’s caused by a simple clog, a full dust cup, or a dirty filter. This guide walks you through a systematic diagnosis, from checking the brush roll to inspecting the hose, and provides clear, safe cleaning instructions for every component. By following these steps, you can diagnose and resolve the issue yourself, saving money on repairs and getting your vacuum back to its powerful best.
You’re halfway through vacuuming, and you notice it. That familiar, powerful whoosh of air has turned into a weak sigh. Your Shark vacuum, once a dirt-devouring beast, is now just pushing debris around. Don’t panic, and definitely don’t rush to buy a new one. In my years of fixing appliances, I’ve found that a loss of suction in a Shark vacuum is one of the most common—and most easily fixable—issues there is. The motor is almost always fine. The problem is almost always something simple, something you can handle with a few minutes and some basic tools. Think of your vacuum like your car: it needs regular, simple maintenance to perform its best. This guide will be your mechanic manual. We’ll systematically diagnose the problem, clean every nook and cranny, and have your Shark sucking like new again. Let’s roll up our sleeves.
Key Takeaways
- Suction loss is usually a blockage or maintenance issue: Over 90% of Shark vacuum suction problems are caused by clogs in the hose, wand, or brush roll area, a full dust cup, or dirty filters—not a failed motor.
- Always perform a “suction test” first: Before disassembling anything, remove the hose and feel for suction at the vacuum’s intake to determine if the problem is in the main body or the cleaning tools.
- The brush roll is a prime suspect: Hair, string, and carpet fibers wrap around the brush roll bearings and housing, creating a seal that blocks airflow. Regular cleaning is essential.
- Filters are non-negotiable for performance: Both the pre-motor foam/felt filter and the post-motor HEPA filter must be clean and completely dry. A clogged filter is a top cause of weak suction.
- Check the dust cup seal and valves: A warped, cracked, or dirty dust cup lid seal or a stuck one-way valve will allow air to bypass the collection chamber, killing suction power.
- Hose and wand clogs are common but easy to fix: Use a long, flexible tool like a broom handle or a garden hose (on low pressure) to gently dislodge blockages from both ends.
- Know when to call for help: If you’ve thoroughly cleaned all components, checked for seals, and the suction test from the vacuum body is still weak, the issue may be internal (e.g., fan blade, motor seals), requiring professional service.
📑 Table of Contents
- Understanding the Anatomy of Suction: It’s All About Airflow
- Step 1: The Critical Suction Test – Finding the Leak in the System
- Step 2: Deep Clean the Brush Roll and Its Housing
- Step 3: The Dust Cup, Lid Seal, and One-Way Valve
- Step 4: Filter Maintenance – The Silent Suction Killers
- Step 5: Hunting Down Hidden Clogs in the Hose and Wand
- Step 6: When You’ve Tried Everything – Advanced Checks and Professional Help
- Conclusion: Prevention is the Best Cure
Understanding the Anatomy of Suction: It’s All About Airflow
Before we start taking things apart, it helps to understand one thing: a vacuum cleaner is just a fan in a tube. The motor spins a fan, which creates a negative air pressure—a vacuum—inside the system. This pressure difference pulls air (and the dirt in it) from your floor, through the brush roll and hose, into the dust cup or bag, and finally out through the exhaust filter. If any part of that path is blocked, restricted, or leaking, suction drops. Our job is to find the break in that path. Shark vacuums, especially the popular Navigator and Rotator series, have a straightforward path: Floor → Brush Roll Housing → Wand → Hose → Dust Cup → Filters → Motor Fan → Exhaust. We’ll check each link in this chain.
The Usual Suspects: A Shortlist of Culprits
Based on thousands of repair calls, here’s the hit list for suction loss, in rough order of frequency:
- Clogged Brush Roll Housing: Hair wraps around the brush roll and its bearings, creating a solid barrier.
- Full or Improperly Sealed Dust Cup: The cup is overfull, or the lid seal is dirty, damaged, or not seated correctly.
- Dirty or Clogged Filters: The foam pre-motor filter and the HEPA post-motor filter are caked with dust.
- Blocked Hose or Wand: A sock, large debris, or a compacted wad of hair is lodged inside.
- Faulty One-Way Valve: The small rubber flapper in the dust cup exhaust port is stuck open or coated in dust.
- Cracked or Disconnected Hose: A split in the hose or a loose connection at either end leaks air.
We’ll tackle these one by one, starting with the fastest diagnosis.
Step 1: The Critical Suction Test – Finding the Leak in the System
This is the most important diagnostic step you can take. It takes 30 seconds and tells you exactly where to look. You need to isolate the problem to either the “upper body” (motor, filters, dust cup) or the “lower body” (hose, wand, brush roll).
Visual guide about How to Fix Suction on Shark Vacuum
Image source: sharkvacuum.blog
How to Perform the Test
First, make sure your vacuum is unplugged. Safety first. Now, detach the hose from the vacuum’s main body. You’ll see a port where the hose clicks in. Put your hand over that port to seal it. Now, plug the vacuum in and turn it on for just 3-5 seconds. You should feel a strong, steady pull against your hand. This is the raw suction power of the motor, filters, and dust cup assembly working directly.
Scenario A: Strong suction at the port. This is good news! It means the motor and the upper body are fine. The blockage, leak, or restriction is definitely downstream—in the hose, wand, or brush roll assembly. Your entire focus from here is on the cleaning tools and the hose.
Scenario B: Weak or no suction at the port. This means the problem is upstream—in the dust cup, the filters, or potentially the motor itself. Your focus shifts to the main body: the cup, its seal, the filters, and the exhaust.
Don’t skip this test! It saves you from randomly cleaning parts that are already fine.
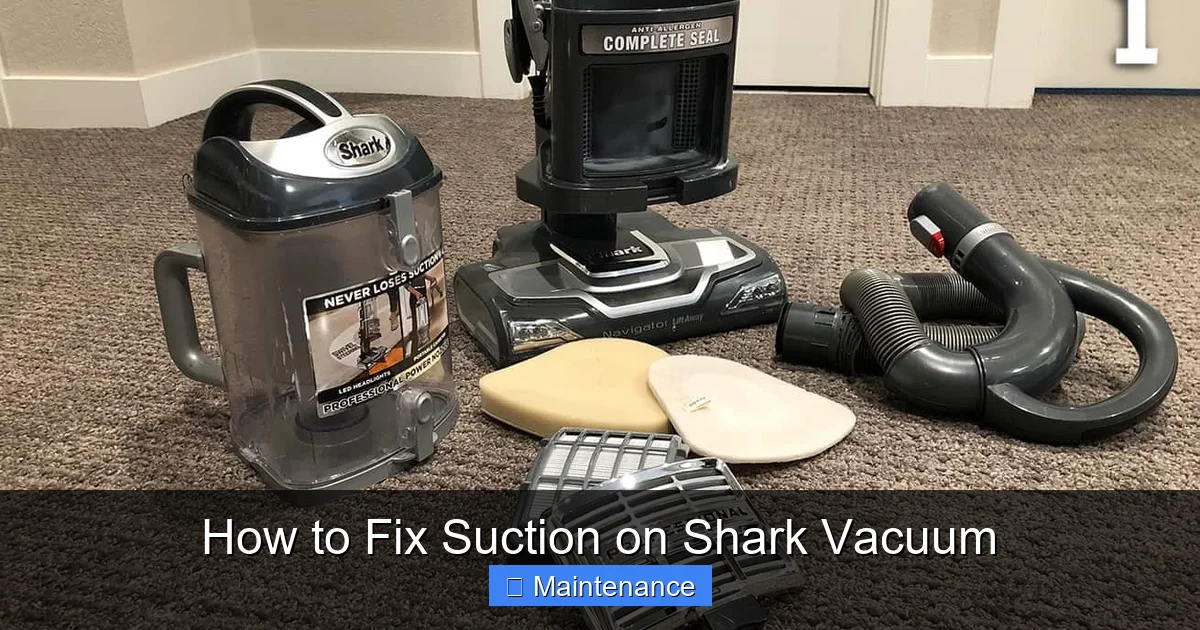
Step 2: Deep Clean the Brush Roll and Its Housing
Let’s start with the most common physical blockage. The brush roll, that cylindrical bar with bristles, is a magnet for hair, string, and carpet fibers. They don’t just wrap around the bristles; they wind tightly around the bearings on each end. When this happens, the brush can’t spin freely (reducing agitation) and, more critically for suction, it creates a physical dam against the airflow path.
Visual guide about How to Fix Suction on Shark Vacuum
Image source: everydaycheapskate.com
Disassembly and Cleaning
Lay your vacuum on its side for better access. Locate the brush roll cover—usually a gray or black plastic plate on the underside of the vacuum head. It’s held by either 4 screws or 2 quarter-turn clips. Remove it. Now, pull the brush roll straight out. You’ll likely see a tangled mess. Use scissors or a seam ripper to carefully cut and remove all the hair and fibers. Be meticulous here. Check the rubber seals on each end of the brush roll housing (the plastic piece the brush roll sits in). These seals must be intact and clean. Any debris here will allow air to bypass the brush roll, reducing suction. Wipe the entire housing clean with a damp cloth.
Check the Brush Roll Spin
Once clean, spin the brush roll by hand. It should rotate smoothly and freely for several seconds. If it’s gritty or stiff, the bearings are likely packed with debris or worn out. For most Sharks, you can replace the brush roll assembly relatively cheaply if cleaning doesn’t restore smooth spinning. A stiff brush roll strains the motor and can lead to belt breakage.
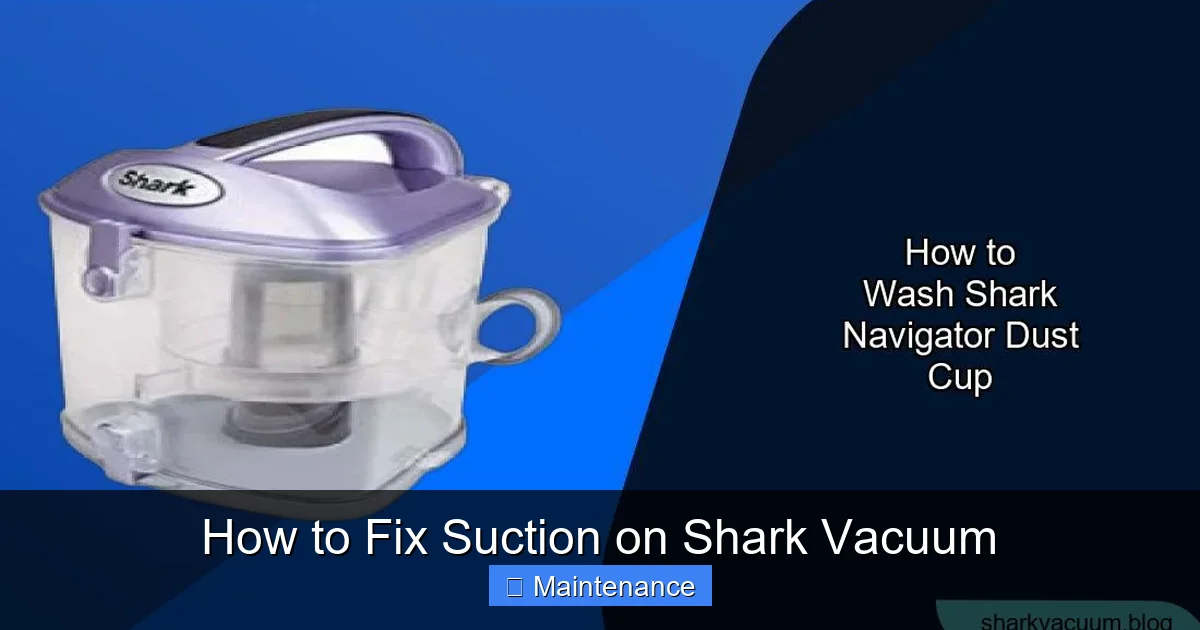
Step 3: The Dust Cup, Lid Seal, and One-Way Valve
If your suction test pointed to an upper-body issue, or as a matter of routine, the dust cup system is your next stop. A Shark’s “Anti-Allergen Complete Seal” dust cup is fantastic, but it has two critical components that fail silently: the lid seal and the one-way valve.
Visual guide about How to Fix Suction on Shark Vacuum
Image source: sharkvacuum.blog
Emptying and Inspecting the Cup
Always empty the dust cup after every use, or when the “full” indicator lights up. But don’t just tap it out. Press the release button and pull the cup out. Hold it over a trash can and press the bottom release to dump the contents. Now, inspect the inside. Is there a layer of fine dust caked on the walls? That’s a sign you’re not getting a good seal. Take the cup to the sink. Wash it thoroughly with warm, soapy water. Use a bottle brush to scrub the interior and the细小的 mesh screen inside. Rinse incredibly well and let it air-dry for at least 24 hours. Never use a wet cup or filters—you’ll damage the motor.
The All-Important Lid Seal
This is a soft, gray rubber gasket that runs around the perimeter of the dust cup lid. Open the lid and run your finger along this seal. It should be smooth, pliable, and free of any tears, cracks, or permanent deformations. It must also be perfectly clean—any dust or hair trapped under it will create an air leak. Wipe it down with a damp cloth. If it’s damaged, Shark sells replacement seals. A bad seal is a top-tier suction killer.
Checking the One-Way Valve
Look at the back of the dust cup, where the exhaust port is. You’ll see a small, round rubber flap (the one-way valve) covering a hole. Its job is to let air out but not back in. Press it gently with your finger. It should move freely and snap back shut. If it’s stiff, coated in a dusty film, or stuck open, clean it with a cotton swab dipped in a tiny bit of rubbing alcohol. If it’s torn or doesn’t seal, replace it. A stuck valve lets all your suction leak out the exhaust.
Step 4: Filter Maintenance – The Silent Suction Killers
Shark vacuums typically have two filters. The pre-motor filter (usually foam or felt) protects the motor from dust. The post-motor HEPA filter cleans the exhaust air. Both are absolutely essential for maintaining strong, consistent suction. A clogged filter is like trying to breathe through a thick blanket. The motor works harder, generates more heat, and suction plummets.
Locating and Removing Your Filters
Consult your manual, but generally: The pre-motor filter is behind the dust cup, often in a rectangular housing you pull out. The post-motor HEPA filter is at the back of the vacuum, near the exhaust vents, behind a small access panel. Remove both.
Cleaning vs. Replacing
Pre-Motor Filter (Foam/Felt): This is washable. Rinse it under cool running water until the water runs clear. Gently squeeze out excess water—do not wring. Let it air-dry completely for 24-48 hours. Never put it in the dryer or use a hair dryer. Important: Some Sharks have a foam filter that is not washable (it’s labeled “do not wash”). If yours is that type, you must tap it out over a trash can to remove loose debris and replace it every 3-6 months.
Post-Motor HEPA Filter: This is almost always a non-washable, pleated media filter. You can gently tap it over a trash can to dislodge loose dust. To clean it more thoroughly, use a soft brush or a vacuum cleaner’s brush attachment on low suction. It is not designed to get wet. These filters have a lifespan (often 6-12 months depending on use) and must be replaced when they become visibly dirty or discolored. A clogged HEPA filter is a very common cause of post-2015 Shark suction loss.
Pro Tip: Mark your calendar. Set a reminder to wash/replace filters every 3 months for average use. If you have pets or allergies, do it every 2 months.
Step 5: Hunting Down Hidden Clogs in the Hose and Wand
If your suction test at the main body was strong, the blockage is in the hose, wand, or extension tube. This is where things can get tricky, but it’s usually solvable.
The Visual Inspection
Detach the hose from both the vacuum body and the wand/tool. Look into both ends. Use a flashlight. You might see the obstruction right at the opening. Use a long, flexible tool like a coat hanger (bent into a hook), a garden hose (on very low pressure, from the opposite end), or a specialized clog-removal tool to gently dislodge it. Never use a rigid metal object that could puncture the hose.
The “Blow-Through” Method
If you can’t see the clog, try to feel for it. With the hose detached from the vacuum, try to blow air through it from one end. If you feel a strong resistance, you’ve found the clog location. Now, work from the opposite end. Sometimes, pushing the obstruction toward the wider end of the hose (where it attaches to the dust cup) is easier than pulling it out the narrow wand end.
Checking the Wand and Tools
Don’t forget the metal telescoping wand and the cleaning tools themselves (the crevice tool, dusting brush, etc.). A small toy, a pen cap, or a dense wad of hair can lodge in the narrow end of a tool. Detach each piece and look through it. A straightened paperclip can help hook out small obstructions.
Step 6: When You’ve Tried Everything – Advanced Checks and Professional Help
You’ve cleaned the brush roll, washed the dust cup, replaced the filters, and cleared the hose. The suction test at the main body is strong. But when you attach the hose, suction is still weak. What now?
Inspect for Cracks and Leaks
Examine the entire length of the hose, especially near the ends where it connects. Look for tiny splits, punctures from staples or nails, or areas where the plastic has become brittle. Even a small pinhole leak can drastically reduce suction. Also, check that all connections—the hose-to-body, hose-to-wand, wand-to-tool—are clicking securely. A poor seal at any joint is a leak.
Internal Motor/Fan Issues (Last Resort)
If you’ve ruled out every external component, the issue may be internal. This could be a broken fan blade on the motor shaft, a failed motor seal, or a severely clogged internal air path that requires full disassembly. This is not recommended for most users. The internal components are delicate, and improper disassembly can cause more damage. At this point, the most cost-effective and safe decision is to contact Shark Customer Support or an authorized service center. Check your warranty first—many Sharks have a 5-year or lifetime warranty on certain parts.
Conclusion: Prevention is the Best Cure
Fixing a suction problem is satisfying, but preventing it is even better. The habits that solve the problem are the same ones that prevent it. Make these three actions part of your routine: First, empty the dust cup after every single use. A full cup restricts airflow before you even start. Second, clean the brush roll weekly. A quick 60-second snip of wrapped hair prevents a major clog. Third, check and maintain your filters on a schedule. Set a phone reminder. A clean filter is a happy vacuum. By understanding the simple physics of airflow and performing these quick, regular maintenance checks, you’ll ensure your Shark vacuum remains a powerful, reliable cleaning partner for years to come. You’ve got this—now go enjoy that strong suction!
Frequently Asked Questions
Can I use my Shark vacuum without the filters to get more suction?
No, never operate your Shark vacuum without the filters installed. The filters are a critical safety component that protects the motor from dust and debris. Running it filter-less will almost certainly damage the motor and void your warranty. Always ensure filters are clean, dry, and properly seated.
My Shark has a “suction boost” button. Should I use that all the time?
The suction boost (or “lift-away” mode on some models) increases motor power but also uses more energy and can be louder. Use it for deep carpet cleaning or stubborn messes. For everyday hard floor cleaning, the standard mode is sufficient and helps preserve battery life on cordless models.
What if my vacuum smells like burning after I cleaned it?
A burning smell immediately after reassembly usually means something is rubbing—often the brush roll is still slightly obstructed or not reinstalled correctly, causing it to bind and overheat. Unplug it, recheck the brush roll for freedom of spin, and ensure all seals and parts are correctly aligned.
How often should I replace the HEPA filter?
Typically every 6 to 12 months with normal use. If you have pets, allergies, or vacuum frequently, check it every 3 months. Replace it when it becomes visibly discolored (dark gray or brown) or when suction noticeably drops despite a clean dust cup and pre-motor filter.
My hose is clear, but suction is only weak when using certain attachments.
The problem is likely in that specific attachment. Check the crevice tool, dusting brush, or upholstery tool for a clog at its narrow tip. A piece of lint, a pet hair wad, or even a small object can block the airflow path inside the tool itself.
Is it worth repairing an older Shark vacuum?
Often, yes. The cost of a common part like a brush roll, seal, or filter is usually under $30. If the motor itself has failed (very rare) and the vacuum is older than 5-7 years, replacement might be more sensible. For most suction issues, a DIY fix is virtually free and extends the life of your investment significantly.