The “Shark Swivel Plus Hose Works but Not Bottom” issue is almost always a clog or blockage within the lower hose section or floor nozzle, not a motor failure. This happens because debris, hair, and objects get stuck in the curved, narrow passages. The solution involves systematic inspection, clearing obstructions with proper tools, and checking for worn or damaged parts. Safety first: always disconnect power before any inspection.
You’re vacuuming your living room floor. The Shark Swivel Plus feels powerful in your hands, the motor hums confidently, and you see dirt collecting in the transparent dust cup. But when you push it over a patch of pet hair or some larger debris, it just… doesn’t pick it up. The suction seems to vanish right at the floor level. You lift the nozzle, and it’s as if the vacuum is working perfectly everywhere except where it matters most. This frustrating scenario—where your Shark Swivel Plus hose works but not at the bottom—is one of the most common maintenance headaches owners face. The good news? It’s almost never a sign of a dead motor or a catastrophic failure. In fact, it’s usually a straightforward, fixable problem that you can solve in under 30 minutes with a few simple tools and a bit of patience. Let’s roll up our sleeves and get your Shark performing like new again.
Key Takeaways
- It’s Usually a Clog: The #1 cause is a physical obstruction in the lower hose or brush roll housing, not a broken motor.
- The Swivel Design Can Trap Debris: The flexible swivel joint and sharp bends in the lower hose are prime spots for hair and string to wrap and compact.
- Diagnosis is Simple: You can often see or feel the clog by detaching the hose and using a flashlight to look through the wand and floor nozzle.
- Use the Right Tools: A long, flexible brush (like a bottle brush) or a straightened coat hanger (with care) is effective for dislodging clogs.
- Check the Brush Roll: A jammed or hair-wrapped brush roll can mimic a hose clog by preventing debris from entering the suction path.
- Worn Seals Cause Leaks: Over time, the rubber seals where the hose connects to the vacuum body can crack, letting air escape and killing suction at the floor.
- Prevention is Key: Regular cleaning of the brush roll, hose, and filters prevents 90% of these issues and maintains peak performance.
📑 Table of Contents
- Understanding the Anatomy: Where Suction is Lost
- Why the Bottom Fails: The Top 5 Culprits
- Diagnosing the Problem: A Systematic Approach
- Fixing the Issue: Step-by-Step Guide
- When to Seek Professional Help or Consider Replacement
- Prevention: Keeping Your Swivel Plus Swiveling
- Conclusion: Restoring the Flow
Understanding the Anatomy: Where Suction is Lost
Before we start poking around with tools, it’s crucial to understand how air flows through your Shark Swivel Plus. Think of it as a simple system: the motor creates suction (negative air pressure), which pulls air and debris from the floor, up through the hose, through the filters, and into the dust cup. A break or blockage anywhere in that sealed path will cause a dramatic drop in suction at the floor nozzle. The phrase “hose works but not bottom” is a bit misleading because the hose and the bottom are inextricably linked. The “bottom” refers to the floor nozzle, the brush roll housing, and the very first section of the hose that connects directly to it.
The Critical Connection Point
The most vulnerable spot in this system is the junction where the flexible swivel hose meets the rigid lower wand and the floor nozzle. This area has multiple seals, bends, and the brush roll mechanism itself. If suction is strong at the hose’s end (you can feel it powerfully against your hand when the nozzle is off the floor), but disappears when the nozzle is attached and on the floor, the problem is isolated to this lower assembly. It’s like having a perfectly good straw, but the bottom inch of it is pinched shut.
Why the Bottom Fails: The Top 5 Culprits
So, what exactly is going wrong down there? Here are the five most frequent reasons your Shark Swivel Plus loses suction at the floor.

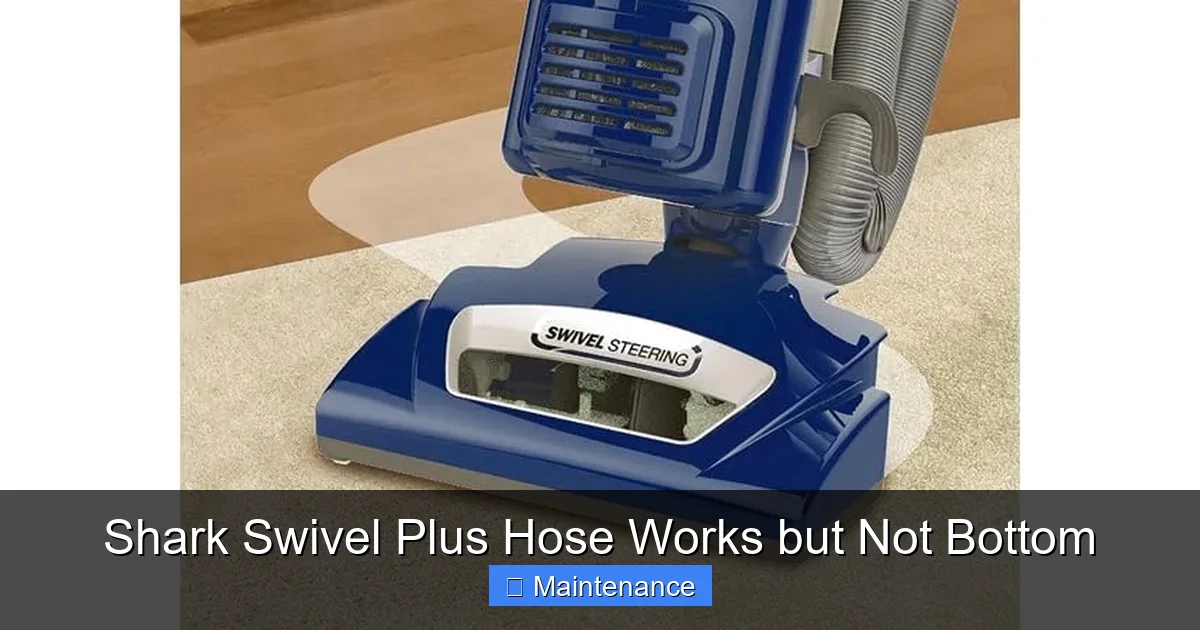
Visual guide about Shark Swivel Plus Hose Works but Not Bottom
Image source: images-na.ssl-images-amazon.com
1. The Classic Clog in the Lower Hose or Nozzle
This is the heavyweight champion of vacuum problems. Long pet hair, human hair, carpet fibers, string, ribbon, small socks, or even bits of hard debris can travel up the hose only to get wedged in the narrow, curved passage of the lower wand or inside the floor nozzle’s intake port. Hair especially loves to wrap around the brush roll bar and then mat together, forming a dense felt-like plug that seals the airway. Because the suction is so strong, it packs this material in tightly, making it impossible for air to flow.
2. A Jammed or Wrapped Brush Roll
The rotating brush roll is designed to agitate carpet fibers and fling debris into the suction path. However, it’s also a spinning trap. Hair, thread, and carpet string wind around the axles and ends of the brush roll, eventually binding it completely. A brush roll that can’t spin freely creates immense drag on the motor and, more importantly, physically blocks the large opening that leads into the hose. Even if the hose is clear, a sealed brush roll housing means no air can get in.
3. Damaged or Worn Seals and Gaskets
Every connection point in your vacuum has a rubber seal or gasket to maintain an airtight system. The seal where the hose connects to the vacuum body, and the seals inside the floor nozzle assembly, can dry out, crack, or deform over time and with heat. A cracked seal is like a hole in your vacuum’s “lung.” The motor struggles, and the powerful suction is diverted out through the leak instead of being focused at the floor. You might even hear a high-pitched whistling sound from the leak.
4. A Dislodged or Broken Internal Component
Less common but possible: a piece of the vacuum’s internal ducting can become dislodged. This could be a plastic baffle inside the floor nozzle or a section of the internal hose that connects the brush roll housing to the main suction path. If this part falls out of place, it creates a giant gap where suction is lost. This often happens after a major impact (like hitting a hard object) or during a previous, clumsy repair attempt.
5. Overly Full or Improperly Sealed Dust Cup
It seems counterintuitive, but a dust cup that is packed to the brim with fine dust can actually restrict airflow. The air has to fight its way through a dense plug of debris to get into the cup. Similarly, if the dust cup isn’t seated correctly—the latch is loose or the seal is dirty—it won’t create the vacuum needed for full suction. Always check this first, as it’s the easiest fix.
Diagnosing the Problem: A Systematic Approach
Don’t just guess. Follow this logical checklist to pinpoint the exact cause of your Shark Swivel Plus’s bottom suction loss. Always start by unplugging the vacuum.
Visual guide about Shark Swivel Plus Hose Works but Not Bottom
Image source: images-na.ssl-images-amazon.com
Step 1: The Dust Cup and Filter Check
This is your baseline. Empty the dust cup completely. Wash the pre-motor foam filter and the post-motor felt filter (if your model has one) with cool water. Let them dry completely for 24 hours before reinserting. A clogged filter is the #1 cause of general suction loss, but it can also manifest as poor performance at the floor. Reassemble, ensuring the cup clicks securely into place.
Step 2: The Hose Isolation Test
Detach the hose from the vacuum’s main body. Turn the vacuum on. Place your hand over the hose’s open end. Do you feel strong, steady suction? If yes, your motor and main body are fine. The problem is definitely in the lower assembly (nozzle, brush roll, lower hose). If the suction is weak here, your issue is higher up—likely filters, a full dust cup, or a failing motor.
Step 3: Visual and Tactile Inspection of the Bottom
Lay the vacuum on its side. Remove the floor nozzle if your model allows (usually by pressing a release button). Use a bright flashlight. Look directly into the intake port where the hose connects. Can you see all the way through to the other side of the brush roll housing? If you see a mat of hair or debris, that’s your clog. Next, manually rotate the brush roll by hand. Does it spin freely in both directions? If it’s stiff, gritty, or won’t turn, it’s wrapped with debris. Finally, run your fingers carefully along the inside of the lower hose section (the rigid plastic part just above the nozzle). Feel for any rough, packed areas.
Fixing the Issue: Step-by-Step Guide
Once you’ve identified the culprit, here’s how to fix each one safely and effectively.
Visual guide about Shark Swivel Plus Hose Works but Not Bottom
Image source: images-na.ssl-images-amazon.com
Clearing a Deep Hose or Nozzle Clog
For clogs you can see but not reach with your fingers:
- Tool of Choice: A long, flexible bottle brush (like for cleaning thermoses) is ideal. Its bristles can navigate bends and scrub debris loose.
- Method: Insert the brush into the intake port from the bottom. Push and twist it firmly. You’ll feel resistance as it hits the clog. Work it back and forth, trying to break the mass apart. Pull it out and check the brush for debris. Repeat.
- Alternative: A straightened wire coat hanger can work, but be extremely gentle. Wrap the very end with duct tape to create a soft, blunt tool to avoid scratching the plastic interior. Insert it slowly, hook, and pull debris out. Never use a rigid metal tool aggressively, as you can puncture the hose.
- Final Flush: Once you feel the passage is clear, use your shop vac (or a friend’s vacuum) in reverse (blow mode) if it has one, or simply use your mouth carefully (cover the end with a cloth first) to blow air through the section and dislodge any remaining particles. Reassemble and test.
De-hairing the Brush Roll
This is a routine maintenance task that solves a huge portion of problems.
- Remove the floor nozzle completely.
- Use a seam ripper, a dedicated brush roll cleaning tool, or even a sturdy pair of scissors. Always cut parallel to the brush roll bar to avoid slicing it. Slip the tool under the wrapped hair, cut it, and then pull the large sections out with your fingers.
- For hair wound around the axles, use the tip of the seam ripper to gently pry and cut.
- Once all debris is removed, spin the brush roll by hand. It should whirl freely with minimal resistance. If it still feels gritty, disassemble the brush roll according to your manual (some have caps you can pop off) and clean the bearings.
Inspecting and Replacing Seals
Locate the rubber seals. They are typically black o-rings or flat gaskets at hose connections and inside the nozzle housing.
- Remove them and inspect closely under light. Look for cracks, tears, flattening, or a hard, brittle texture.
- Clean the seal grooves thoroughly with a damp cloth. Dirt here prevents a good seal.
- If a seal is damaged, you must replace it. Find the exact part number in your Shark Swivel Plus manual or on the Shark website. Using a damaged seal is pointless. New seals are inexpensive and are the correct fix for a “hose works but not bottom” problem caused by air leakage.
When to Seek Professional Help or Consider Replacement
Not all problems are DIY-friendly. Here’s when to stop and call it.
Signs of a Failing Motor
If, after confirming all hoses are clear, seals are perfect, and filters are clean, you still have weak suction at the floor and the motor sounds strained, labored, or significantly quieter than usual, the motor’s internal fan or bearings may be worn out. Repairing a motor is often not cost-effective on a mid-range vacuum like the Swivel Plus.
Broken Internal Ducting
If you suspect a plastic internal baffle or hose is broken or missing, you’ll need to order the specific replacement part. This requires more disassembly. If you’re not comfortable with this level of teardown, a small appliance repair shop can do it, but weigh the cost against the price of a new vacuum.
The Age and Cost Factor
The Shark Swivel Plus is a workhorse, but it has a lifespan. If your vacuum is over 7-8 years old and has required multiple repairs (new belts, seals, brush roll), the cumulative cost may approach the price of a new, more efficient model. Sometimes, “fixing” it is throwing good money after bad.
Prevention: Keeping Your Swivel Plus Swiveling
An ounce of prevention is worth a pound of cure. Adopt this simple monthly routine:
The 60-Second Weekly Blow-Out
After each use, before storing, turn the vacuum on for 10 seconds with the hose detached from the body. This blows any loose debris out of the hose and nozzle connection before it can settle and compact. It’s a quick habit that prevents 80% of clogs.
Monthly Deep Clean of the Brush Roll
Don’t wait for a suction problem. Once a month, remove the nozzle and fully de-hair the brush roll as described above. Check the brush roll bearings for gunk. Wipe the inside of the nozzle housing with a damp cloth.
Filter Maintenance Schedule
Follow Shark’s guidelines: foam filter every 3 months, felt filter every 6-12 months. Never wash a felt filter with soap; just rinse with water. Never reinsert a damp filter. Mark it on your calendar.
Be Mindful of What You Vacuum
Your Shark is powerful, but not invincible. Avoid picking up: hard, sharp objects (nails, tacks); large, bulky items (toys, clothing); wet messes (unless it’s a wet/dry model); and infinite amounts of long, stringy materials like holiday tinsel or Easter grass. These are guaranteed clog-makers.
Conclusion: Restoring the Flow
The “Shark Swivel Plus Hose Works but Not Bottom” problem is a classic case of a system-wide failure caused by a single point of restriction. By understanding the vacuum’s airflow path and methodically checking from the floor up—starting with the dust cup, then the brush roll, then the lower hose and seals—you can diagnose and fix the issue yourself 95% of the time. The key is patience and a systematic approach. Remember, the most powerful vacuum in the world is useless if its airway is blocked. A clean, clear path from floor to dust cup is everything. Invest 20 minutes a month in the preventive steps outlined here, and your Shark Swivel Plus will reward you with consistent, powerful suction for years to come. If you’ve followed all these steps and the problem persists, the fault likely lies with a worn motor or a broken internal part, at which point a professional assessment or an upgrade may be your most practical path forward.
Frequently Asked Questions
Is my Shark Swivel Plus broken if the hose has suction but the bottom doesn’t?
Almost certainly not. This symptom points to a localized clog, jammed brush roll, or worn seal in the floor nozzle assembly—all of which are repairable. The motor is likely fine.
Can I use a metal coat hanger to clear the clog?
You can, but with extreme caution. Wrap the very tip in several layers of duct tape to create a soft, blunt end. Work slowly to avoid puncturing the soft plastic hose or nozzle interior. A flexible bottle brush is a safer, more effective tool.
How do I know if the brush roll is the problem?
Remove the floor nozzle and try to spin the brush roll by hand. If it doesn’t spin freely, feels gritty, or is visibly wrapped with hair and string, it’s the culprit. Even a partially wrapped roll can block the suction inlet.
What if I can’t see or feel the clog?
Use a bright LED flashlight. Shine it into the intake port from the bottom and look through the hose connection from the top. Often you can see a mat of debris blocking the light. You can also try using your vacuum in reverse (if it has a blow function) or carefully blowing through the section with your mouth.
My vacuum is new. Why is this happening?
Even new vacuums can develop clogs quickly, especially in homes with pets or long hair. The Shark Swivel Plus’s powerful suction can pack debris in tightly after just one or two uses. Regular brush roll cleaning is essential from day one.
Should I call Shark customer service or a repair shop?
First, exhaust all DIY troubleshooting—clearing clogs, cleaning the brush roll, checking/replacing seals, and ensuring filters are clean. If suction is still poor, contact Shark. If your vacuum is out of warranty, compare the estimated repair cost to the price of a new unit before proceeding.